[Tutorial][T6][Zombies] How to Add Custom Playermodels to BO2 Zombies
-
This is a tutorial only. No files, models, or FFs are distributed in this post
Hello everyone, In this post im going to show you how to add your own playermodels (custom models) to black ops 2 zombies in the TranZit map. For this we are going to need some tools: Blender 3.0, an addon called "BetterBlenderCod", another one called "OpenAssetTool", and any file converter (dds to iwi). We are going to need a reference model which we can find at:
https://forum.plutonium.pw/topic/18568/release-zombies-all-bo2-zombies-xmodels-obj-ma-xe-smd-files-images-dds-tga?loggedin=trueOpen Blender and create the model, the created model must be humanoid, once we done that, import the reference models

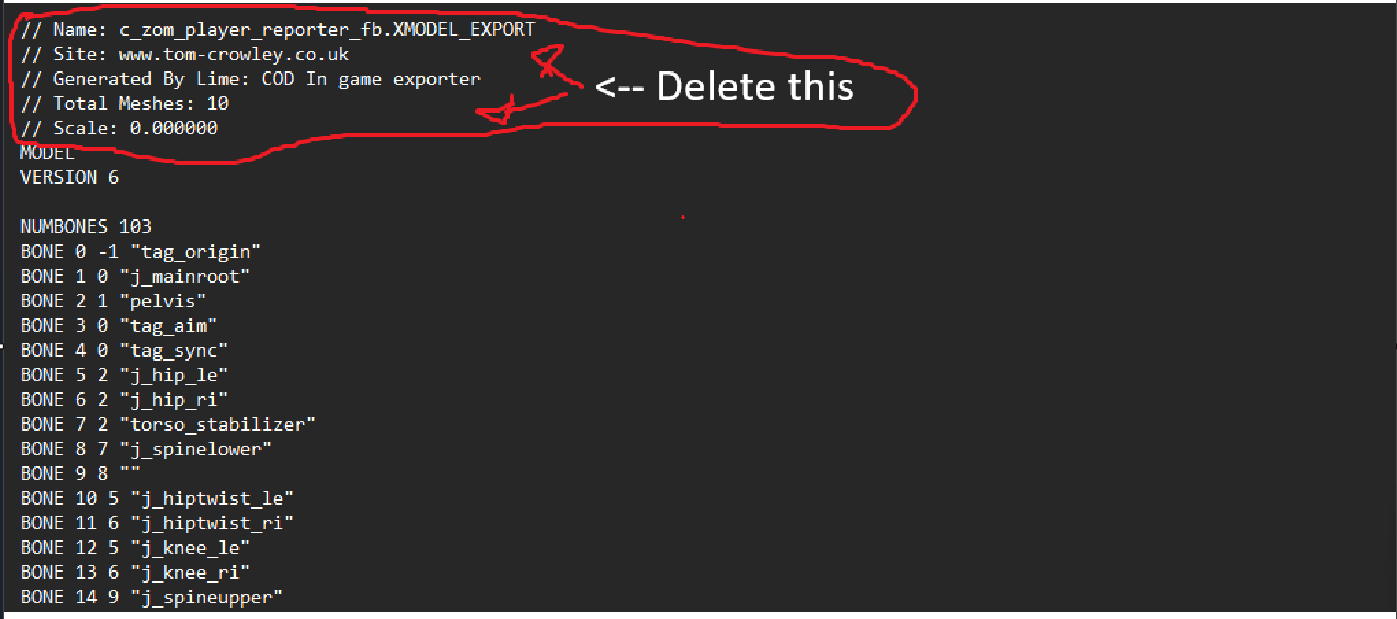
We are going to import the model to Blender with BetterBlenderCod (if you can't add the model properly you have to delete the comments in the XMODEL_EXPORT file)
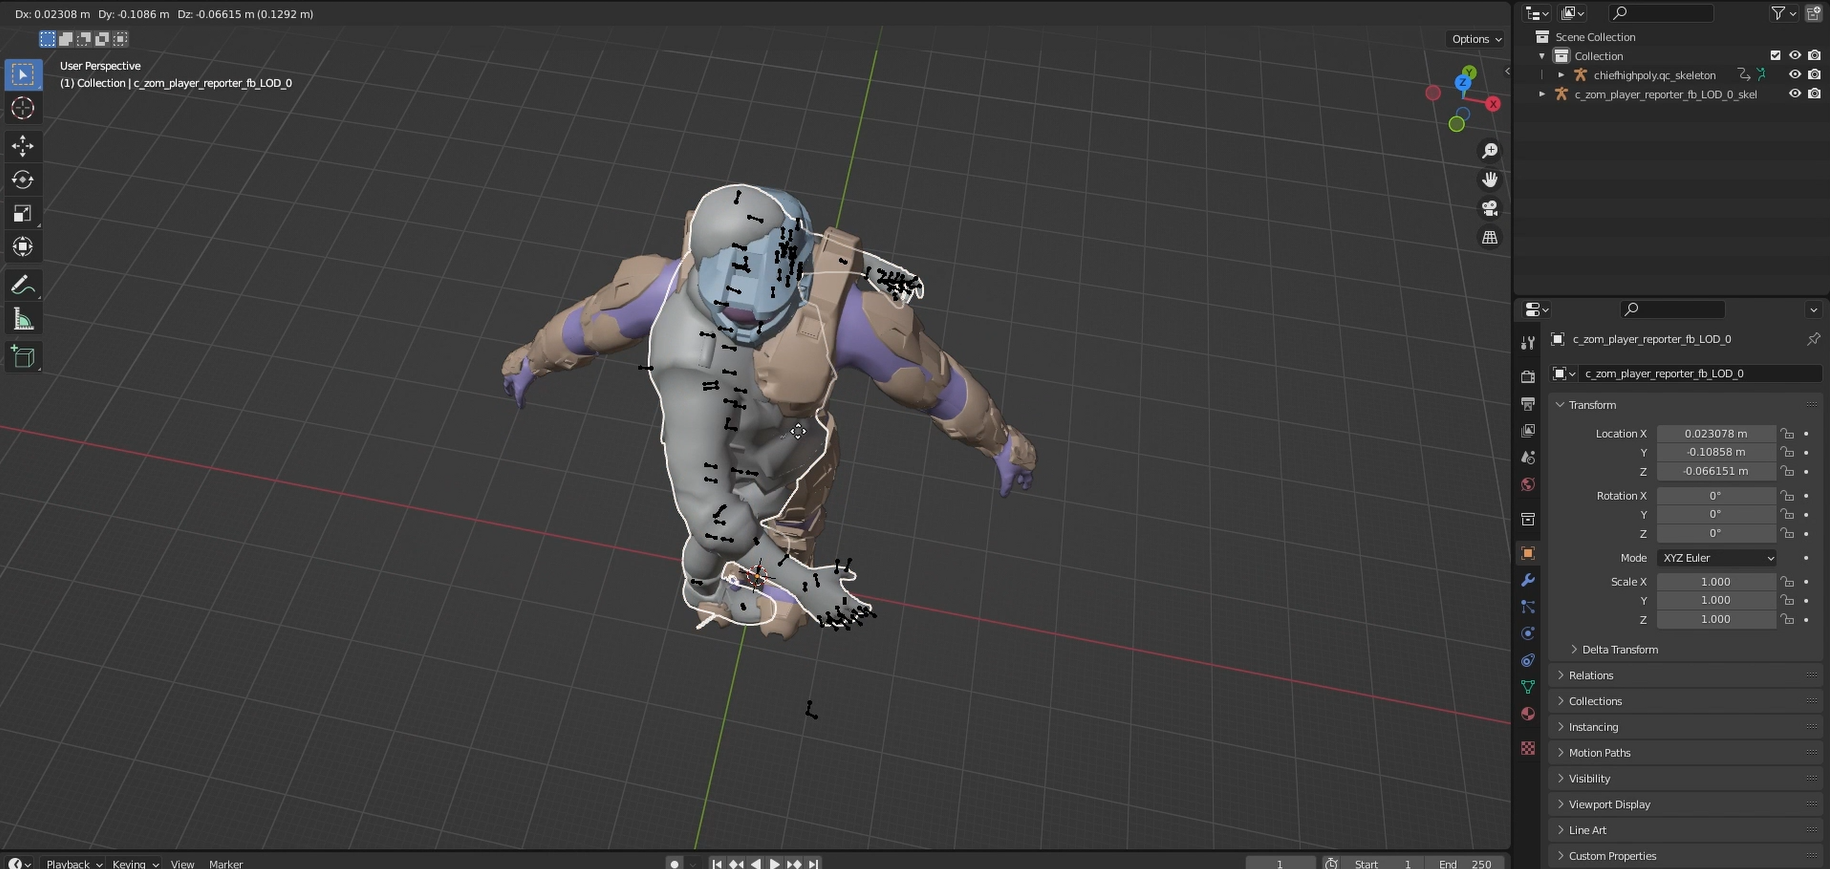
Once we imported the reference model, we have to positionate our model in the same place as the reference model. For that, it's got to have the same orientation and position. It's important that we make them exactly in the same pose to avoid errors.
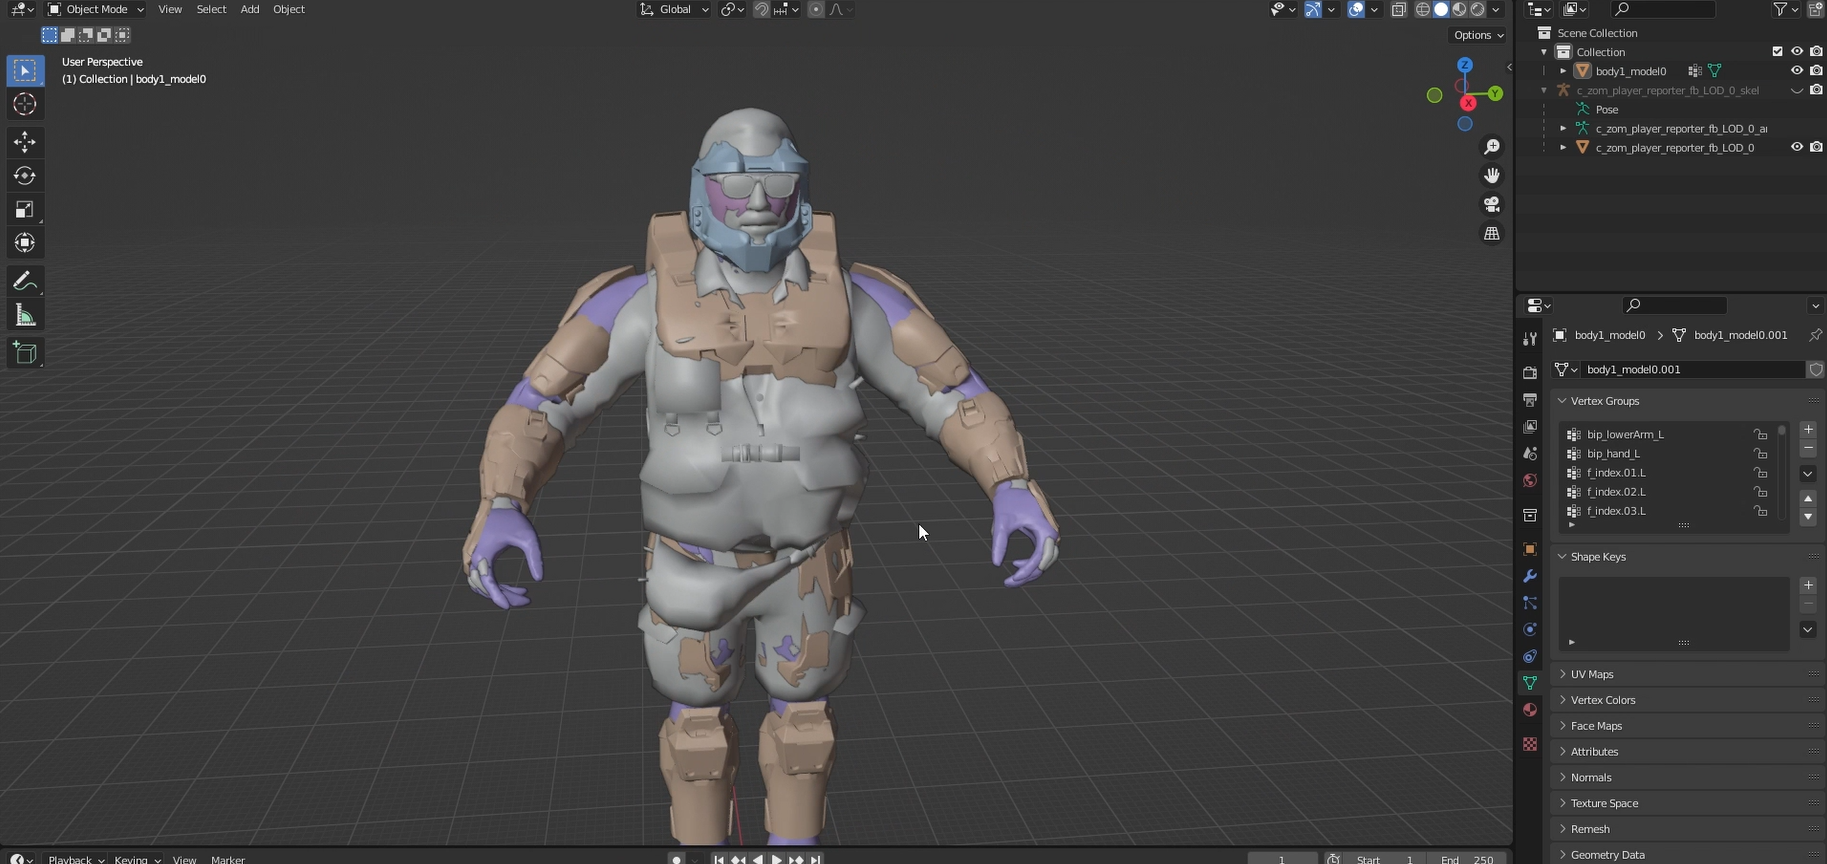
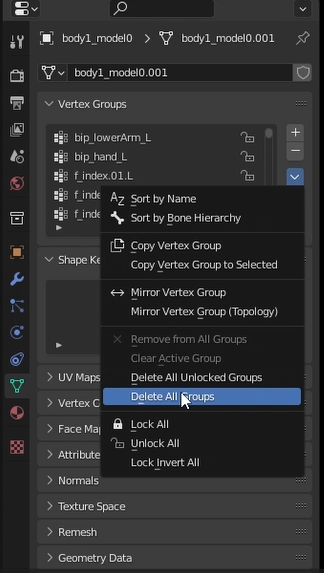
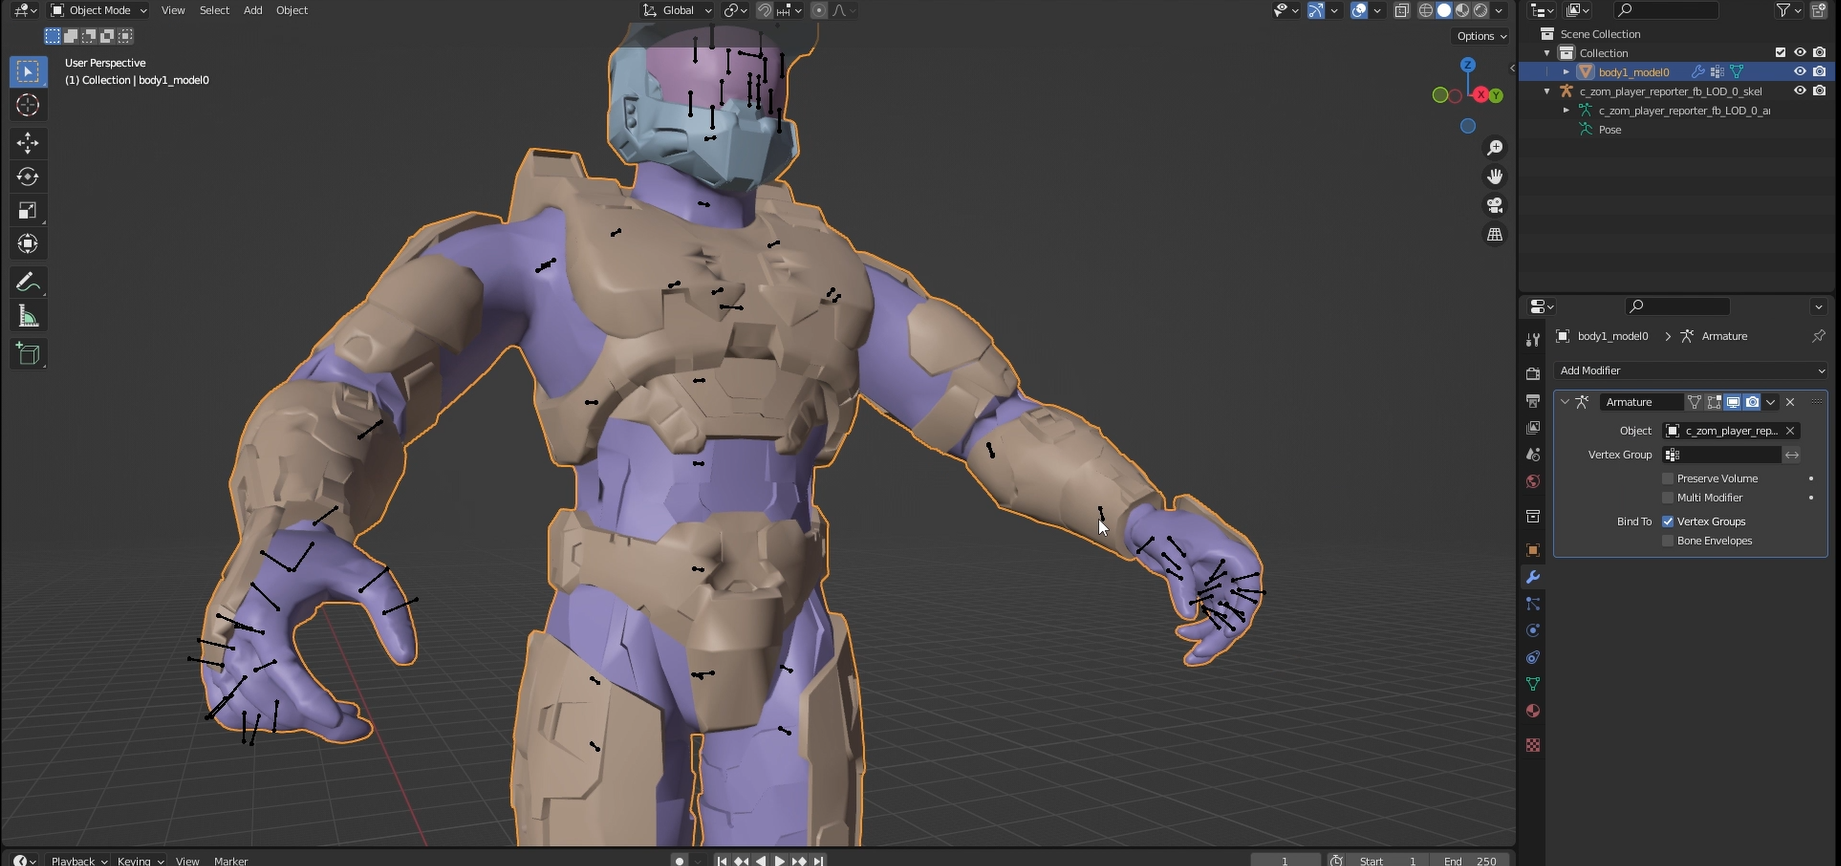
Once our model is in the same pose and position, remember to delete all Vertex groups associated to your model. After that, we'll have to transfer the reference model's vertex weights to our model. After that we can delete our reference model and add the armature to your model, what we're gonna get with this is that our model inherits the needed requirements so that the engine can correctly replace the character
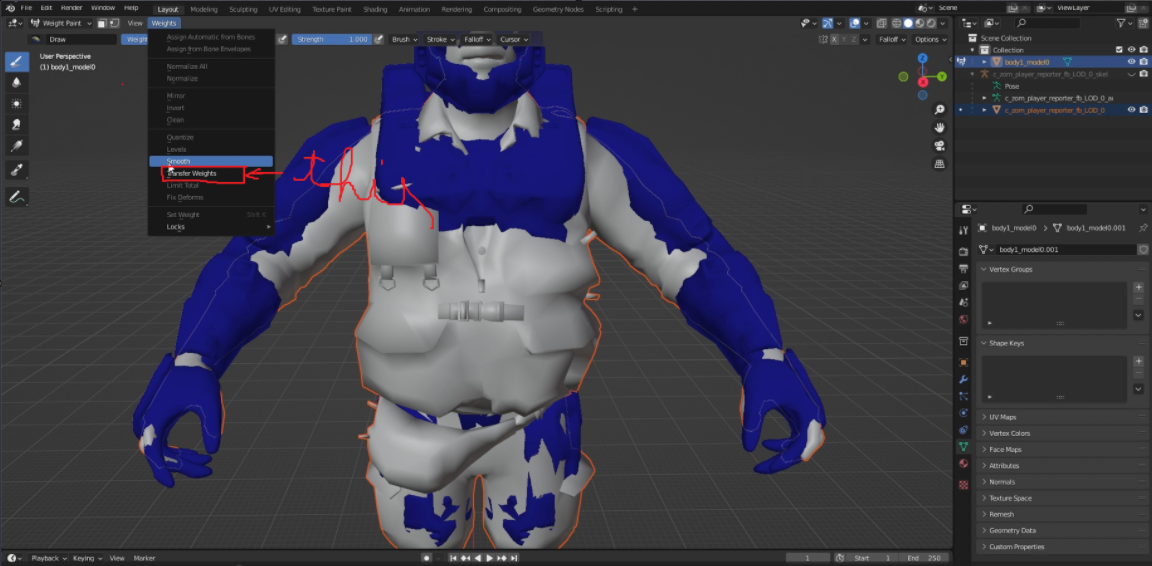
IF: The model looks stretched or has weird movements in to the game, we can fix it by setting the weights correctly
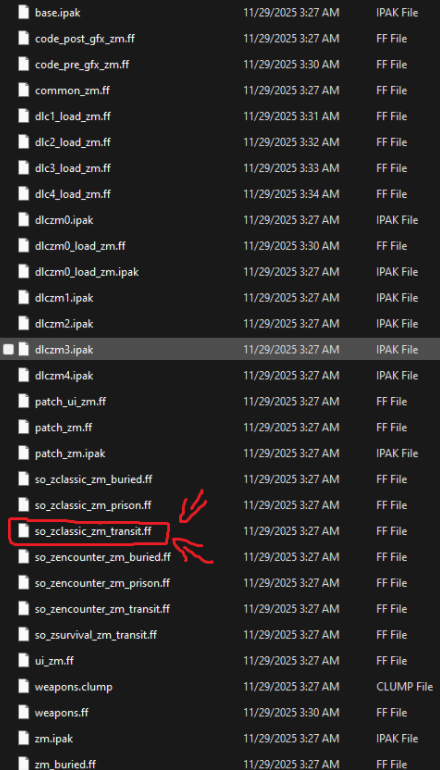
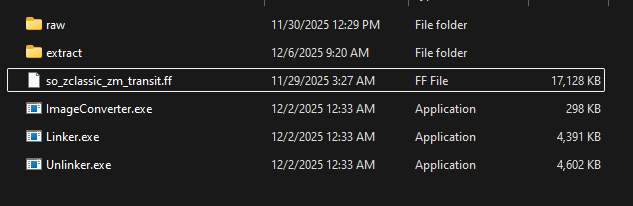
Now that we're here, let's open OpenAssetTools, what we're going to do is decompile the BO2 FF files, in this case we'll focus in a very important one called "so_zclassic_zm_transit.ff" This file contains the playable characters reference from tranzit.
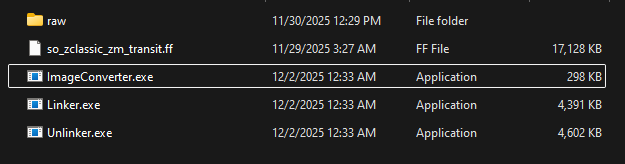
We'll have to move this file (which we can find in the game files) in the same folder as the apps called "linker.exe", "unlinker.exe", once done this, launch cmd and type "cd (the apps path)" in the console
Example: cd C:\OAT\oat-windows

Then execute the command: unlinker.exe -o extract so_zclassic_zm_transit.ff

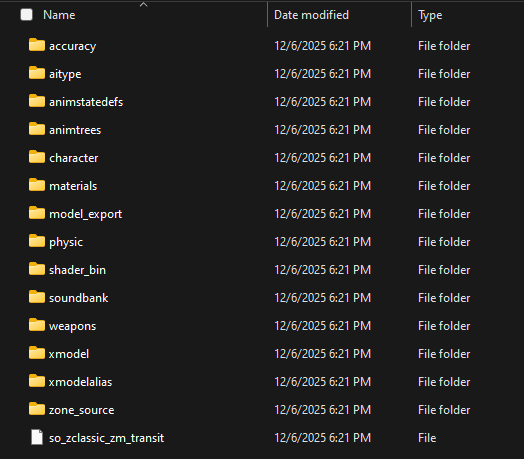
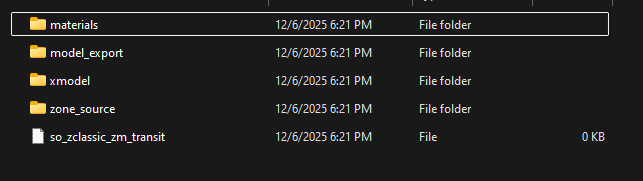
Once decompiled we'll see a folder called "extract" in which inside we'll focus on the folders named materials, model_export, xmodel, zone_source. Every other folder we just delete it.
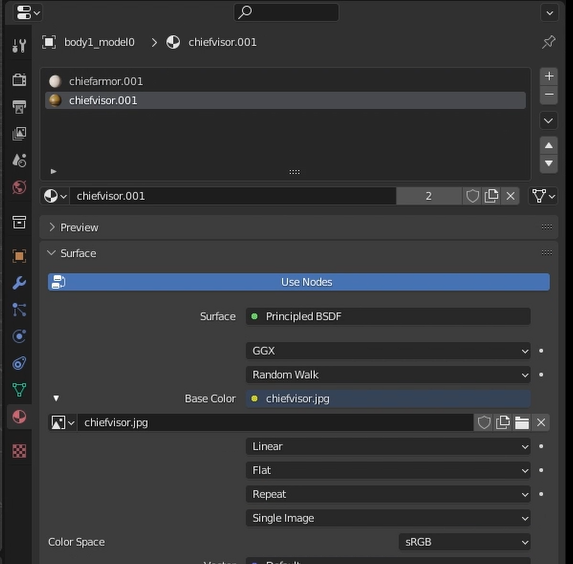
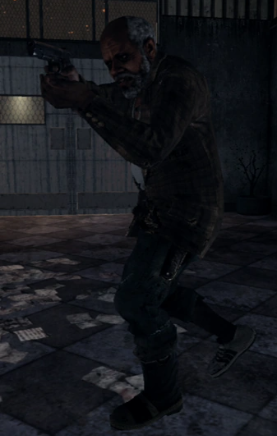
Click on the materials folder, and then on the mc folder, there we can see the materials in JSON format, and here you can choose what character you're going to replace, in my case I'll use Russman as an example
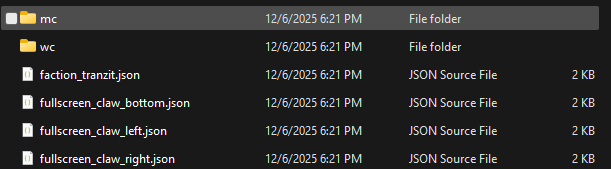

In this case, Russman will have 4 materials in total, 2 for the world model, and 2 for the view model (if you picked another character it'll have more or less materials) It's important to clarify that our model will have the same amount of materials that the engine expects, in this case it's expecting 2 materials for the world model. What we're going to do is we'll go to material properties in Blender and check how many materials your model has.
Farmgirl:
Reporter:
Engineer:
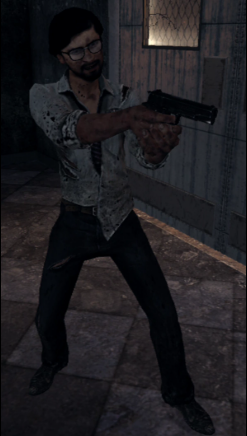
Oldman:
The materials must be called this way: mc/materialname
Examples:
mc/mtl_c_zom_player_oldman_body
mc/mtl_c_zom_player_oldman_head
(This is for russman)
Once done this we can export our model in a GLB file, this file is going to export wherever we have the model_export folder. We have to find the models named:
c_zom_player_oldman_fb_lod0.glb
c_zom_player_farmgirl_fb_lod0.glb
c_zom_player_reporter_fb_lod0.glb
c_zom_player_engineer_fb_lod0.glb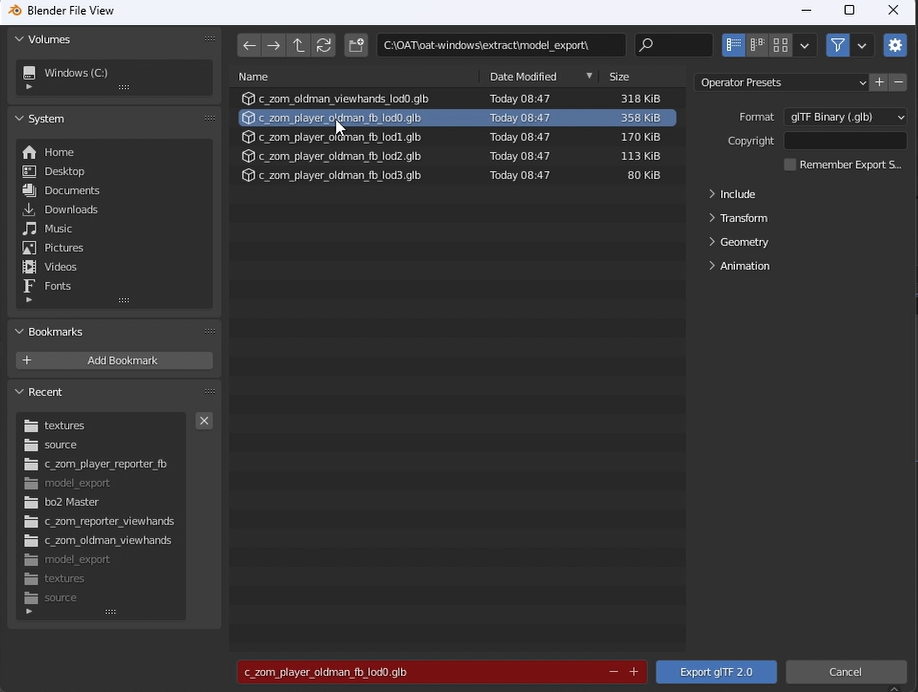
Depending on which material we've picked, we replace one model or another, after that our model will need less polygons. And this same model has to be exported with the next files names:
c_zom_player_oldman_fb_lod1.glb
c_zom_player_farmgirl_fb_lod1.glb
c_zom_player_reporter_fb_lod1.glb
c_zom_player_engineer_fb_lod1.glb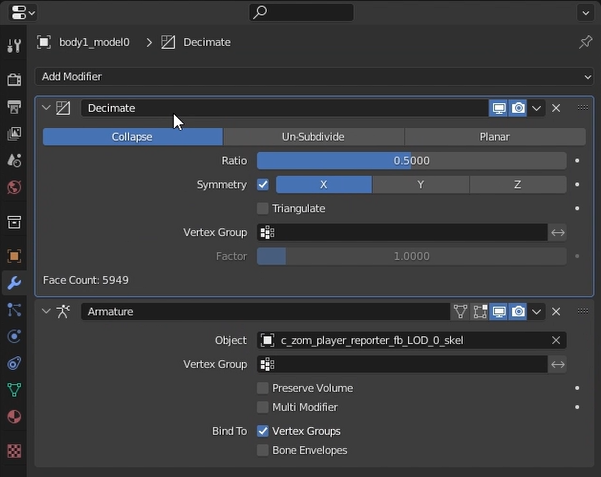
We repeat the process for the next models:
c_zom_player_oldman_fb_lod2.glb
c_zom_player_farmgirl_fb_lod2.glb
c_zom_player_reporter_fb_lod2.glb
c_zom_player_engineer_fb_lod2.glbc_zom_player_oldman_fb_lod3.glb
c_zom_player_farmgirl_fb_lod3.glb
c_zom_player_reporter_fb_lod3.glb
c_zom_player_engineer_fb_lod3.glbAfter that we'll have our main model, we'll only leave the arms and delete everything else. The model will only be 2 arms. We'll go to the folder where we downloaded the black ops models and import the reference arms, preferably c_zom_reporter_viewhands. We import the XMODEL to Blender and we'll do the same we did with the reference model (we have to put our model arms in the same position, orientation and pose as the reference arms).
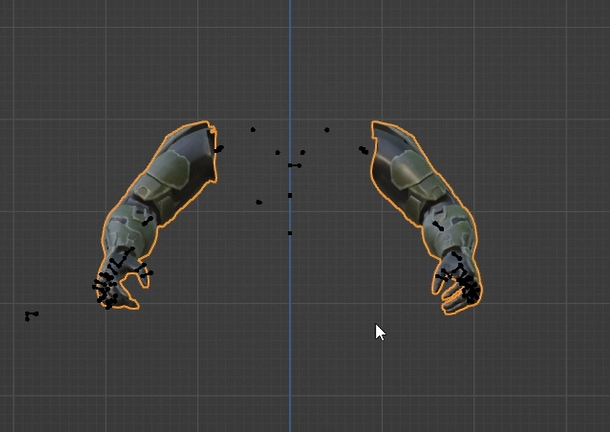
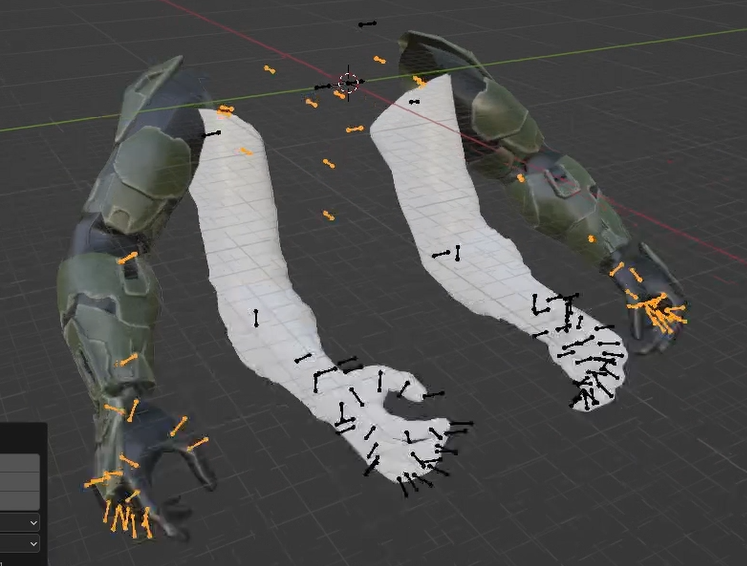
Like this:
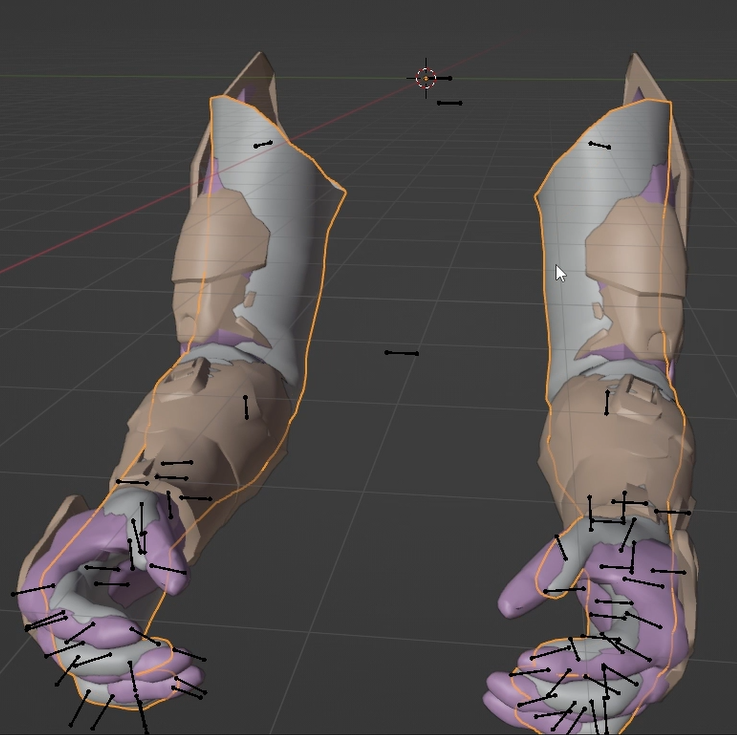
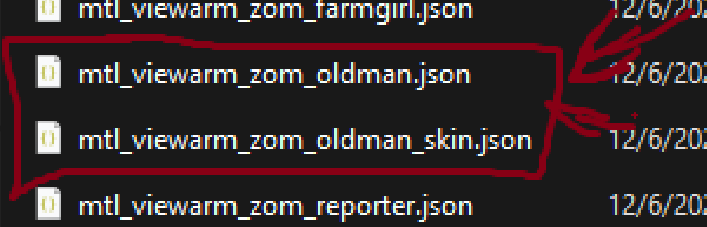
Once done this we delete our model's vertex groups and transfer the vertex weights. After that we delete the reference arms. We assign our reference model's armature to our model. Check the materials and rename them according to what the engine's expecting.
Example:
mc/mtl_viewarm_zom_oldman_skin
mc/mtl_viewarm_zom_oldman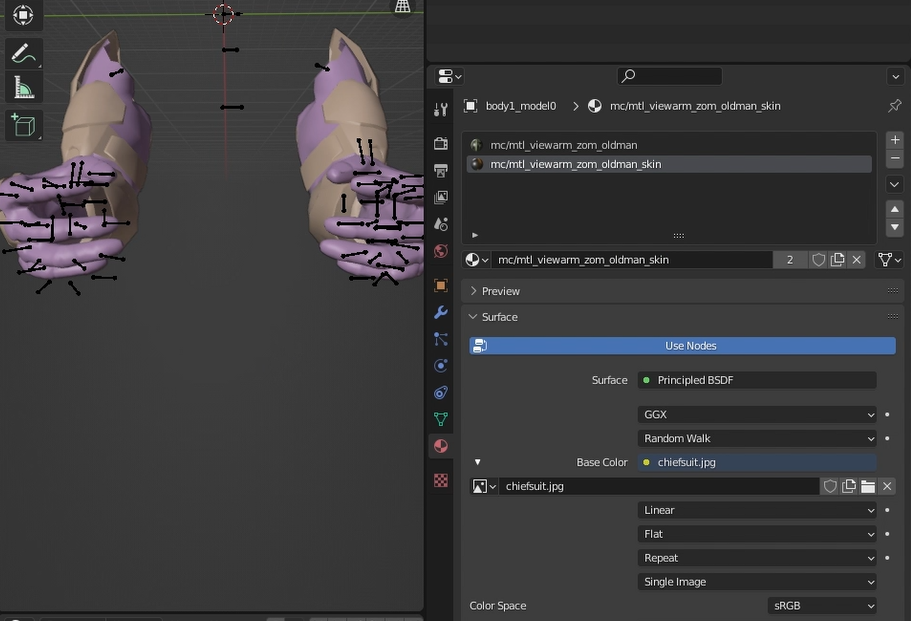
Now what we're going to do is export our model in the model_exports folder to one of this files:
c_zom_oldman_viewhands_lod0.glb
c_zom_reporter_viewhands_lod0.glb
c_zom_farmgirl_viewhands_lod0.glb
c_zom_engineer_viewhands_lod0.glb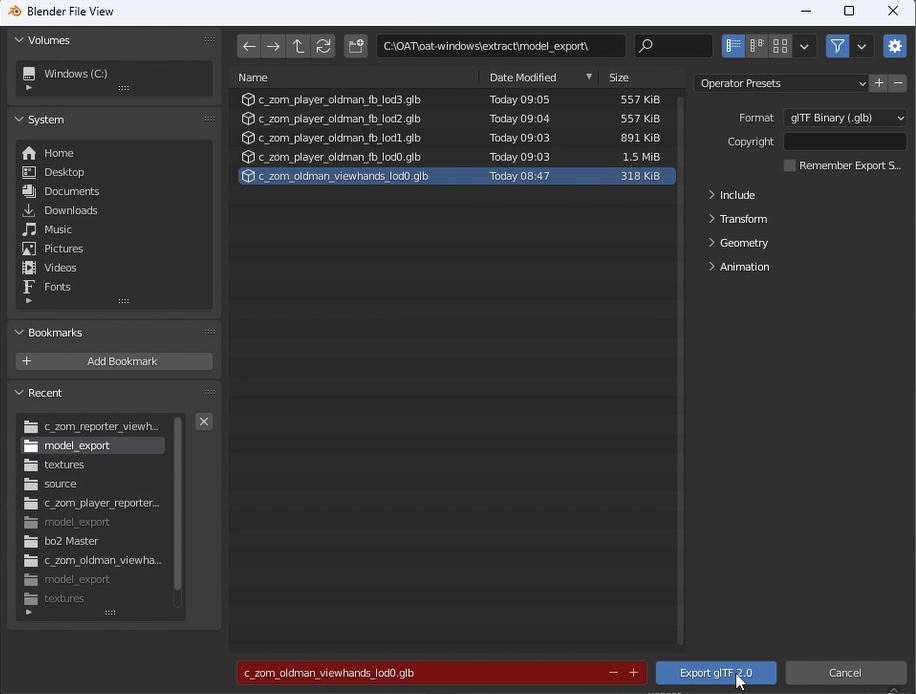
(The file you have to select has to be the same as the model you want to replace)
The folders xmodel, model_export, and materials must be placed in this path after extracting OpenAssetTool:
C:\OAT\oat-windows\raw\t6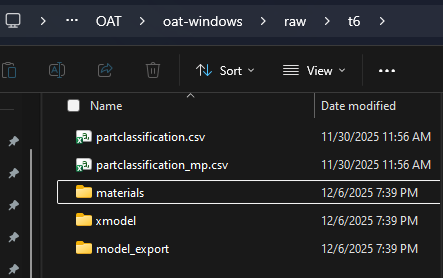
Once done this, if everything's correctly done, the model can be used in game, by first compiling it into an FF file. For that we open up cmd again and we'll type:
Linker.exe -v ^
--load "File path so_zclassic_zm_transit.ff" ^
--source-search-path "ZONE_SOURCE folder's decompiled path" ^
--output-folder "output folder's path" ^
so_zclassic_zm_transit
For the last step we'll add the textures, the textures we're going to use must have a specific name. This names we can find in the JSON files from the materials folder
Inside the JSON files we'll find many image names in which we only want some specific ones. This file names usually have two important signs "~-"
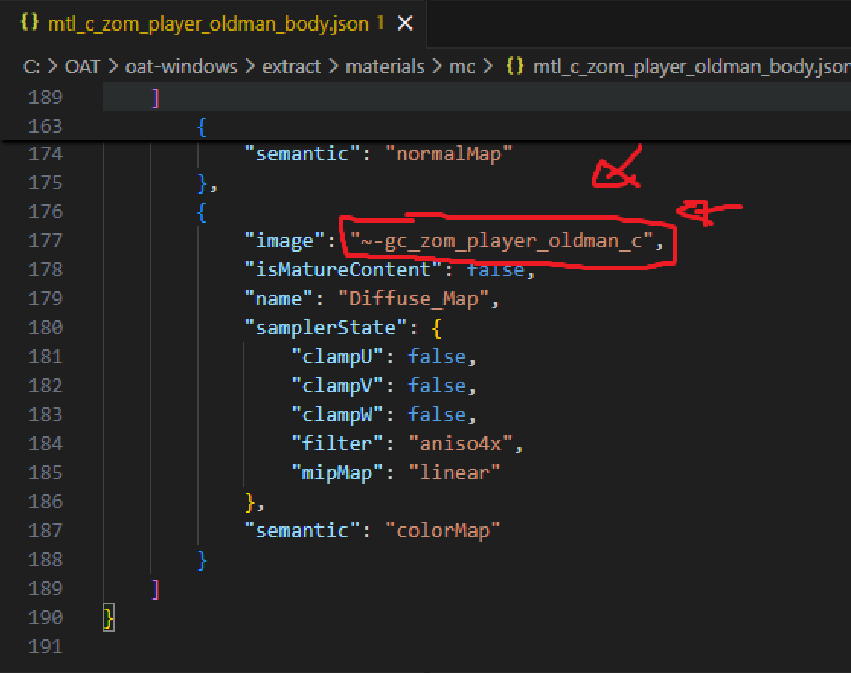
If the image name starts with these symbols we'll have to copy and paste it in our iwi file (the .iwi file has to be the texture we want to replace, this texture is the same we used in Blender). Once replaced every necessary texture with its corresponding name, we'll have to put it in a specific folder which we can find in
Plutonium\storage\t6\images
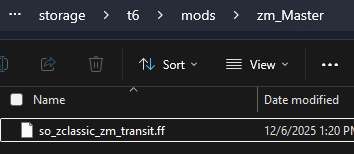
If you can't find the images folder, create it. There we put our iwi files. Once done this we'll go to the mods folder in Plutonium and create a folder named: zm_YOURMODNAME we'll put the compiling result which is a file named so_zclassic_zm_transit.ff
This file name should NOT be changed.
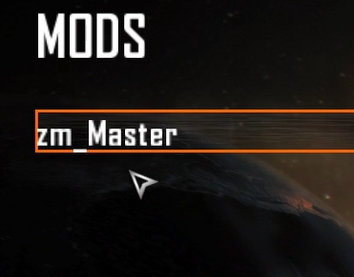
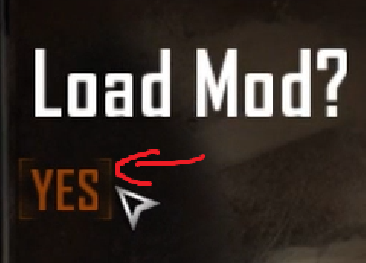
After all of this, we'll open the game from the Plutonium launcher and go to the Mods option, we'll see our mod there and we just toggle it. Then we go to Custom game, toggle cheats, start the game. And we'll se our model with the new arms.
And if you type "cg_thirdperson 1" you're going to see your model.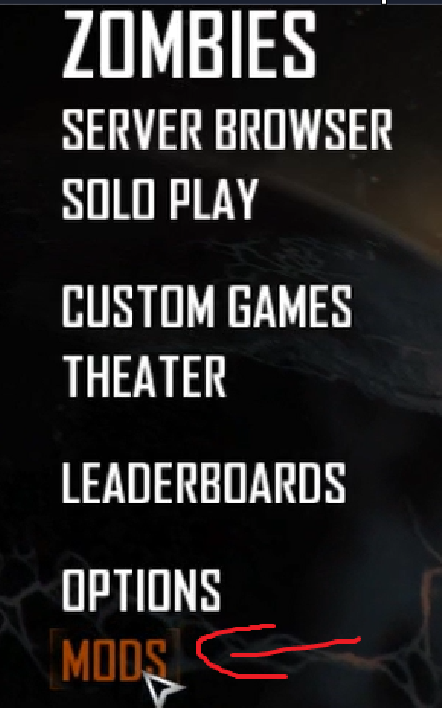
Credits:
Ahrimdon
NotSebax
Laupetin
marv7000 -
IMPORTANT NOTE!!!
The file so_zclassic_zm_transit.ff (found in the game files) should not be moved! You must copy and paste it into the folder where your unlinker.exe is located!AND THIS IS THE CORRECT COMMAND:
Linker.exe ^
--load "File path so_zclassic_zm_transit.ff" ^
--source-search-path "ZONE_SOURCE folder's decompiled path" ^
--output-folder "output folder's path" ^
so_zclassic_zm_transit -
this is so good can you make a tutorial on how to do animated camos for tranzit die rise and the survival maps next plzz?
-
this is so good can you make a tutorial on how to do animated camos for tranzit die rise and the survival maps next plzz?
mr.kennutbuster Thank you!! I'm really happy you found it useful, i'll likely try to make a tutorial about animated camos once i understand the process better
-
mr.kennutbuster Thank you!! I'm really happy you found it useful, i'll likely try to make a tutorial about animated camos once i understand the process better
Meshiru plz do because we need animated camos on zm maps that don't have them i have the camo material if you wanna see what's your discord?
-
now this is peak
-
Meshiru thank you for actually taking the time to post a tutorial. The more modders the better

-
Meshiru plz do because we need animated camos on zm maps that don't have them i have the camo material if you wanna see what's your discord?
mr.kennutbuster
Zexarth -
Wow, that's incredible! I'm learning how to create mods, I can already carry weapons, add animated camos to maps, and now I'm going to read this tutorial to learn about player models.