Resxt Wow thanks for the fast reply, I'll just stick to that and editing the default config! Didn't know about default FOV either, so thank you. Swear it was working for me before, but all I've read is exactly what you're saying, which is weird. Either way, appreciate your time!
Ahrimdon
Banned
Posts
-
"exec" DVAR Non-Functional -
"exec" DVAR Non-FunctionalResxt Thanks for the reply man! I used to bind DVAR's with that method but eventually switched over to my own dedicated config file. Executing the config file works for T4 and IW5, just not T6. I probably should've clarified a bit more that's my bad. I'll include pictures of exactly what I'm talking about. Basically, it has all my default settings in it for each game and it's titled main.cfg, with file extensions on. I use the command "/exec main.cfg" and bind it using the command bind 0 "exec main.cfg". It has been working for me fine for roughly a year now and just recently stopped for T6 with the implementation of r3043. I created a file with only cg_fov "100" tested the exec in all the games and my suspicions were confirmed. Have tried it in custom matches, solo and a dedicated server and it seems to only be an issue with T6. Appreciate your time!


-
"exec" DVAR Non-FunctionalEarlier today I hopped on and pressed my key bind I use for LodBias/Custom Settings and it didn't work for the first time ever. I thought I was crazy because it's worked like a charm every time. Tried everything from verifying files to putting the file in different folders than usual and even all folders in the directory and “%localappdata%/Plutonium” at one point, none of it worked.
I wanted to make it wasn't me so I hop on MW3 and WaW to test the exact same config file and voila, works like a charm on both games. Put the config file in storage - > IW5/T4 -> players. For testing purposes my config file had one line, cg_fov "100". It worked before the update to r3043, but not after, solely for BO2. Just wanted to see if there's a new way, it's a glitch, or at least bring it to someone's attention, in a non-complaining manner of course. Thanks in advance!
-
[Release] Shield durability in hud@AD-BOY7 Sure man, I can do that. Check out my most recent post. Already did all the work for you :). Without sounding cocky, pretty sure I’m the first one to ever dump every single model and .dds/.tga for BO2 zombies, organize it and post it. You’ll want to download only the “All .dds files”. That will have everything you’re looking for!
-
[Release] Shield durability in hud -
[Release] [Zombies] All BO2 Zombies xModels (.OBJ, .MA, .XE & .SMD) Files + Images (.DDS, .TGA)Preface
I have only found one other post containing xModel Exports. Here are the Zombies Only xModels. These xModel's were exported and organized by myself. I will have a short section on how you can do the same if you so choose. Along with some short instruction on what to do with these files.
These files are used for 3D Texture Model Editing (Creating Custom Camos, Textures, Models, etc.). The main two file types people will be working with are .OBJ and .MA. Both of these files types are used with a large array of 3D editing programs, such as, but not limited too, Blender, Adobe, Autodesk, Meshlab, etc.
Downloads
- These .rar files have been compressed to down around ~10% of their normal size. I highly recommend you extract purely the textures you need if you plan on only doing a few. You MUST extract before working!
BO2 Zombies Weapon Texture Models
*Only the weapon xModels (.OBJ, .MA, .XE & .SMD) + (.DDS & .TGA) Files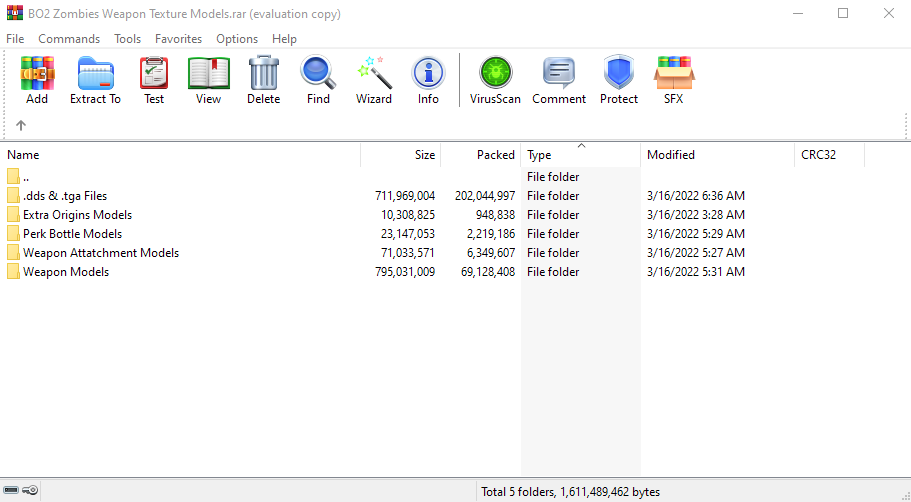
All BO2 Zombies xModels (.MA, .OBJ, .XE, .SMD)
*All zombie models from every single zombies map, once again (.MA, .OBJ, .XE, .SMD) files.
*.DDS & .TGA files downloaded separately.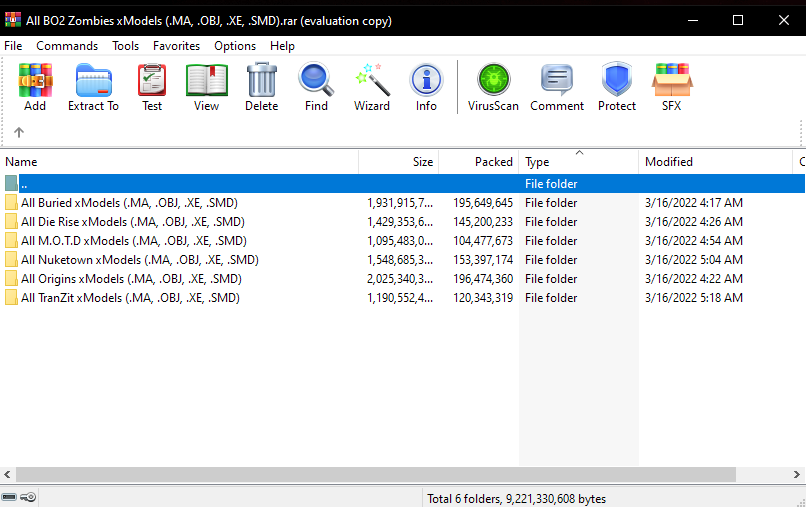
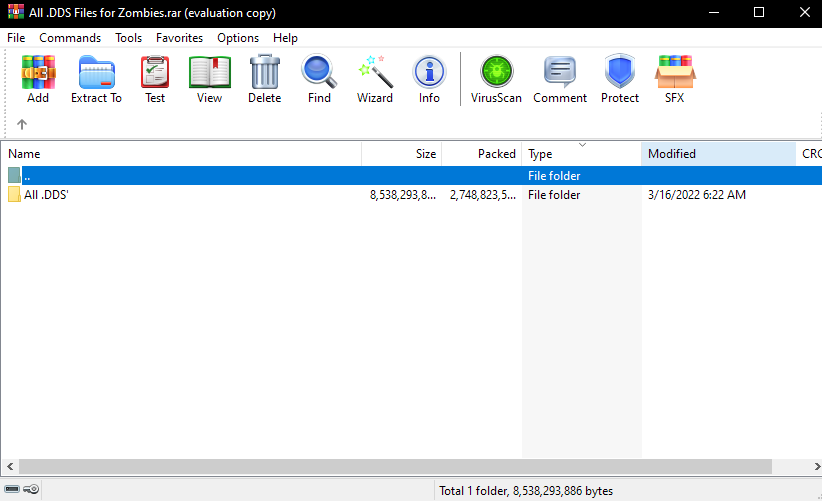
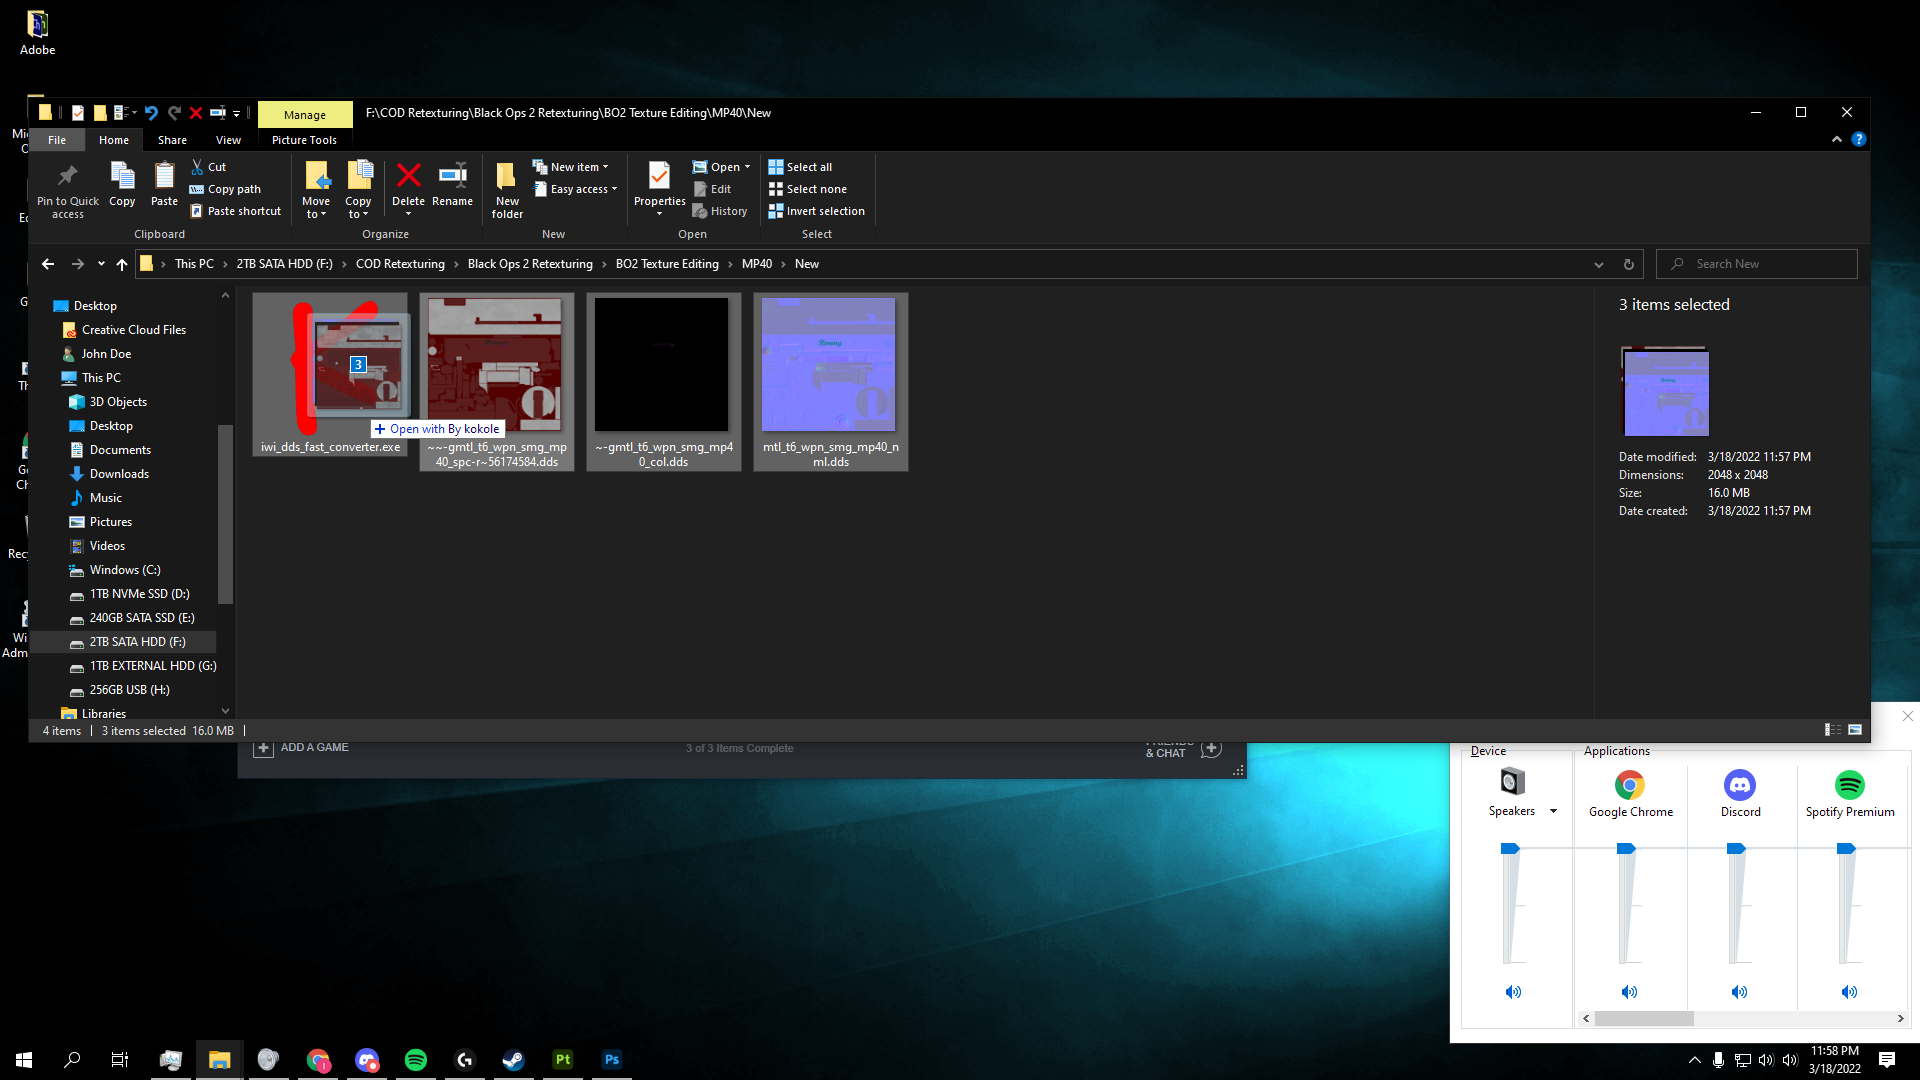
All .DDS Files for Zombies
*All .DDS & .TGA files extracted from- base.ipak
dlczm0.ipak
dlczm1.ipak
dlczm2.ipak
dlczm4.ipak
patch_zm.ipak
zm_nuked.ipak
zm_nuked_patch.ipak
How did I export these files?
I used a program called Lime made by the legend himself, Tom Crowley. Tom has tons of essential programs for Call of Duty modding! I highly recommend you check him out!
Can you export them using Plutonium?
No you cannot. Lime looks for specific Call of Duty .EXE's that are running. For BO2, it looks for the t6*.exe. It will not recognize Plutonium since Plutonium uses a bootstrapper. In order to export your own models you will need a Steam Copy, or an "illegal" copy, however I don't condone the latter. That's why I put this together!
What do the file extensions mean?
The common files that will be worked with are (.OBJ & .MA) + (.DDS & .TGA). The former being the 3D image models, and the latter being the 2D model texture layers. If you are looking to 3D design weapon camos then you will need to export the .TGA file for the particular model as a .PNG. This will act as the normal layer in the 3D design software of your choice.
How do I make my own weapon camos?
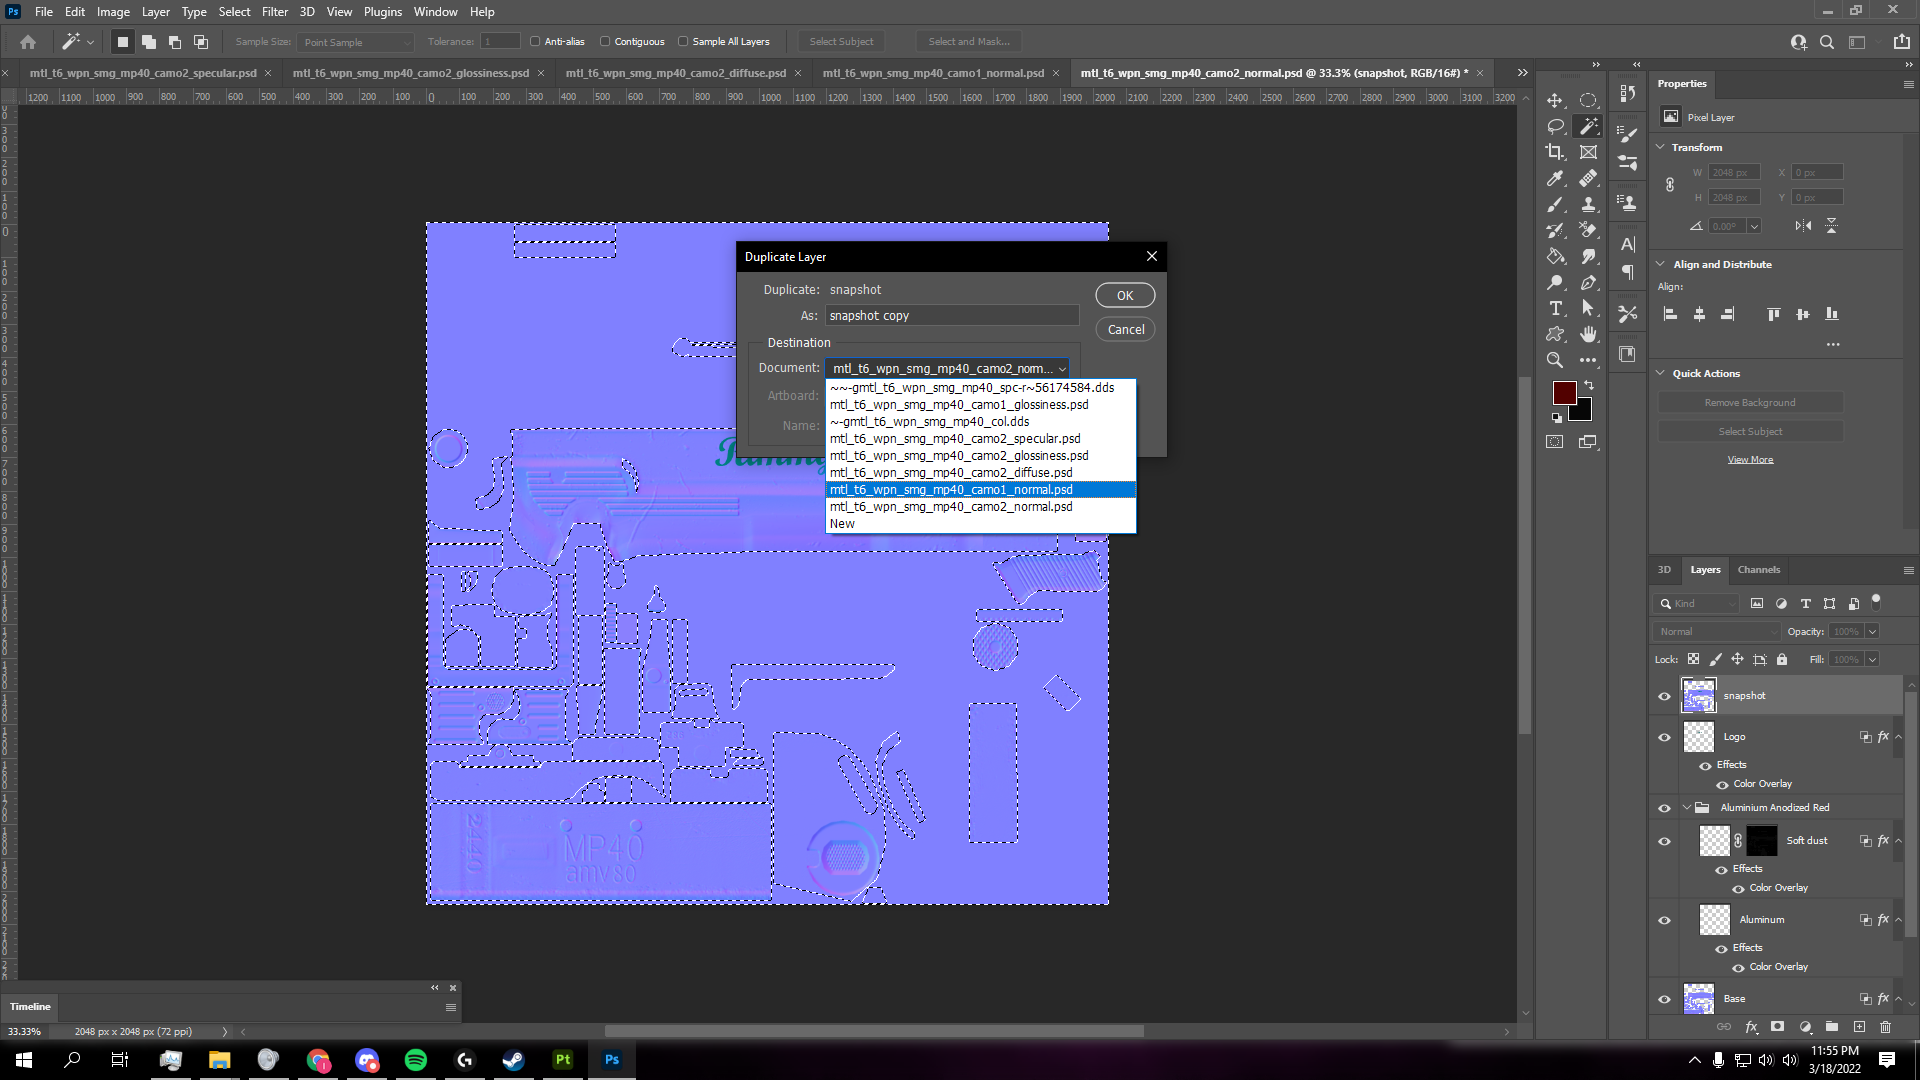
Before I go on you will need to check out this video. It will show you how to do this entire process from start to finish in detail. Excluding exporting the .TGA file for your normal layer. These screenshots are only to give a vague idea and not an ACTUAL tutorial. If you wish to do this properly, then you must watch the video! This is for Weapon Camos ONLY.
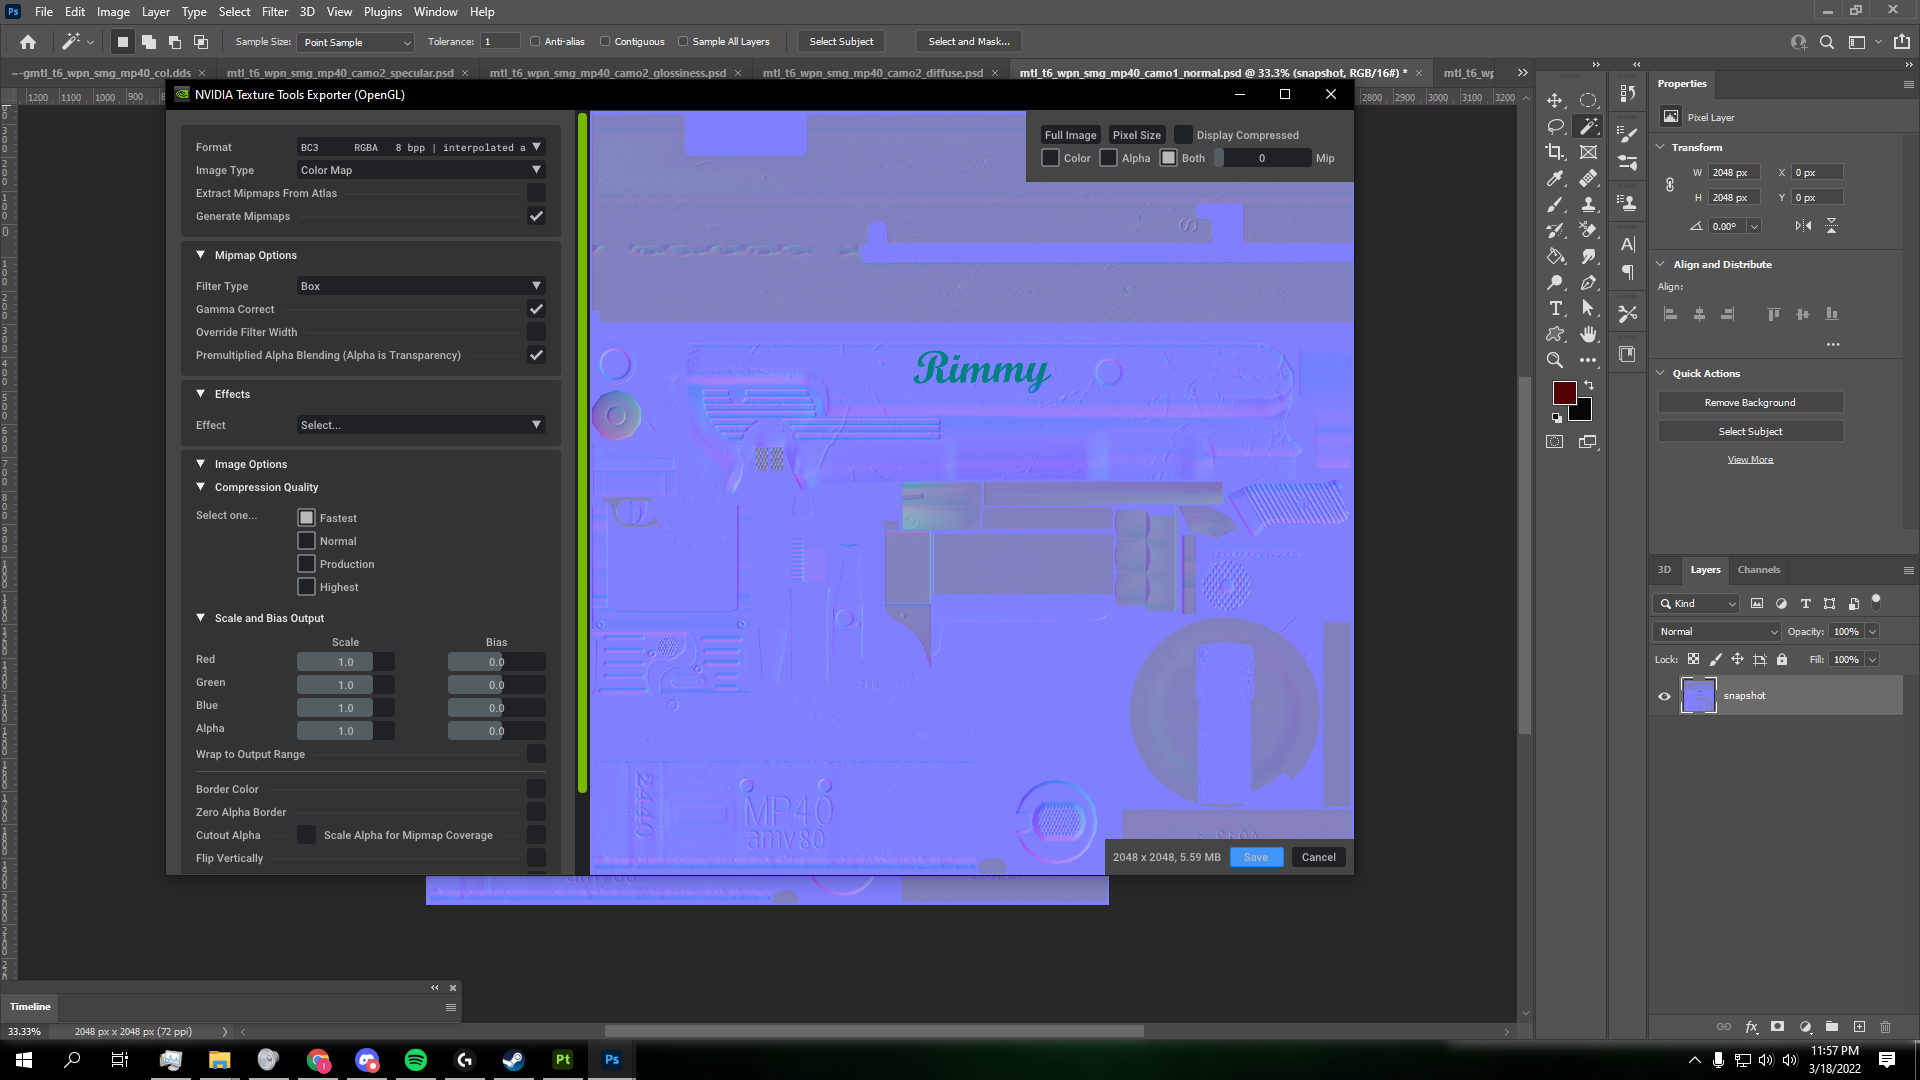
Note: You will need NVIDIA Texture Tools for Photoshop in order to export as .DDS.
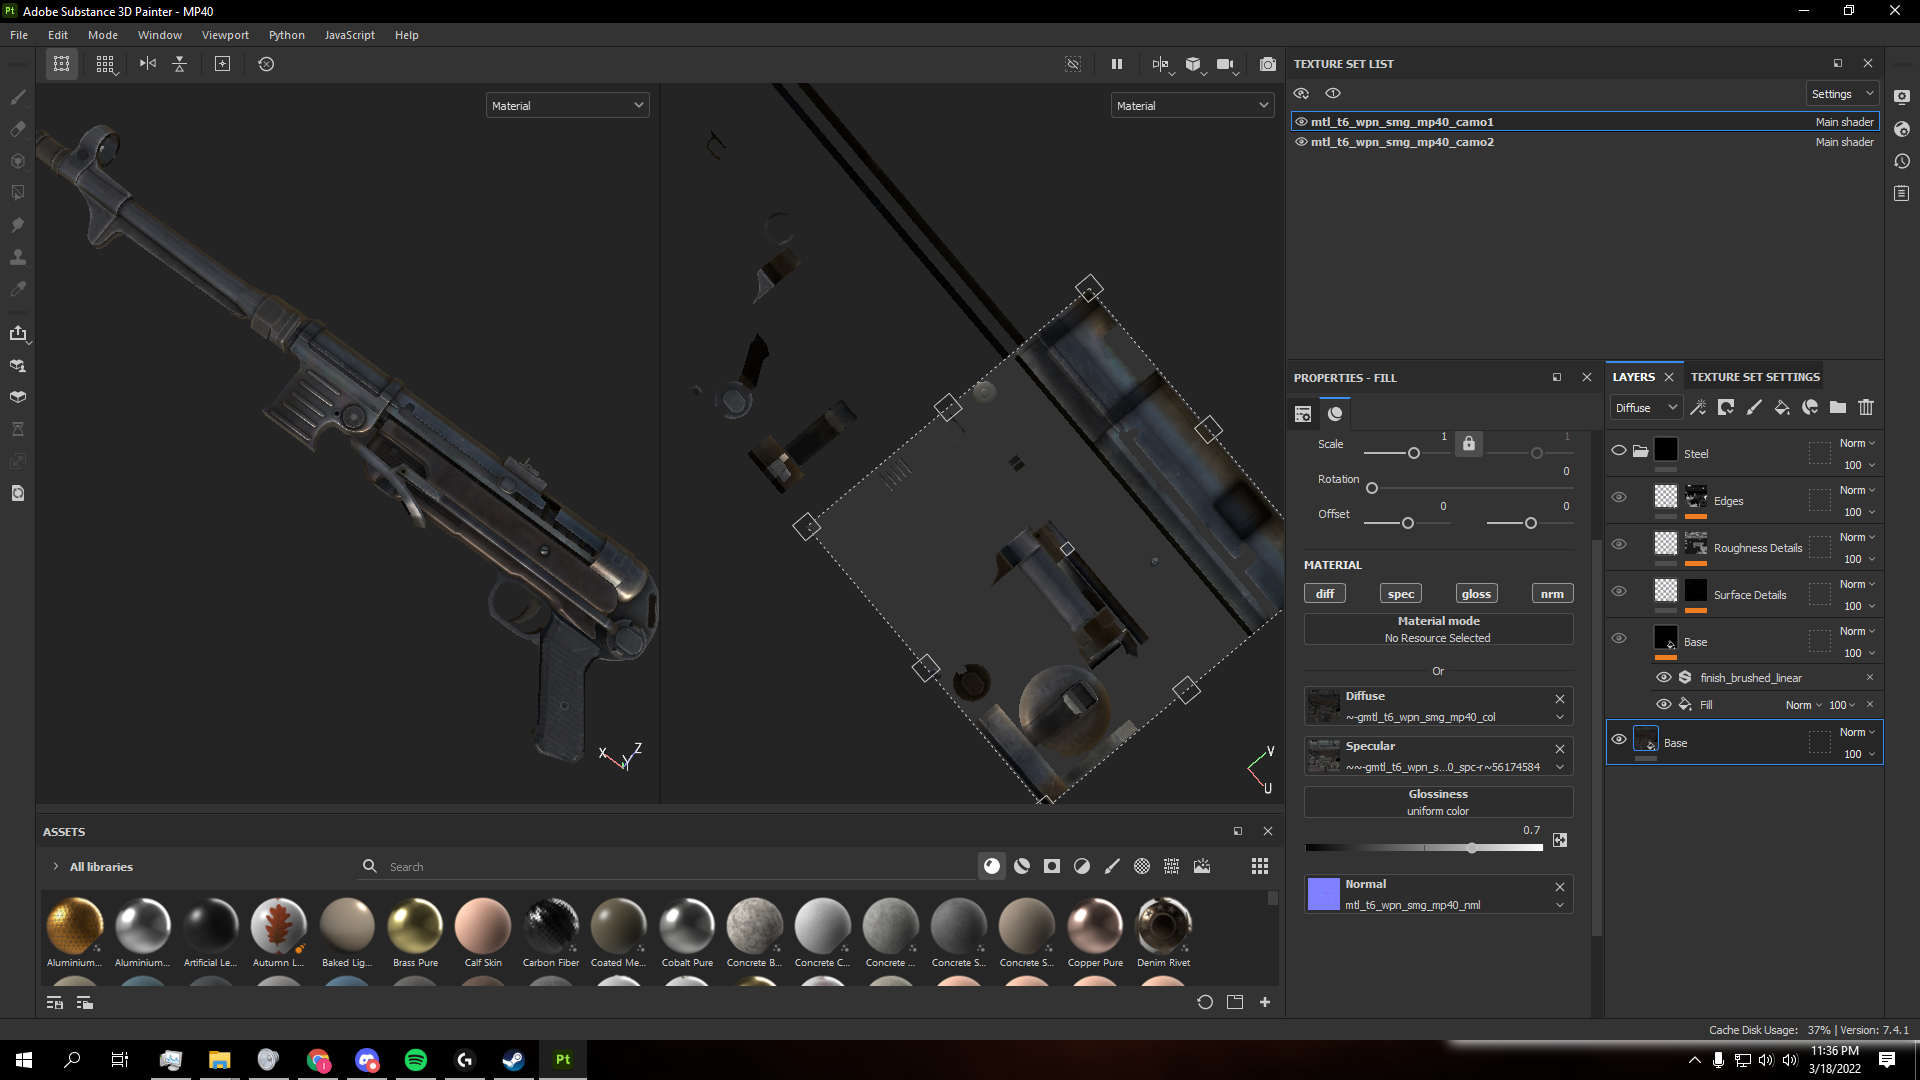
Tip: The Specular Layer .DDS files always have an S somewhere near the end or some variation of "Spec" in the name. The Diffuse Layer .DDS files will always have _col at the end of it. As mentioned previously, in order to get the Normal Layer .DDS file you must open the .TGA file in Photoshop and export it as a .PNG I then open the exported model in Adobe Substance 3D Painter.
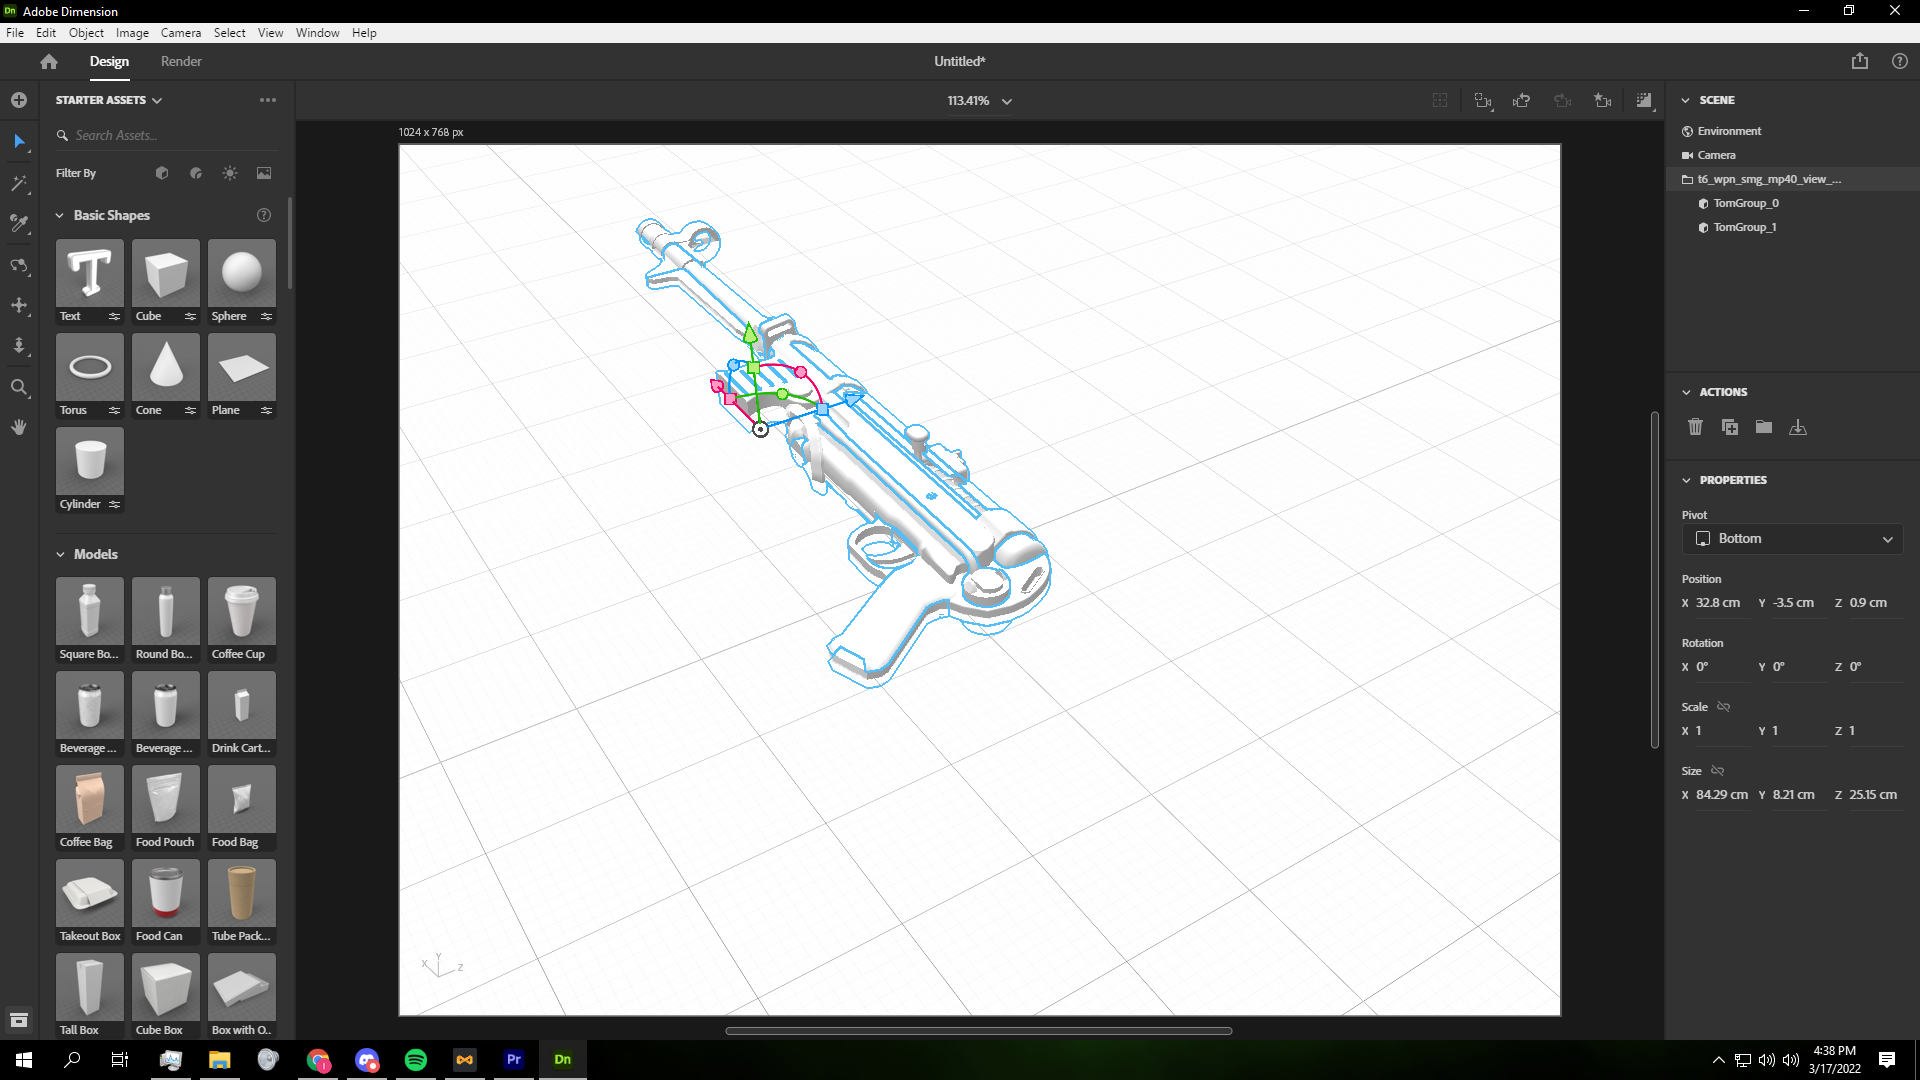
- I personally use Adobe Dimension to Export my selected model as another .OBJ to begin the process in order to remove some of the "environment".
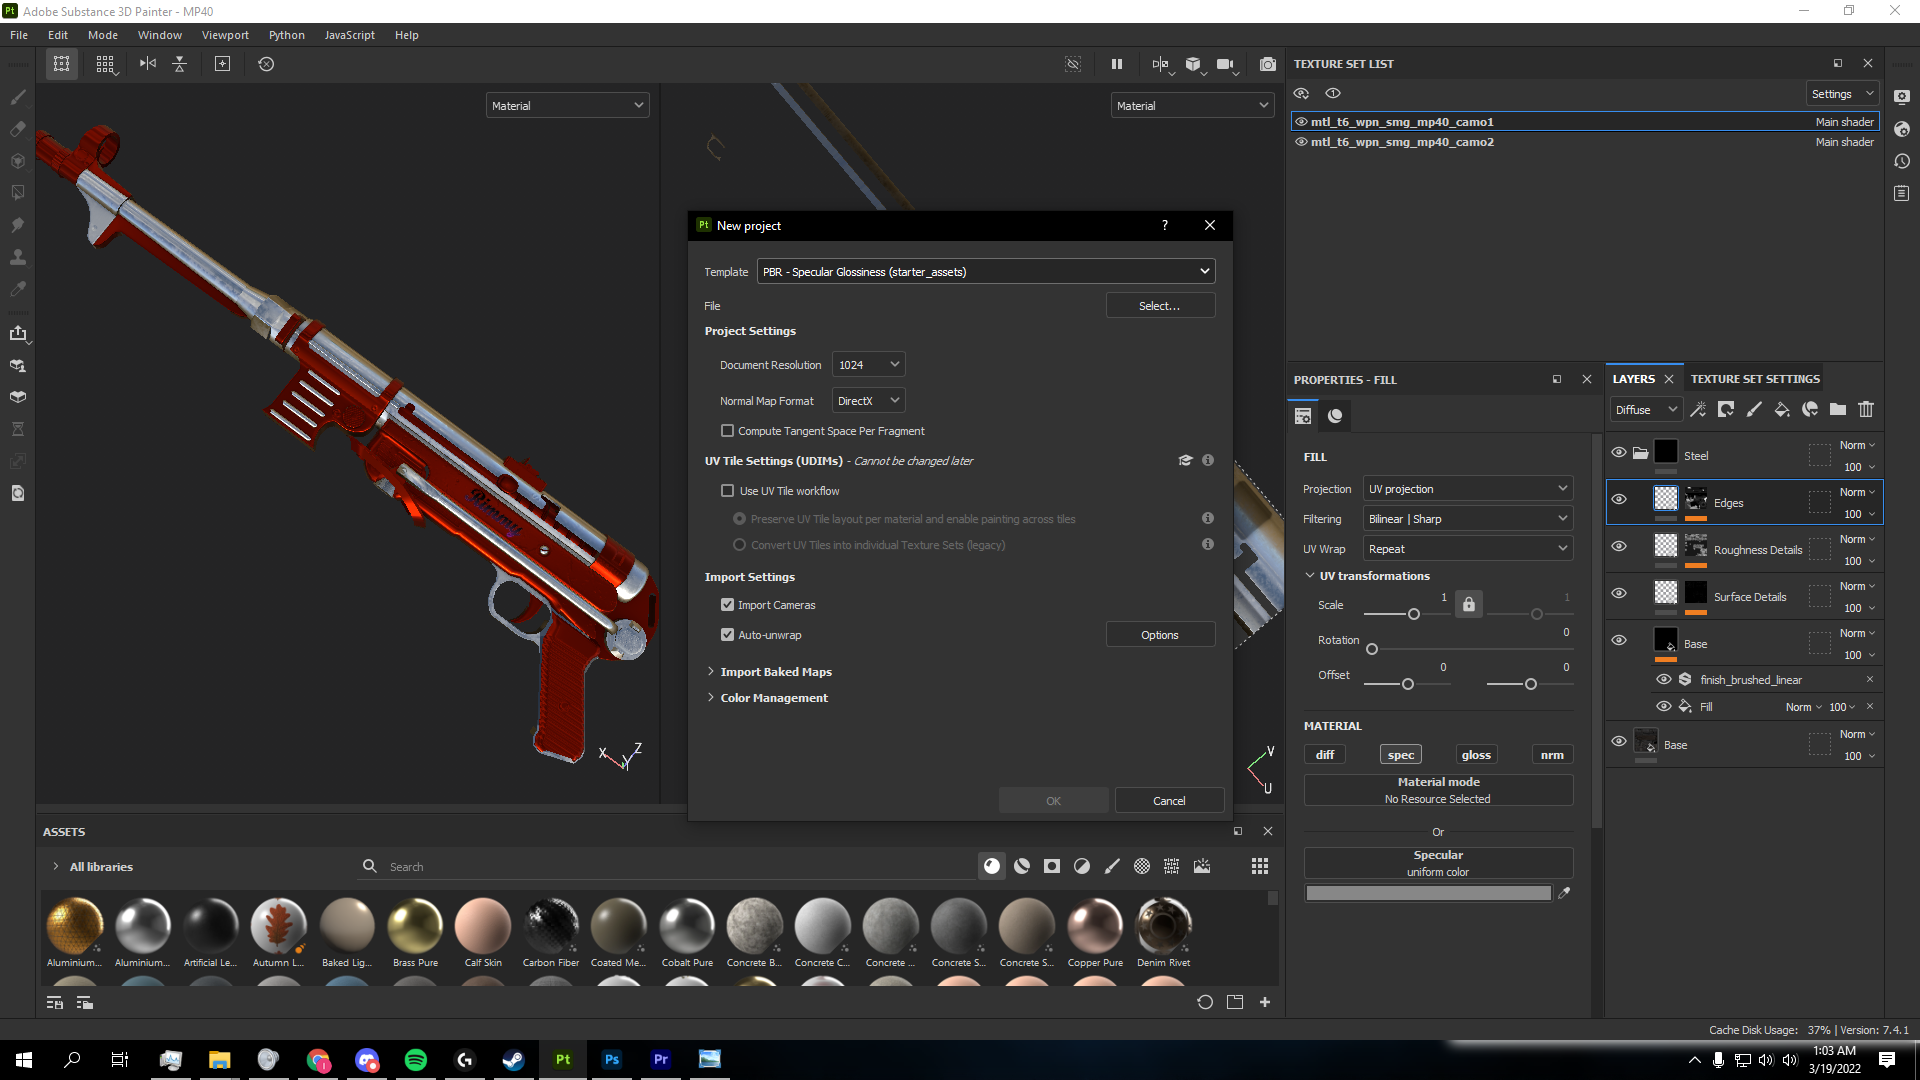
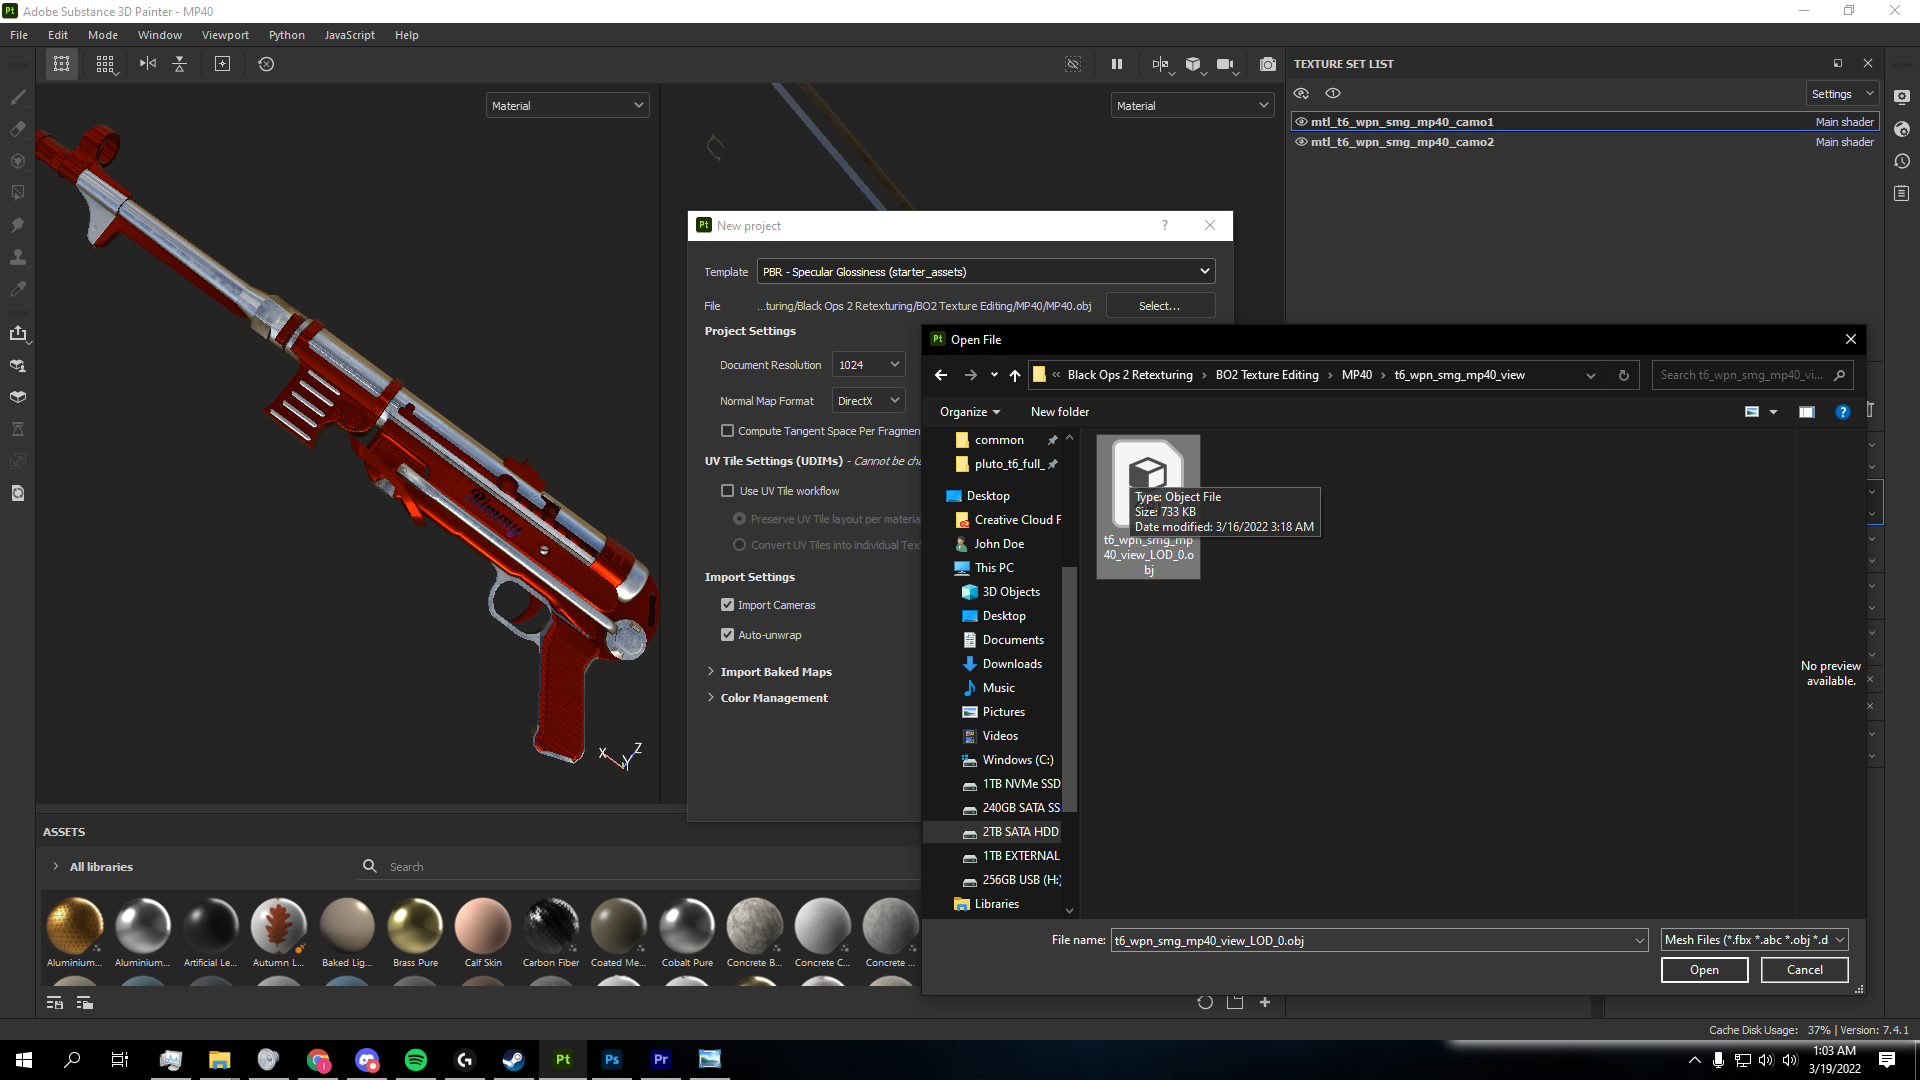
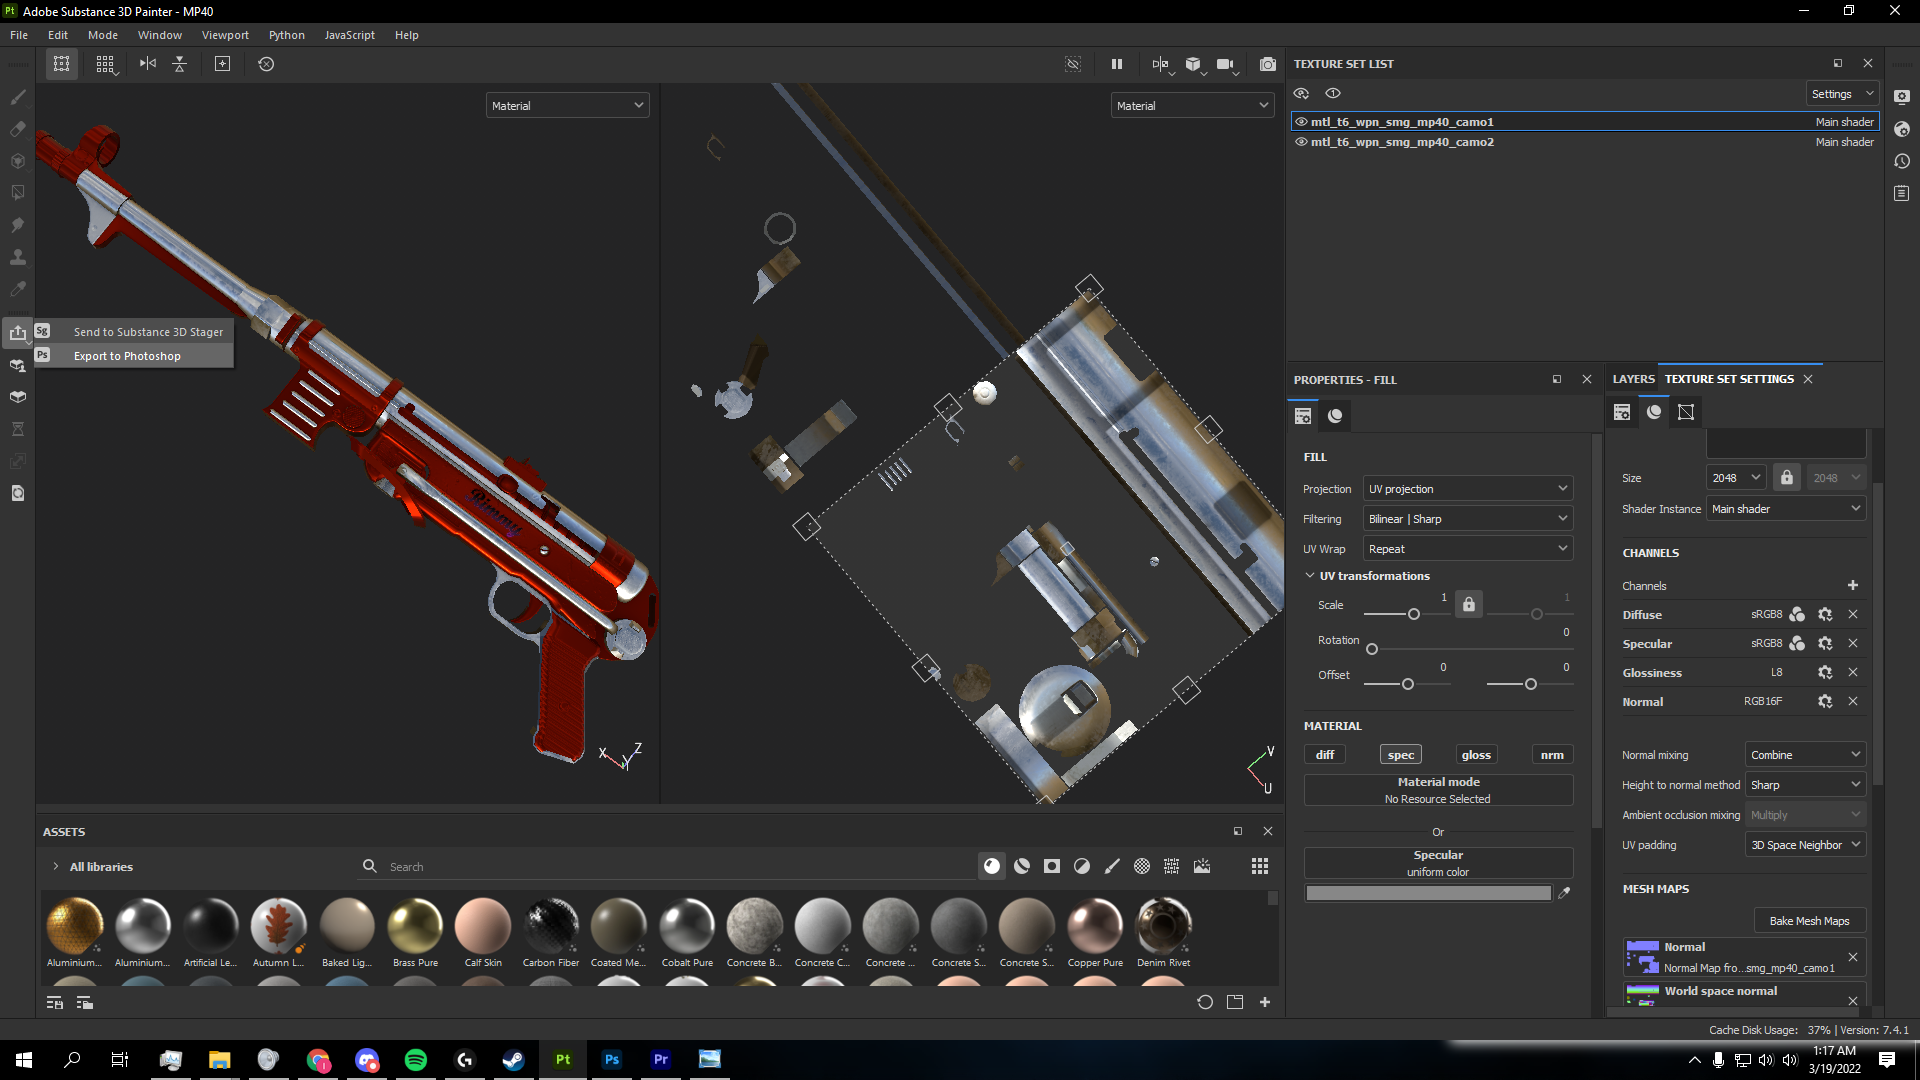
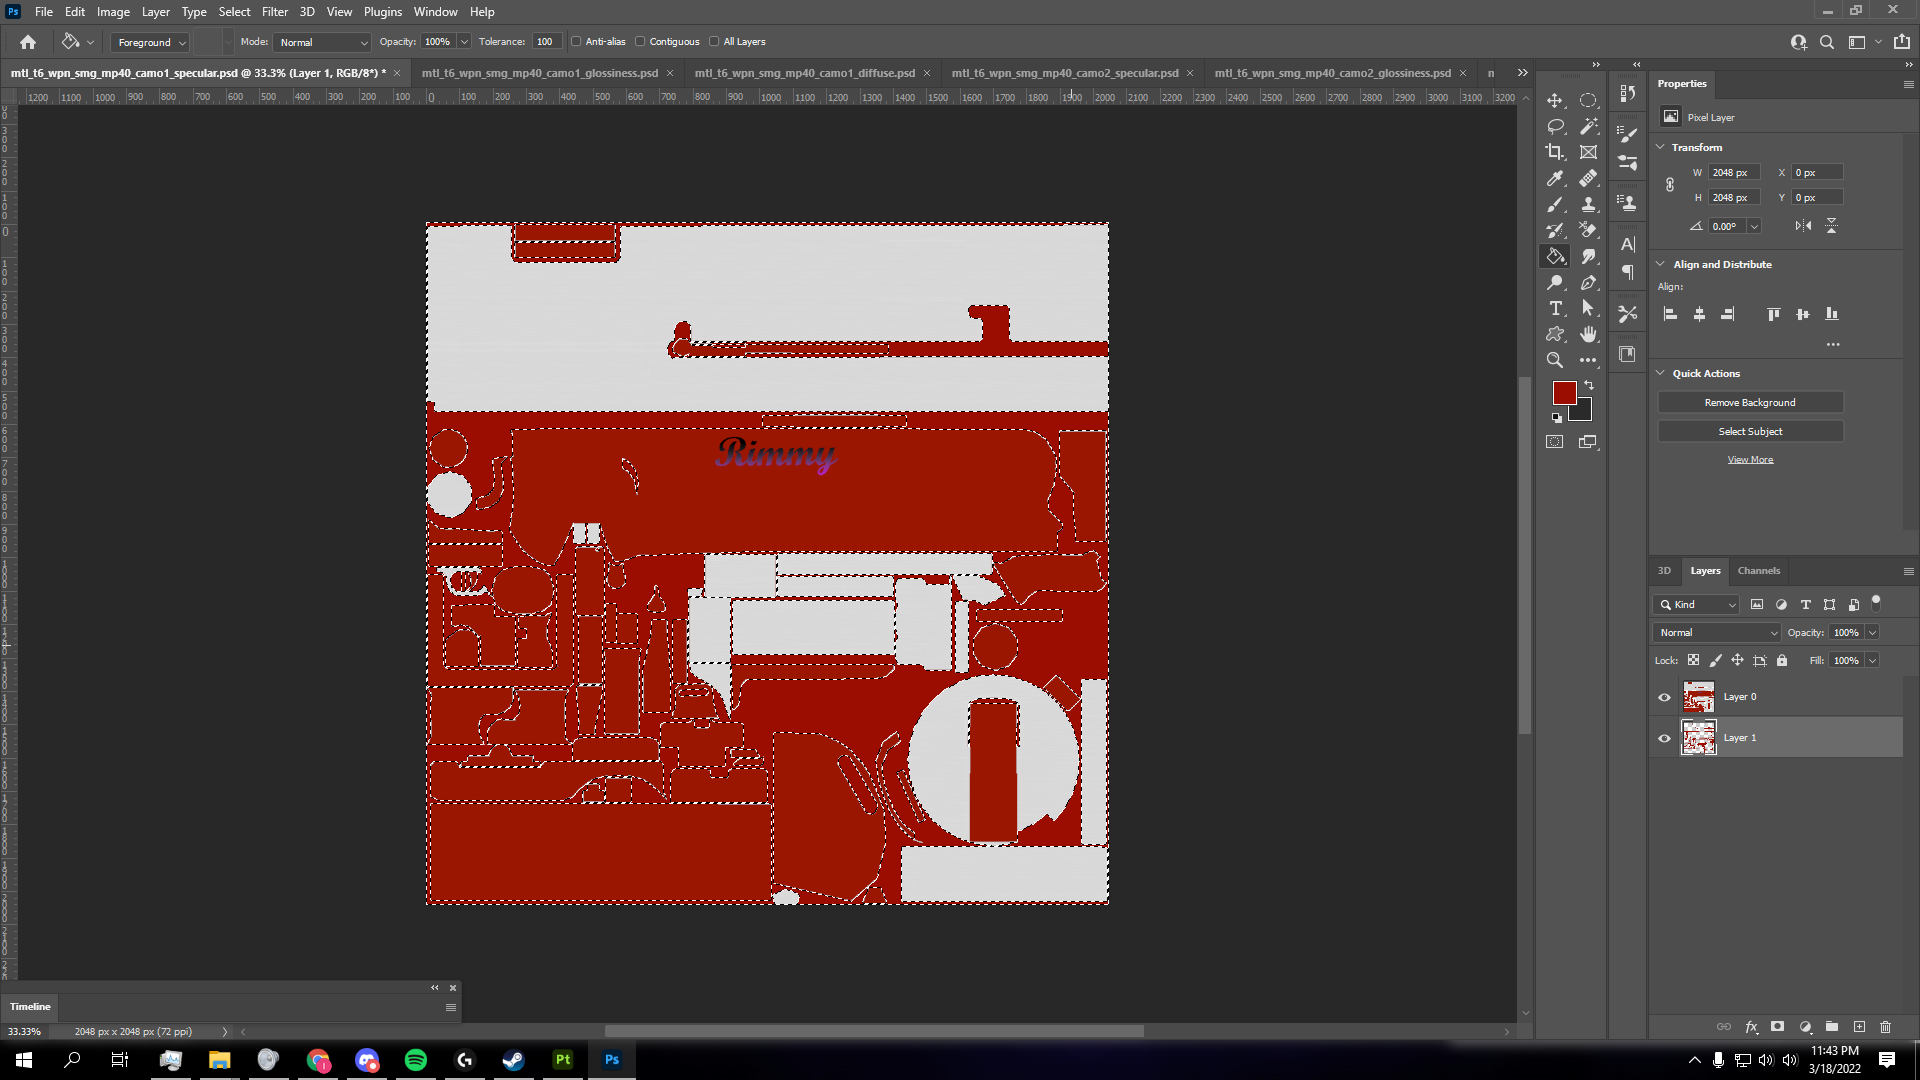
Note: Always use the "View" folder .OBJ & .MA when editing weapon camos.- Then open Adobe Substance 3D Painter and click on New Project. Select the template Specular Glossiness and set the resolution to 1024 or 2048. Select the .OBJ weapon file in the "View" folder and click Ok.
- Before going any further, delete the Height Channel under "Texture Set Settings " for each layer. Also clicking the "Bake Mesh Maps" option for each layer and baking the meshes to your projects resolution will significantly improve texture quality.

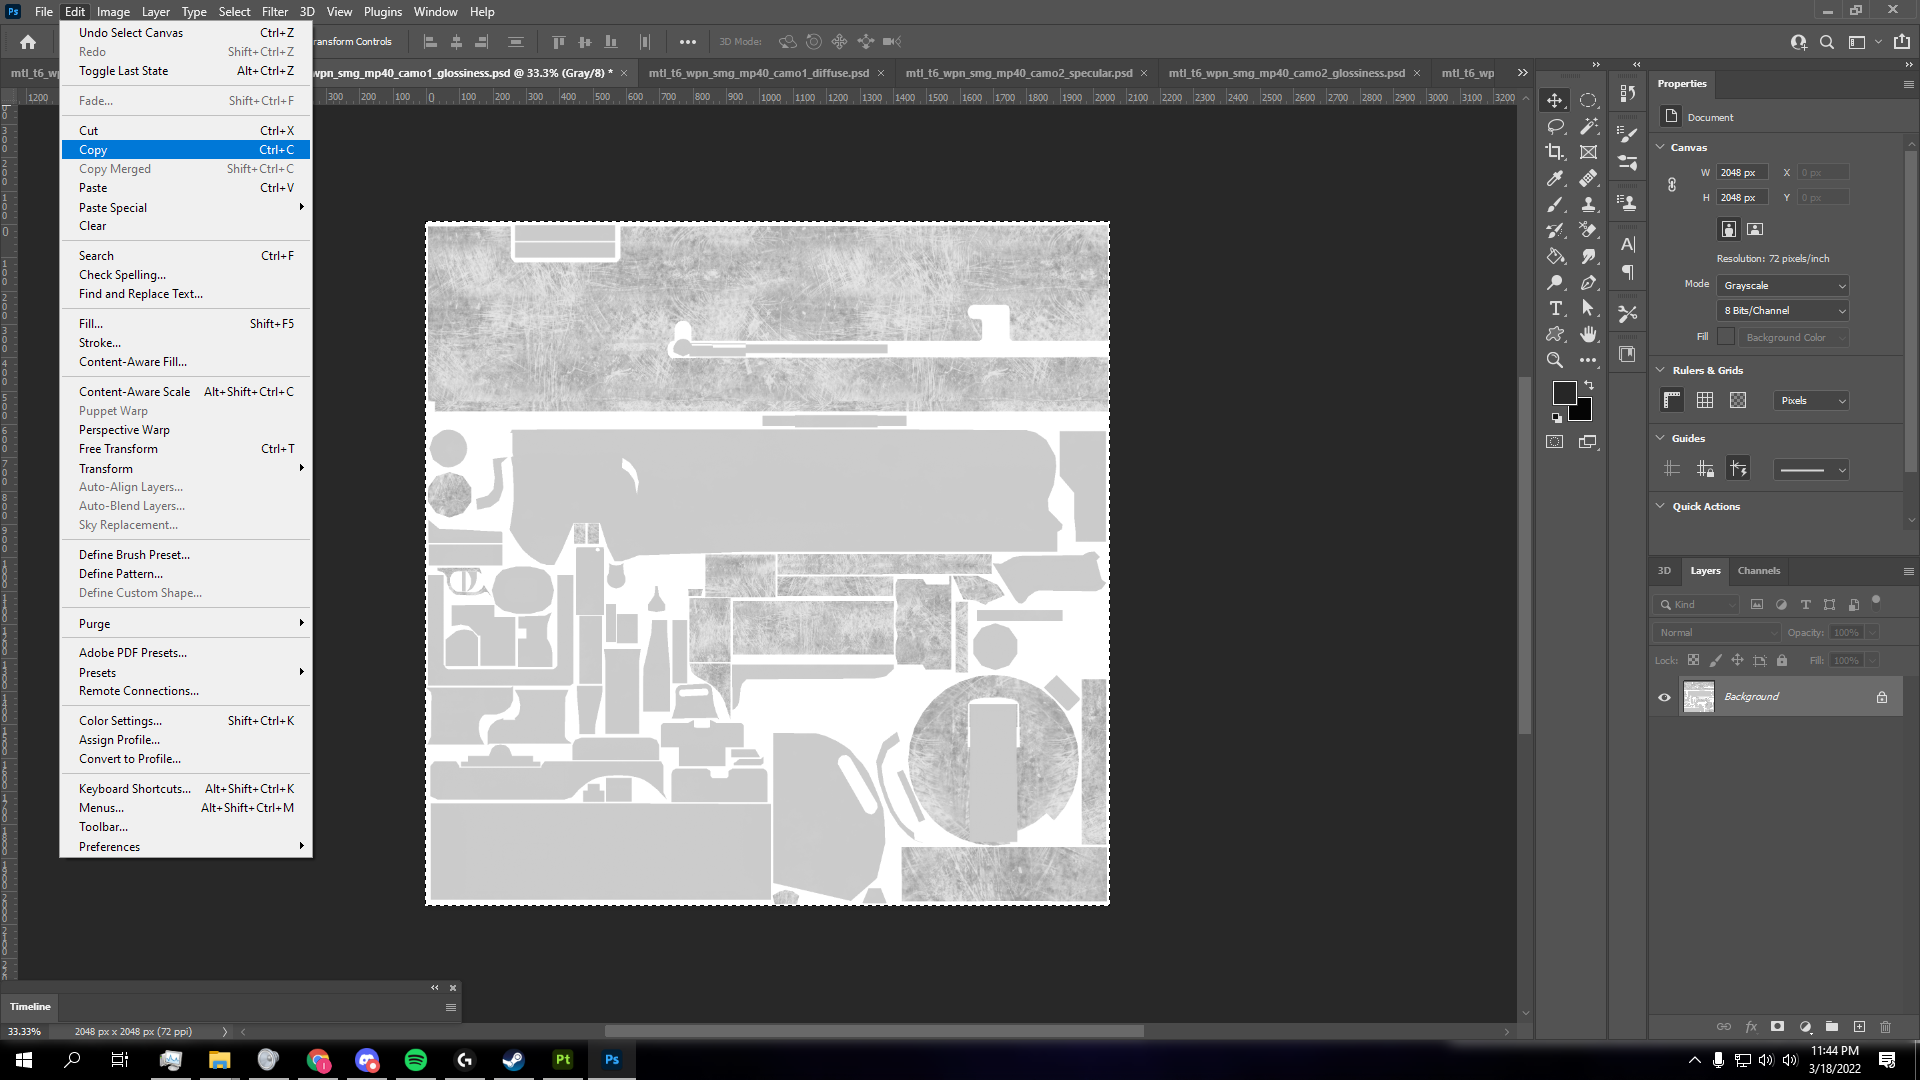
- Next, add the original weapon camo. You will have to find the .DDS and .TGA files that pertain to your particular weapon of choice and export them as .PNG files. This will be the default base weapon skin. Refer to the video above for specifics.
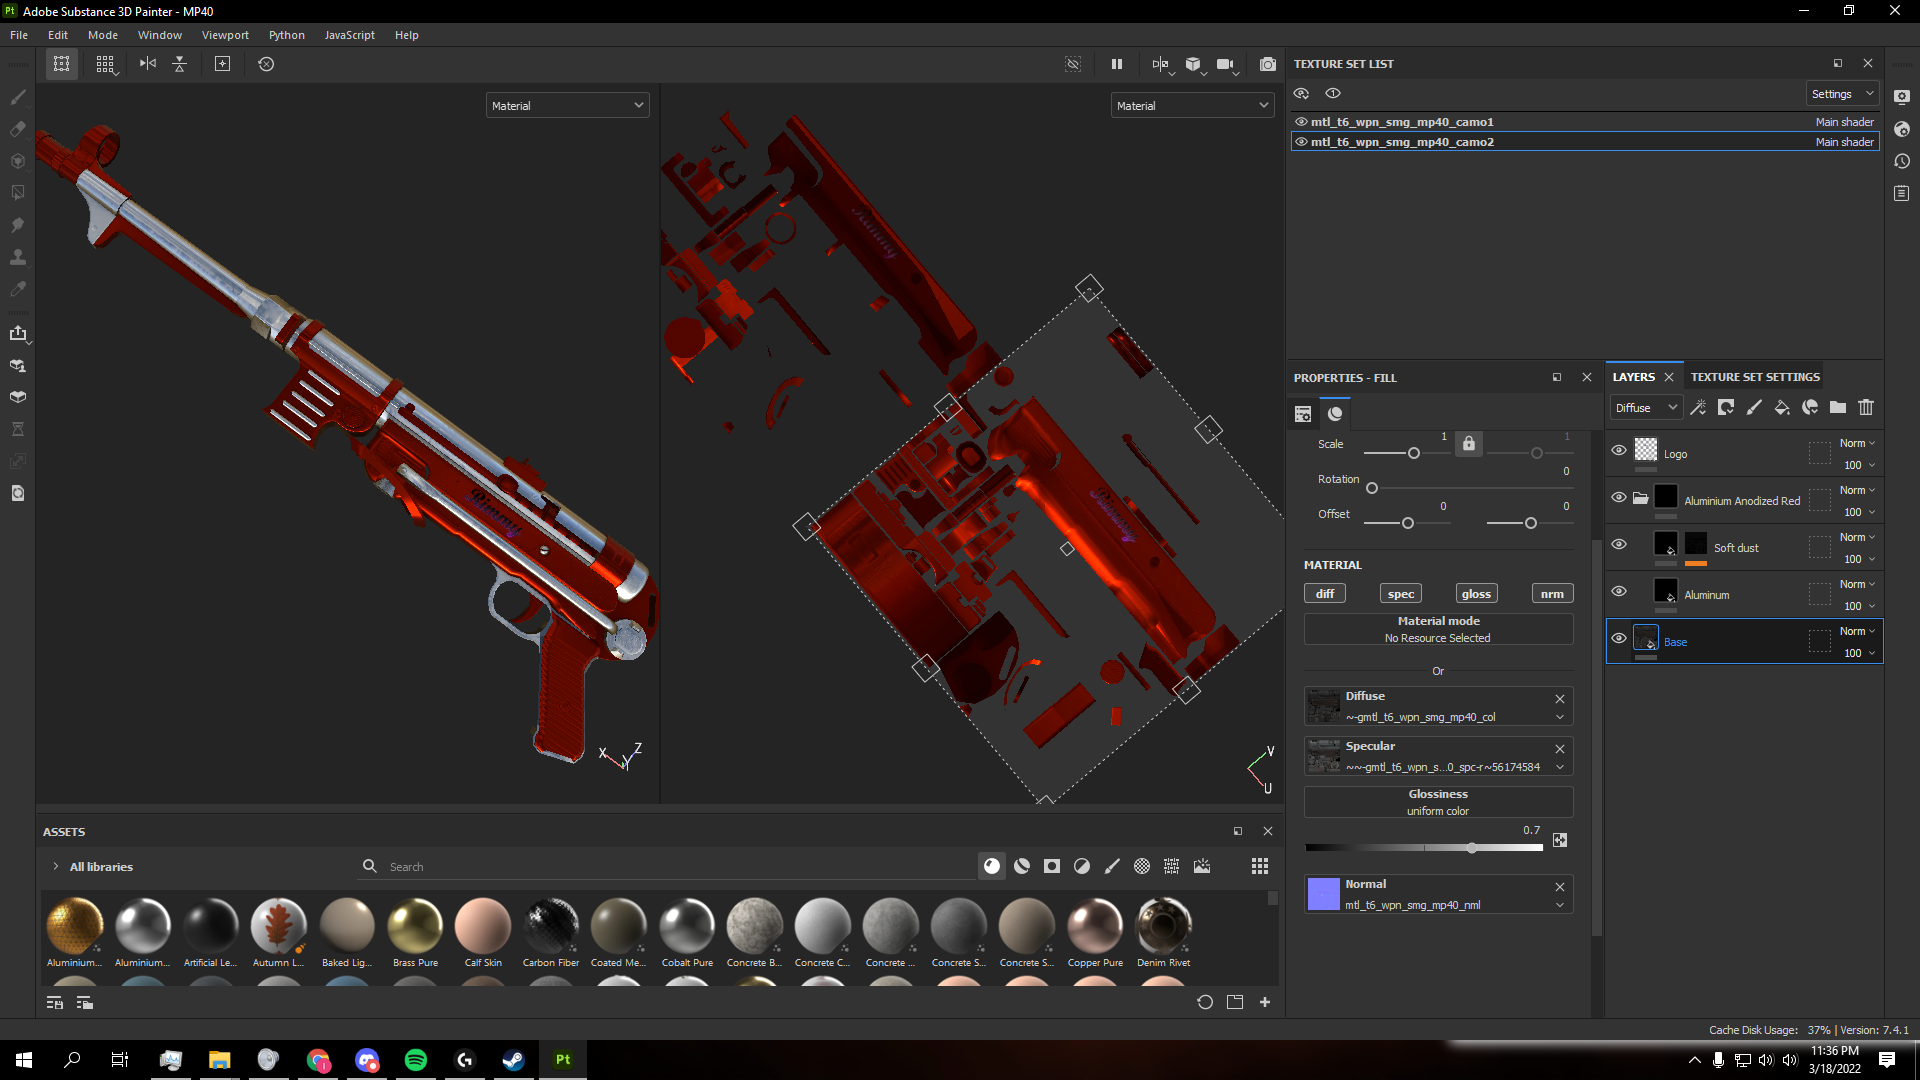
Note: All image layers must be in .PNG format in order to import as textures.- After that create your design. You can use Photoshop and other programs to design assets like text which can later be imported and placed on the weapon model.
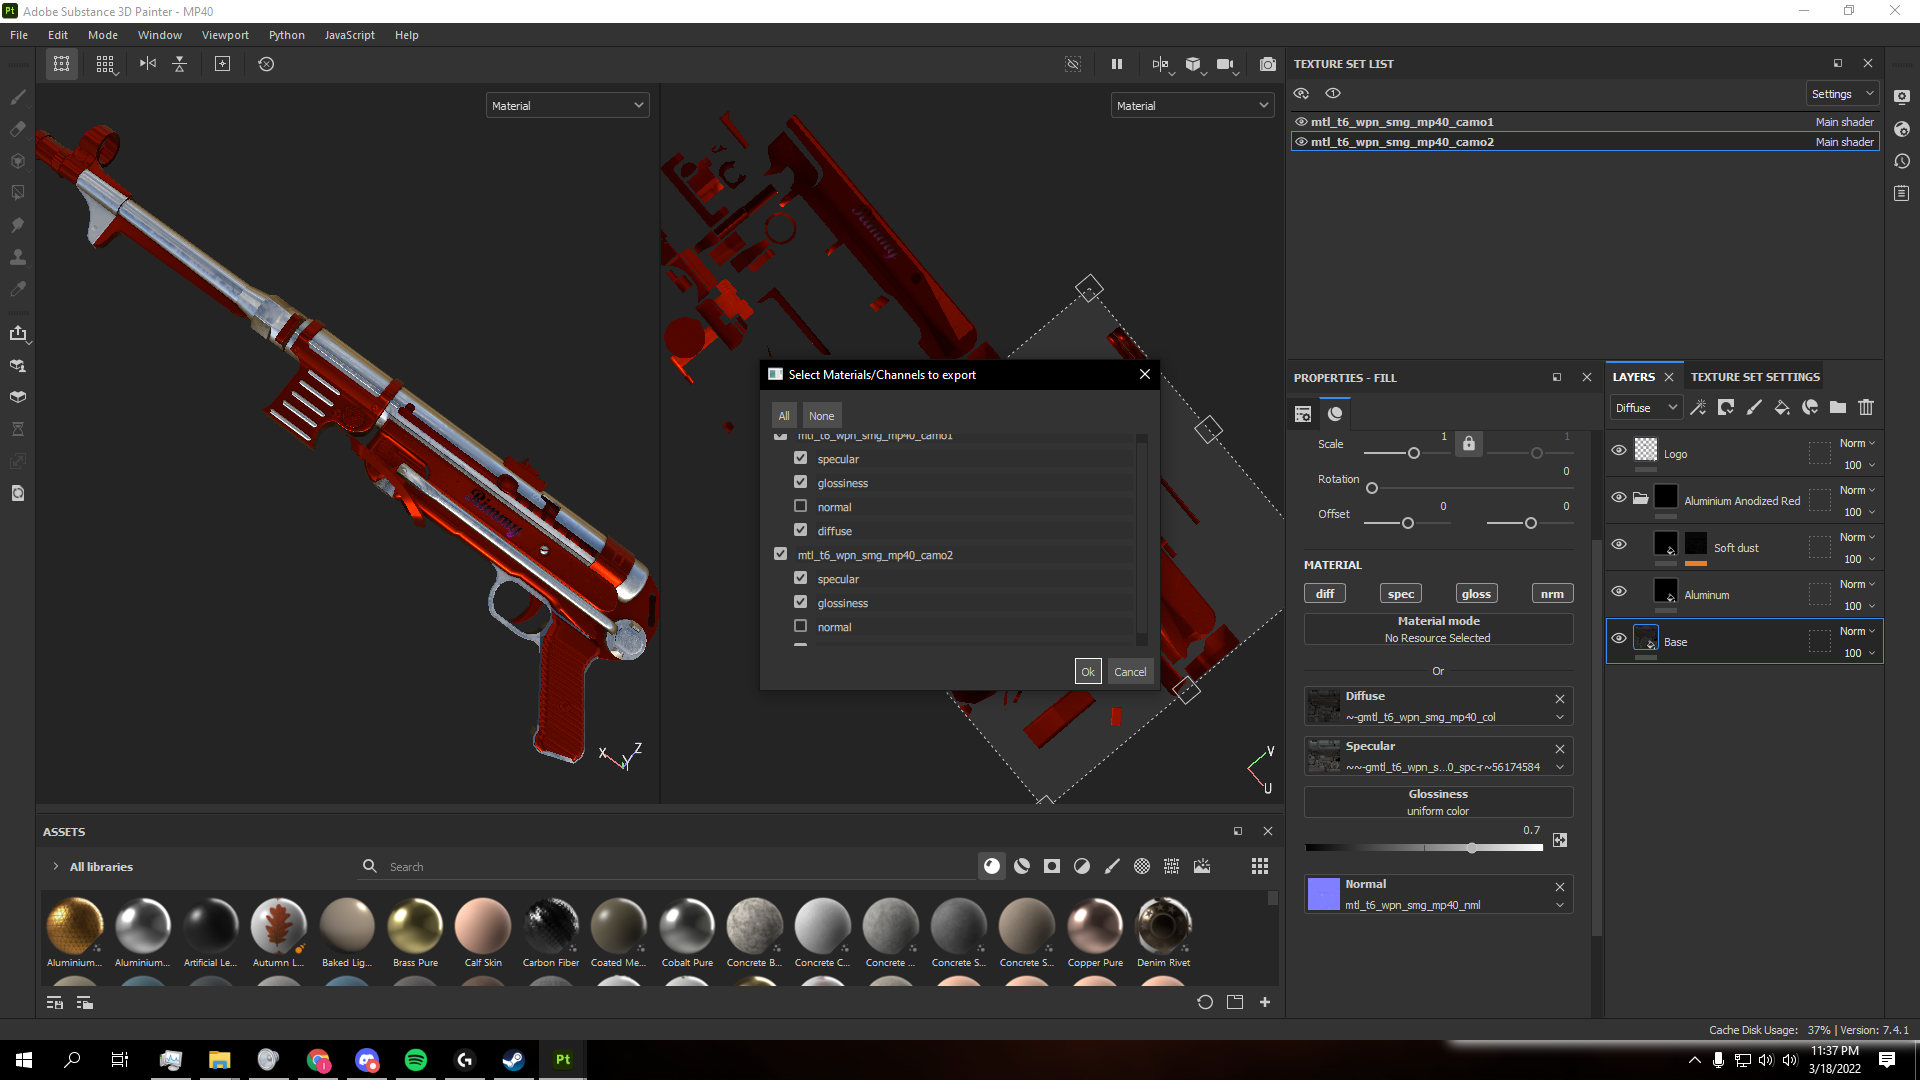
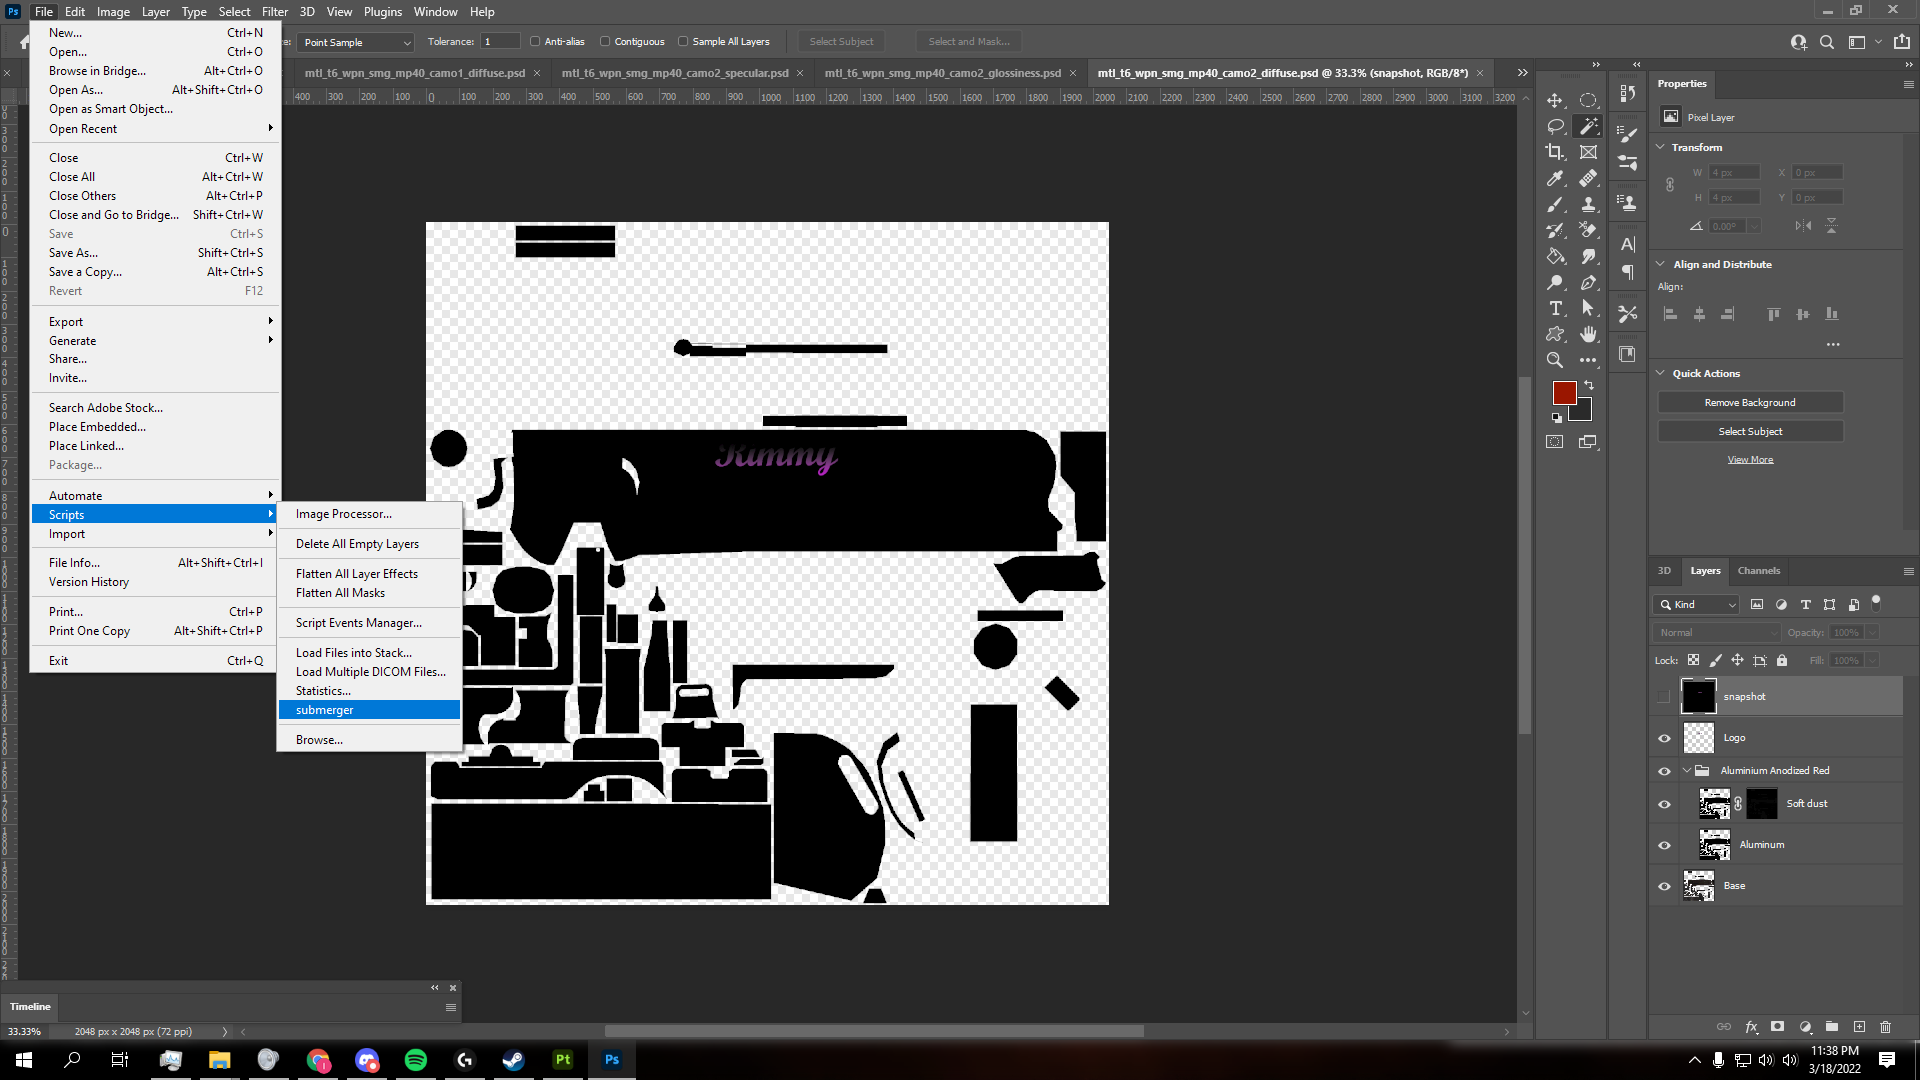
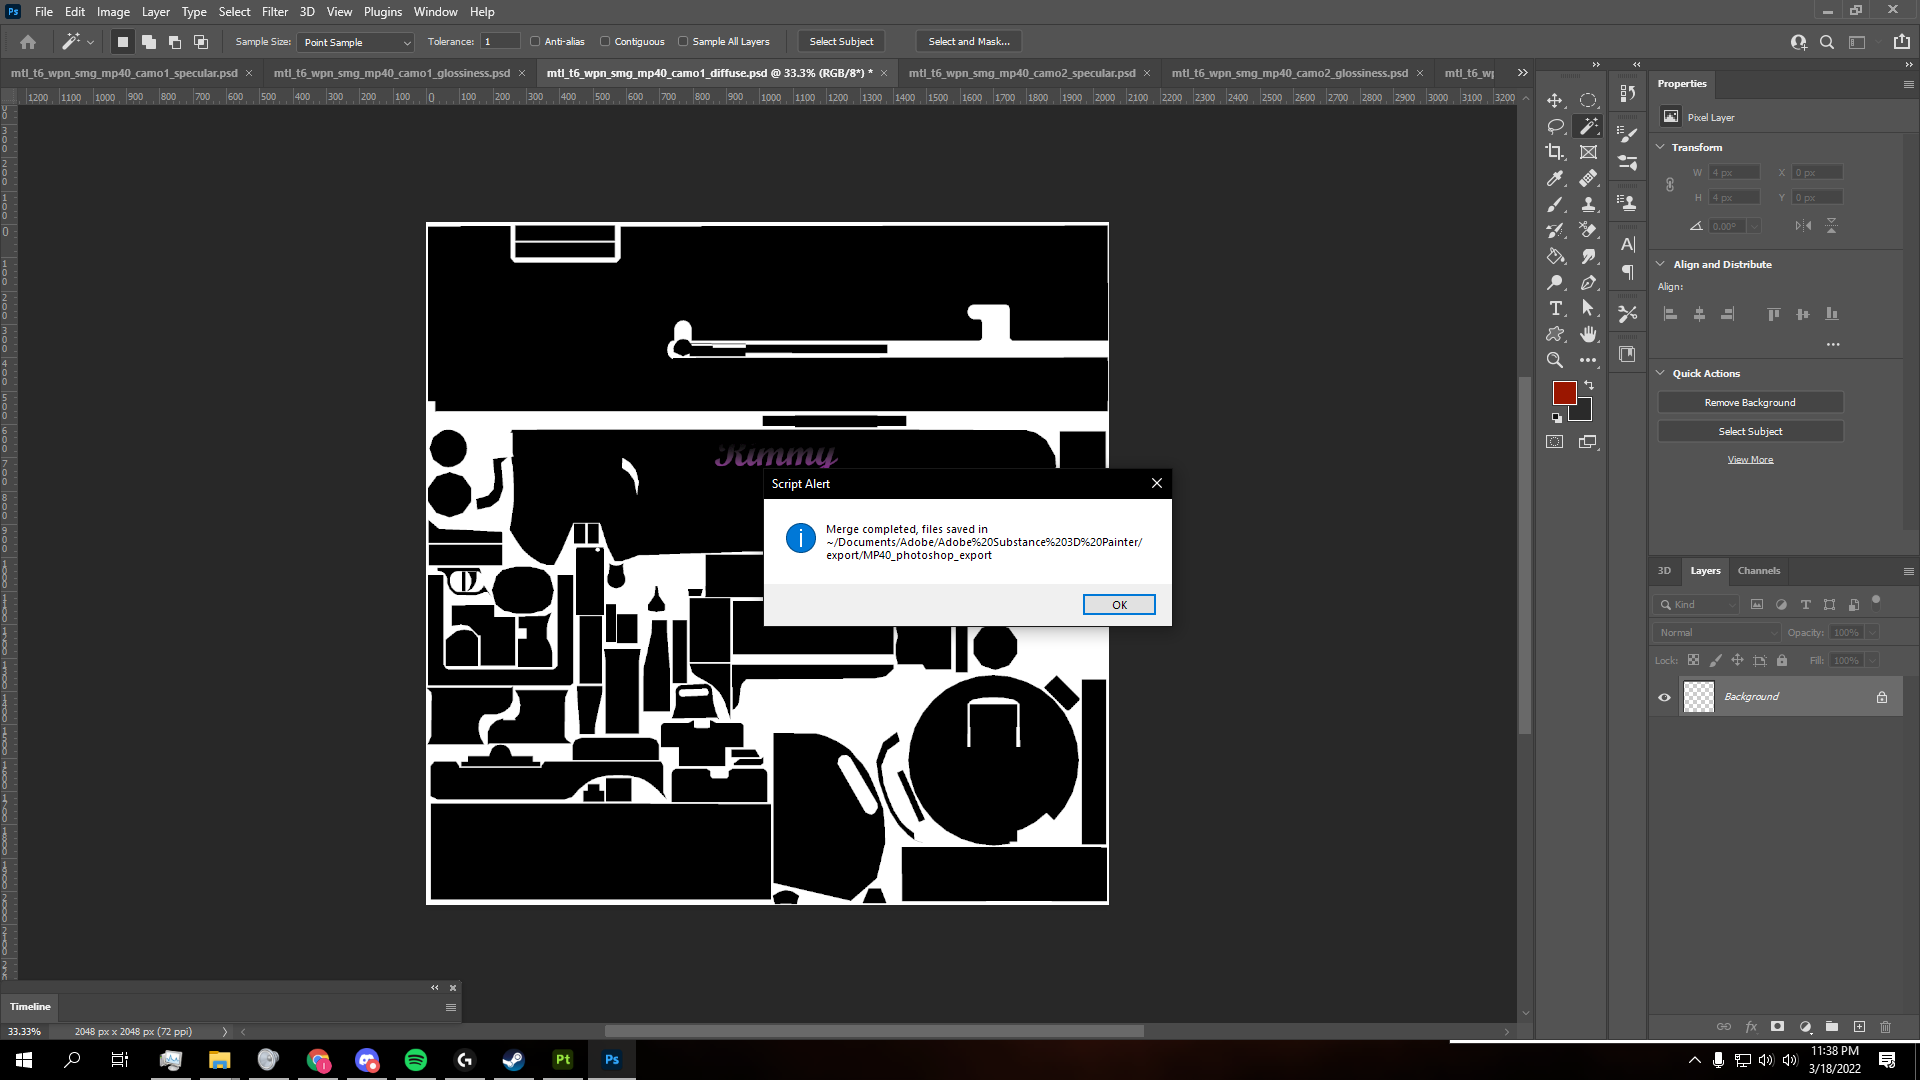
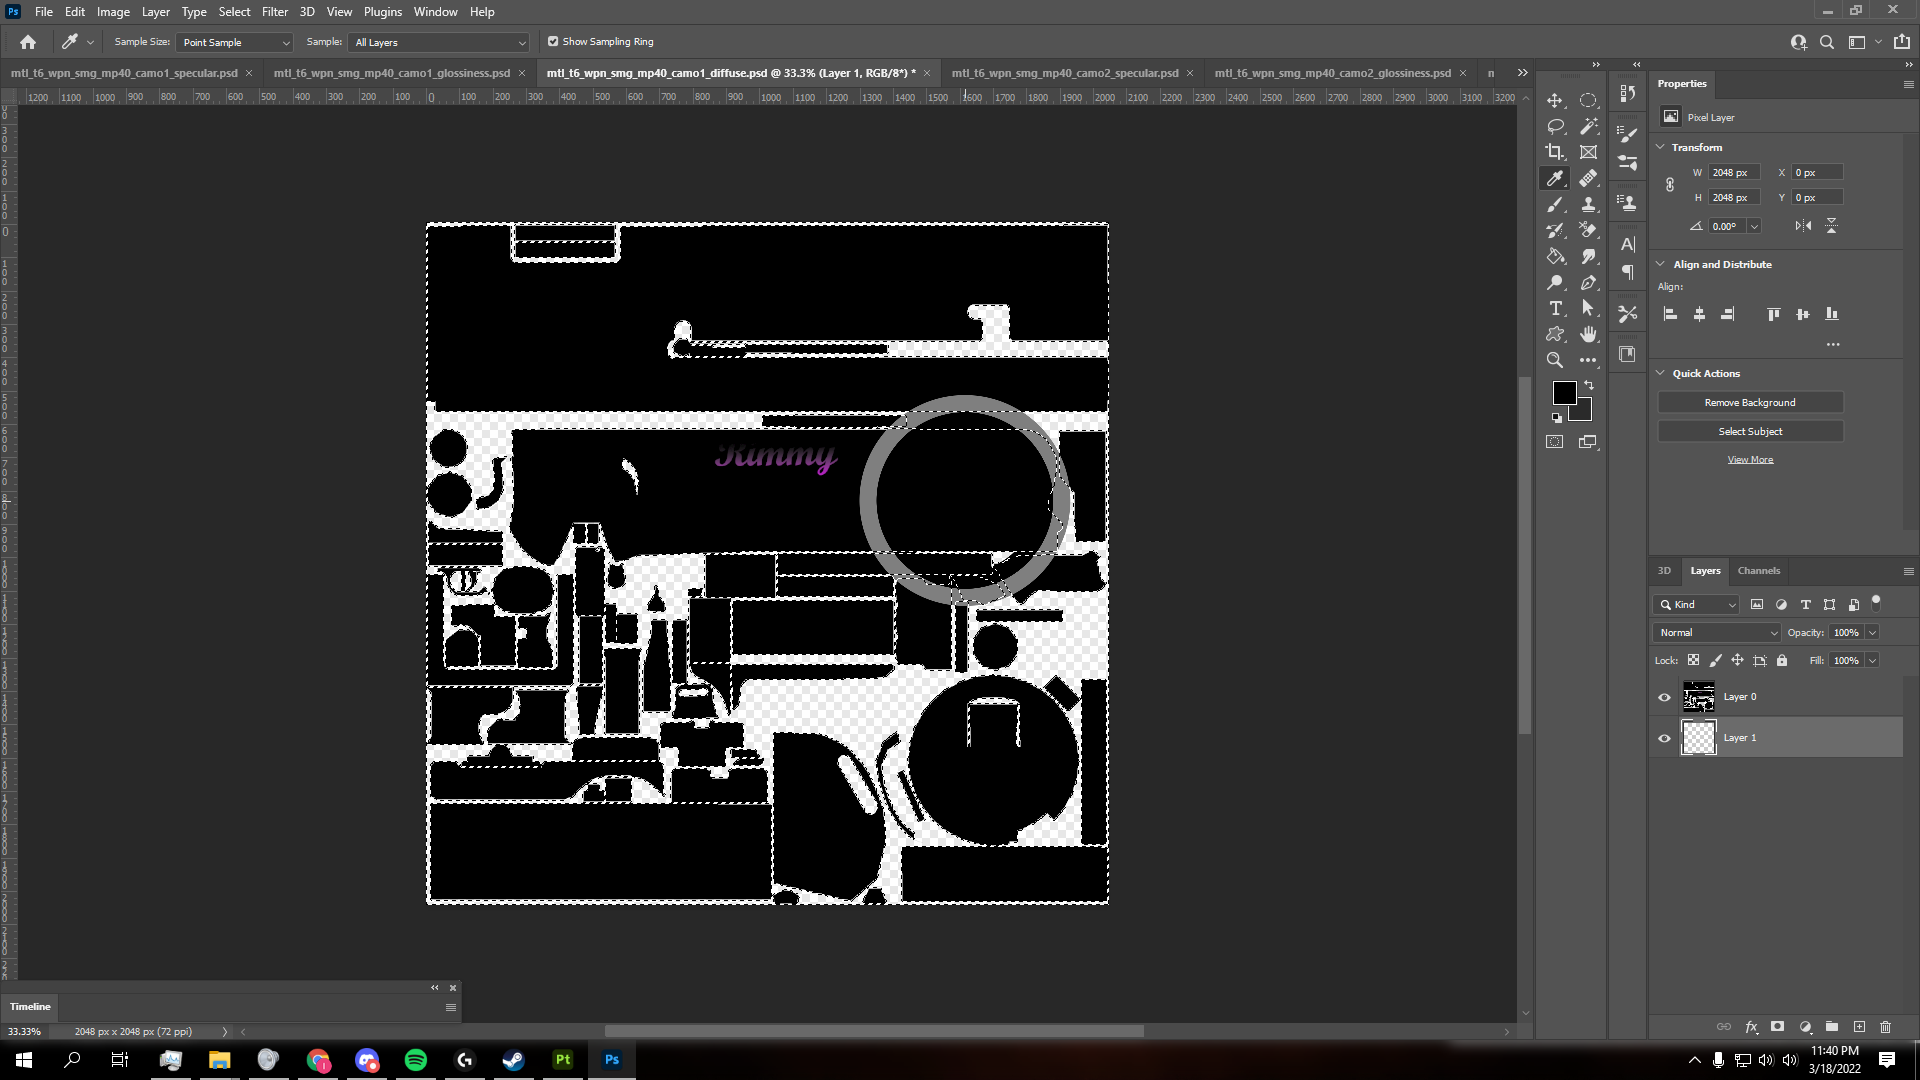
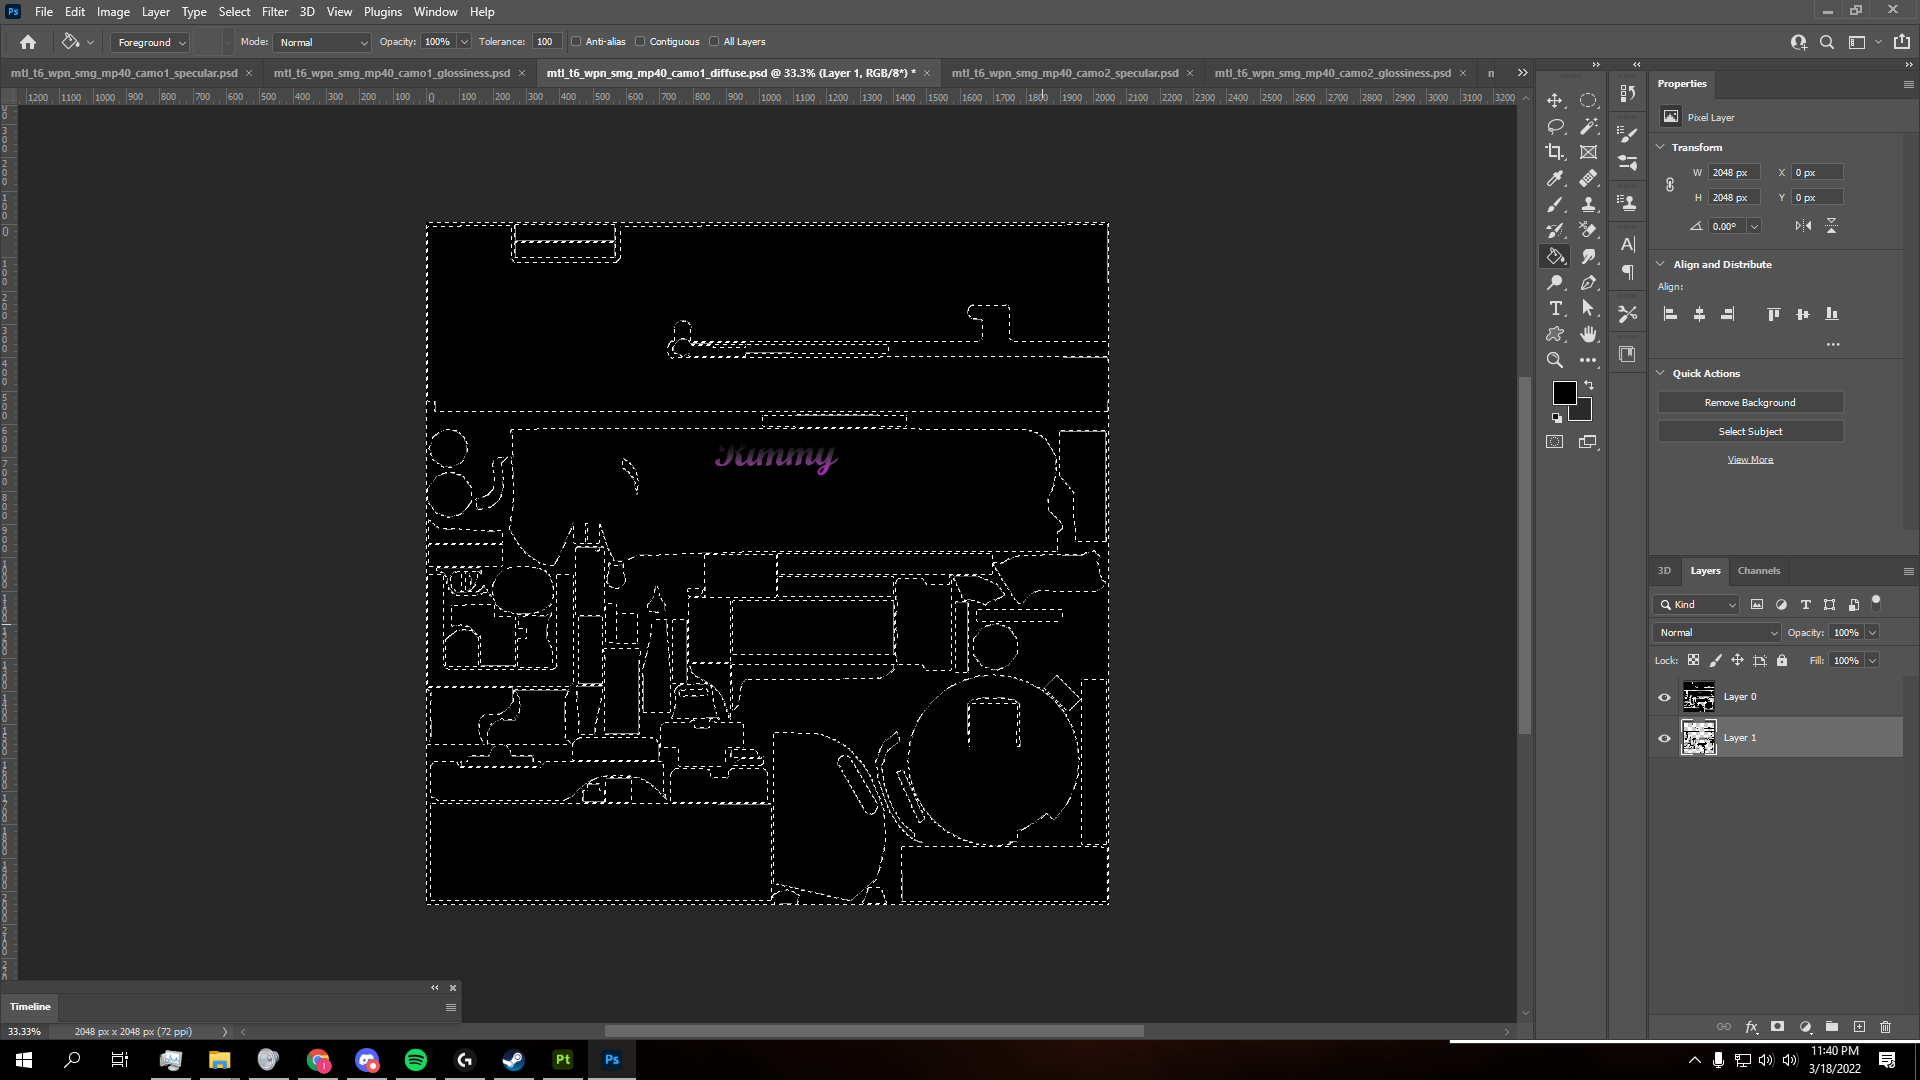
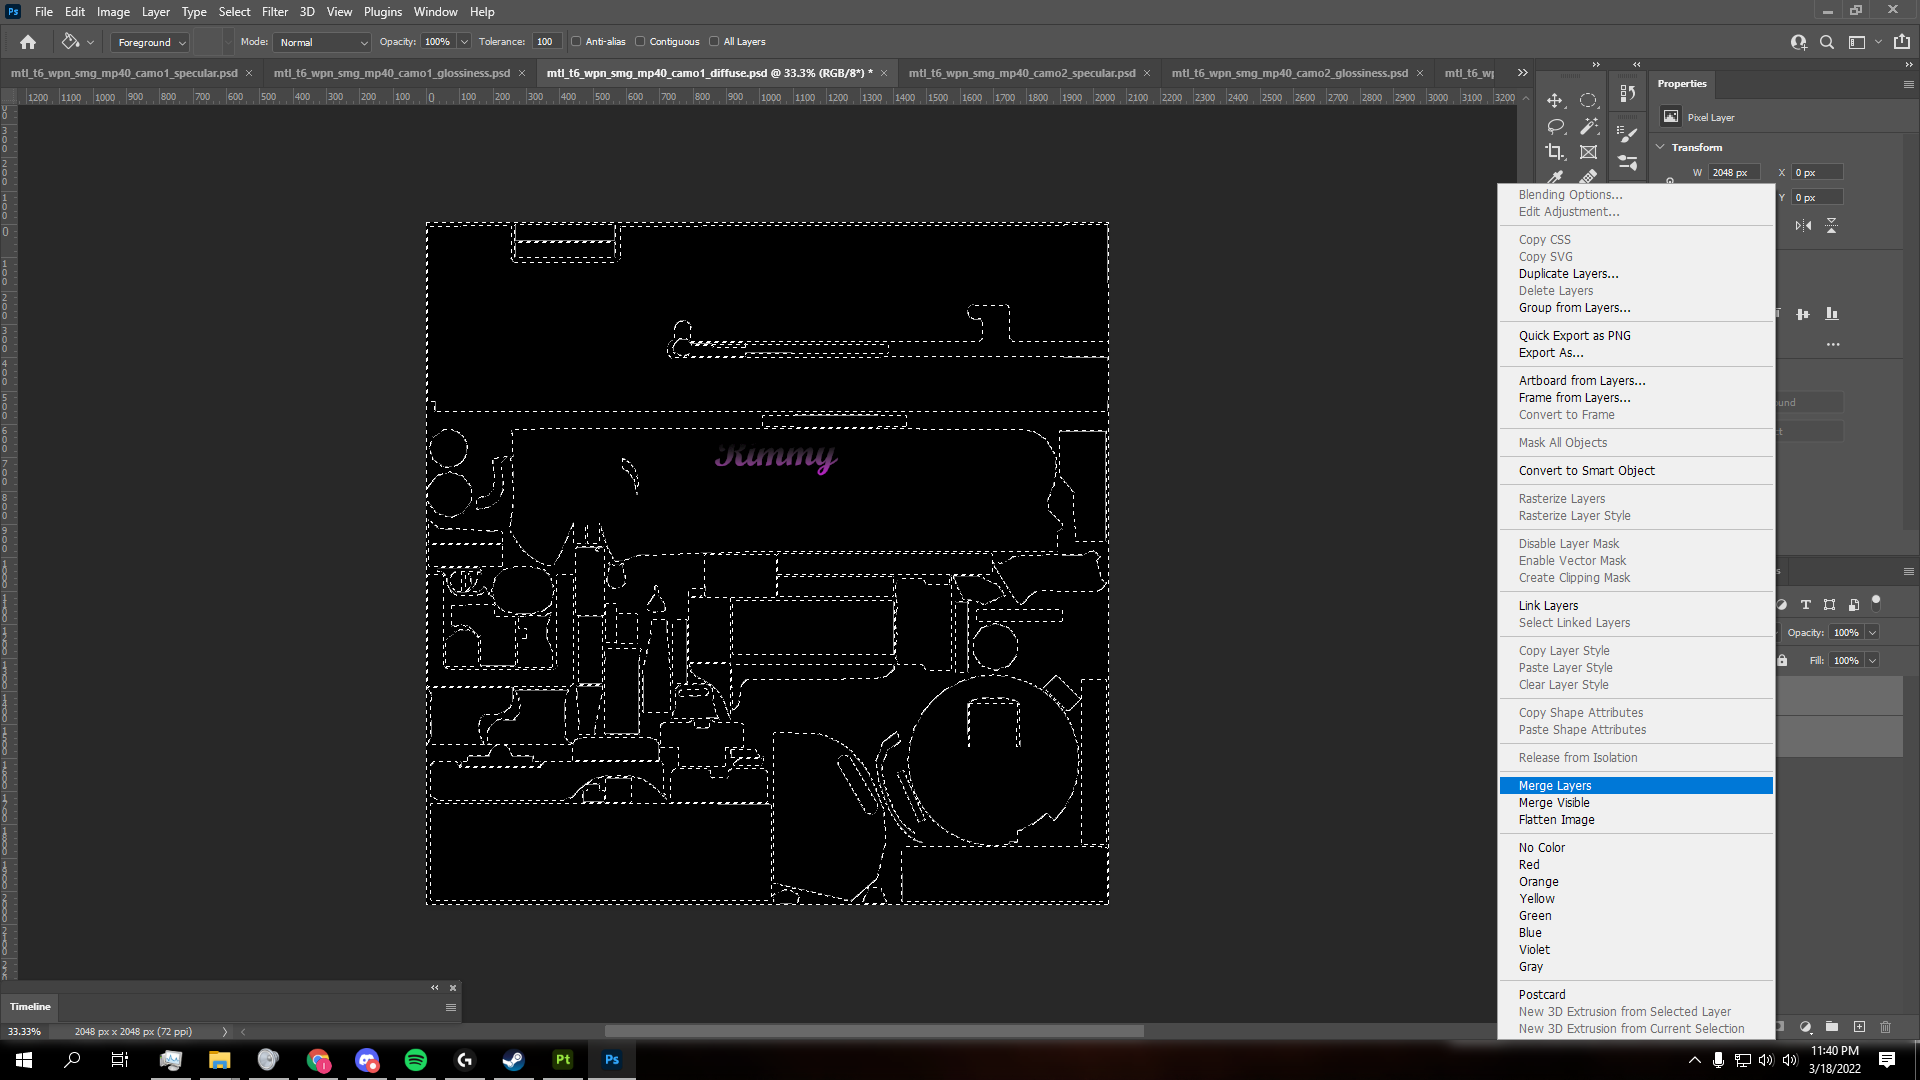
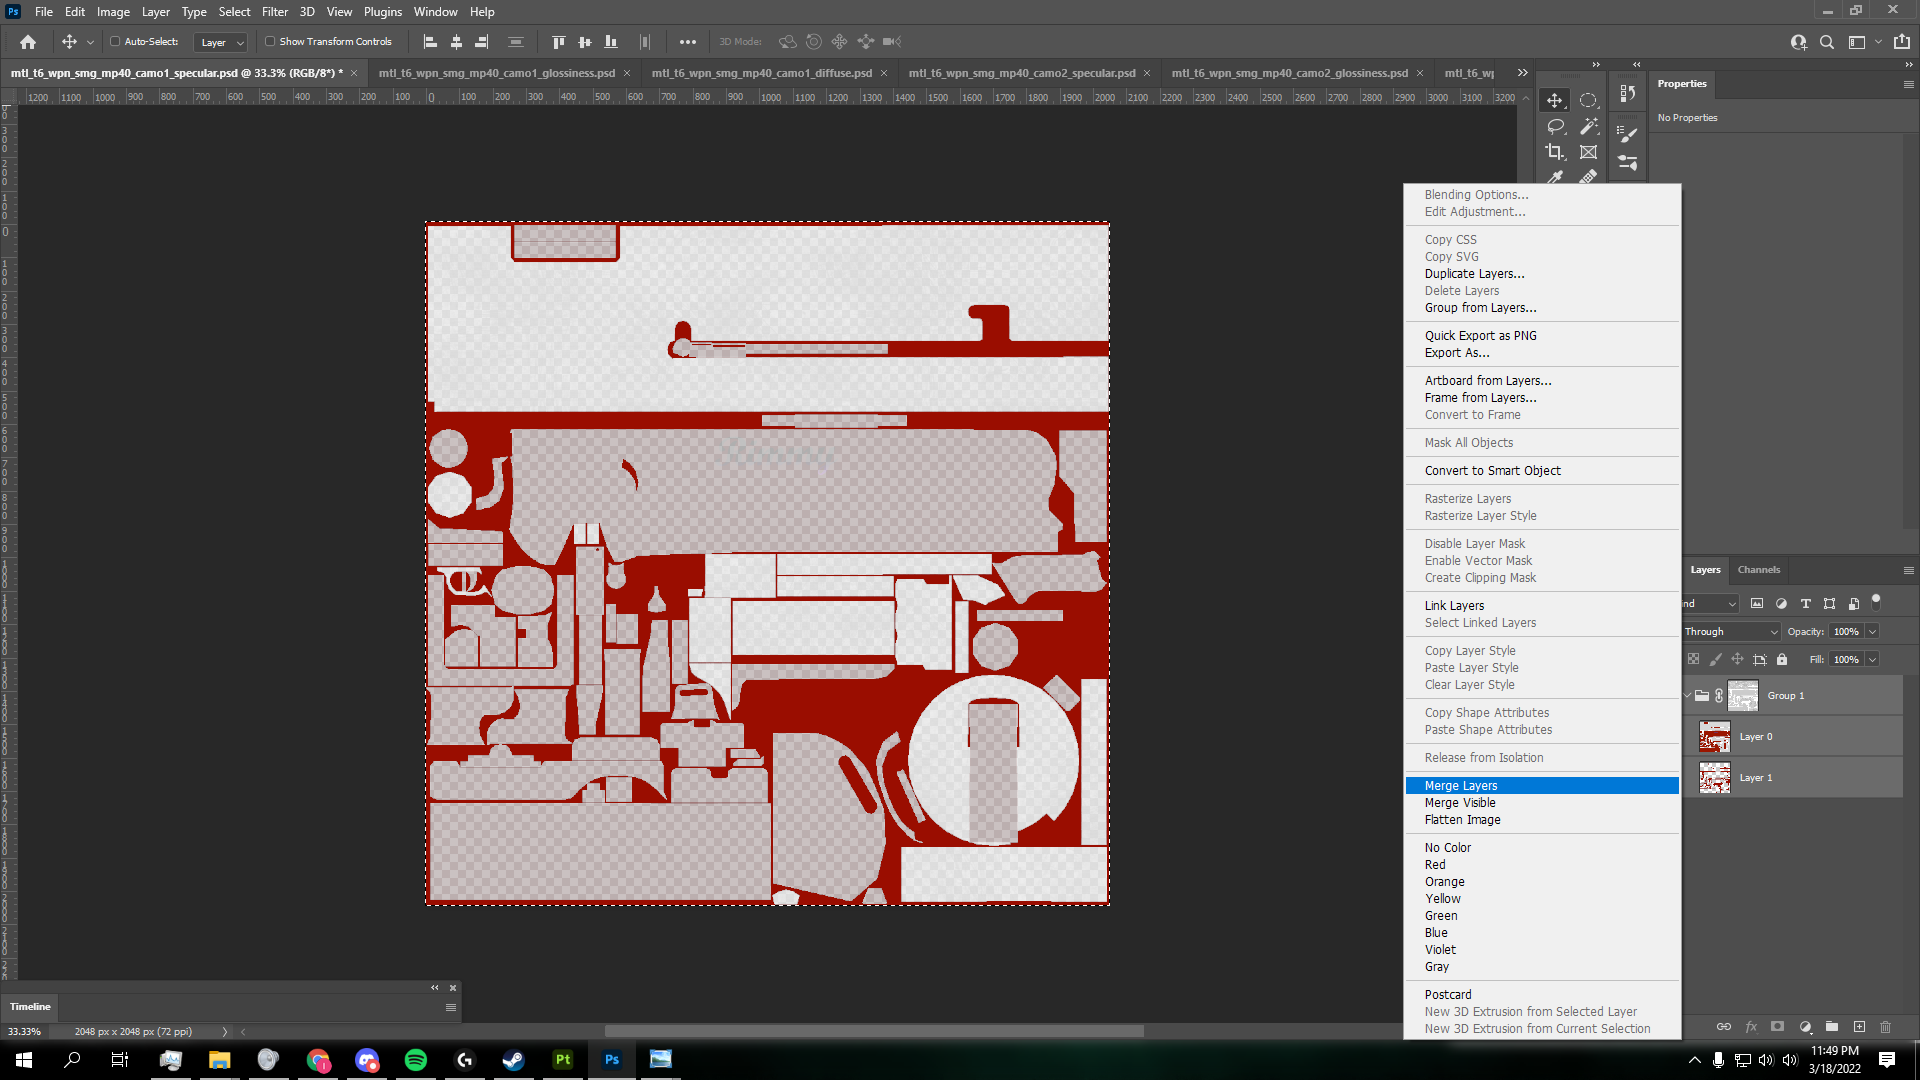
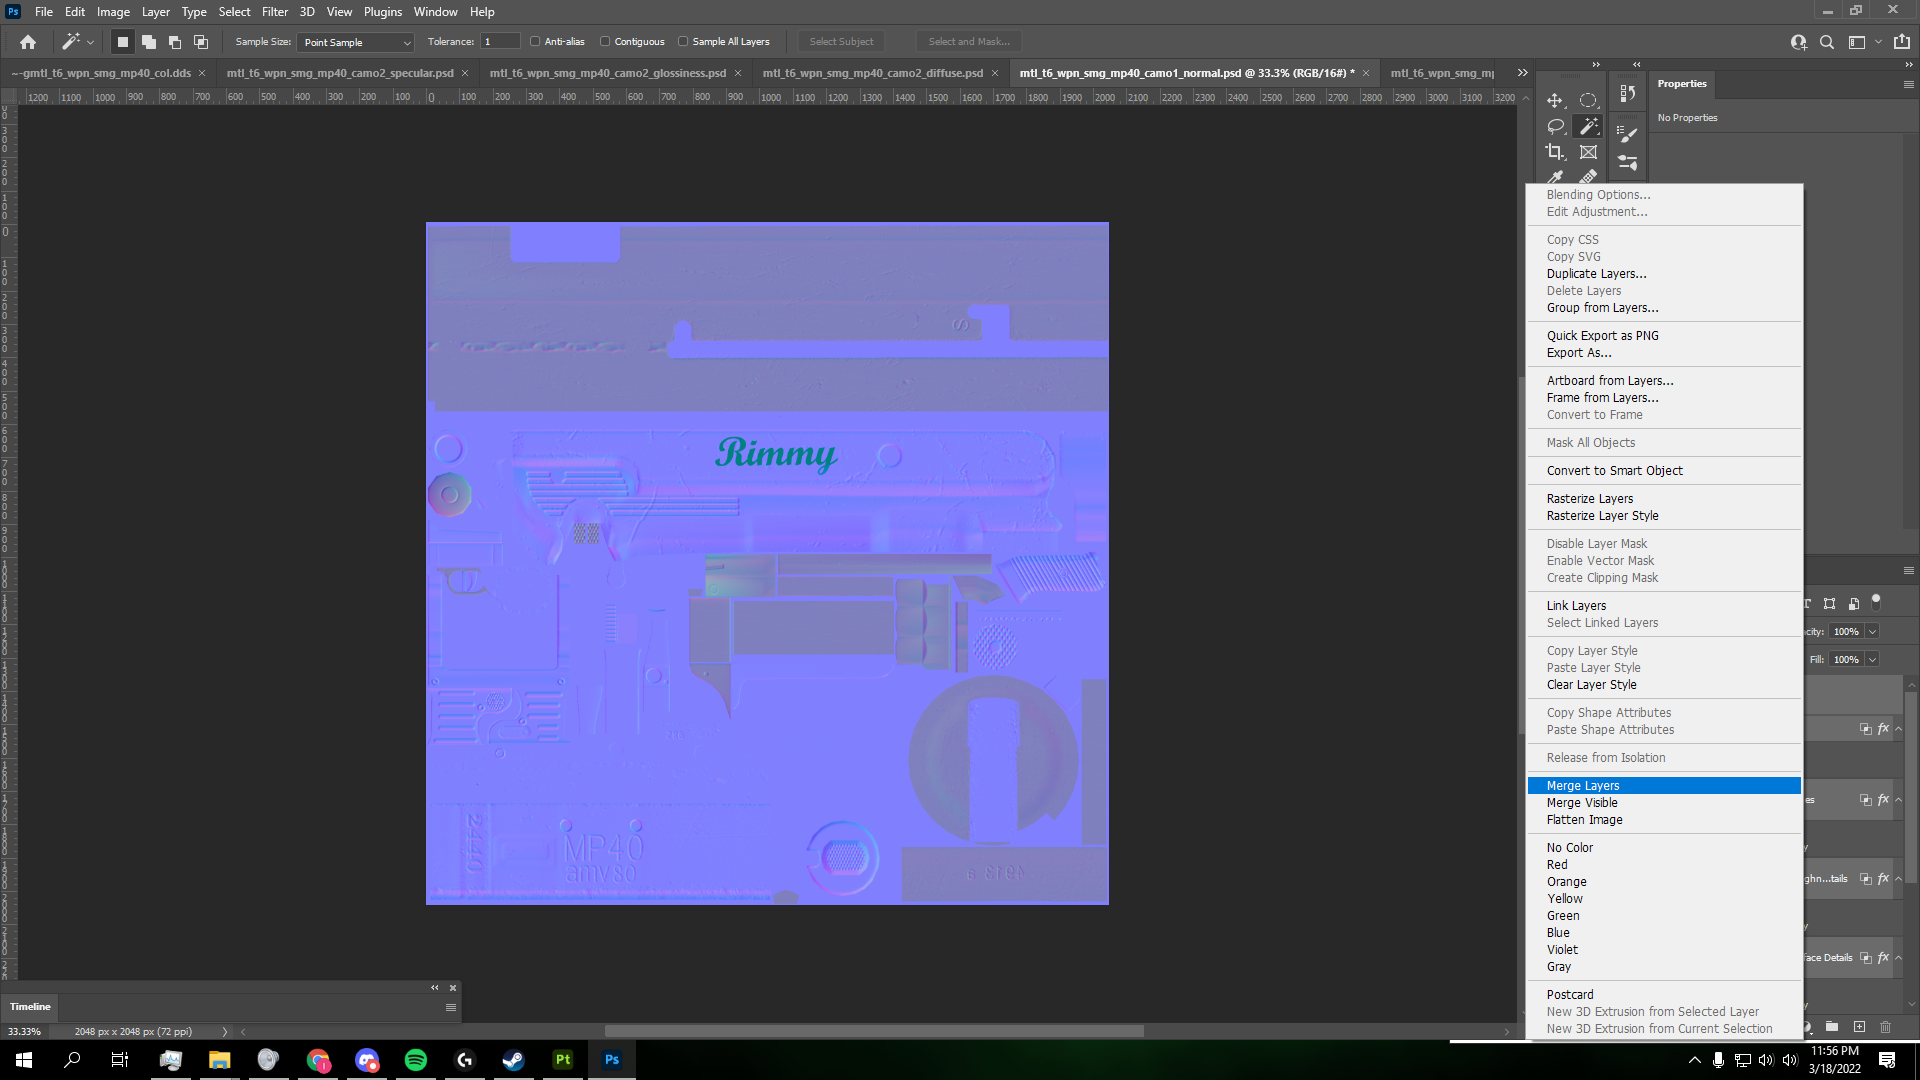
- After that export all layers except normal into Photoshop and use the Submerger Script to merge the layers correctly. This part is crucial, if you do not use this script, this process will most likely not work.
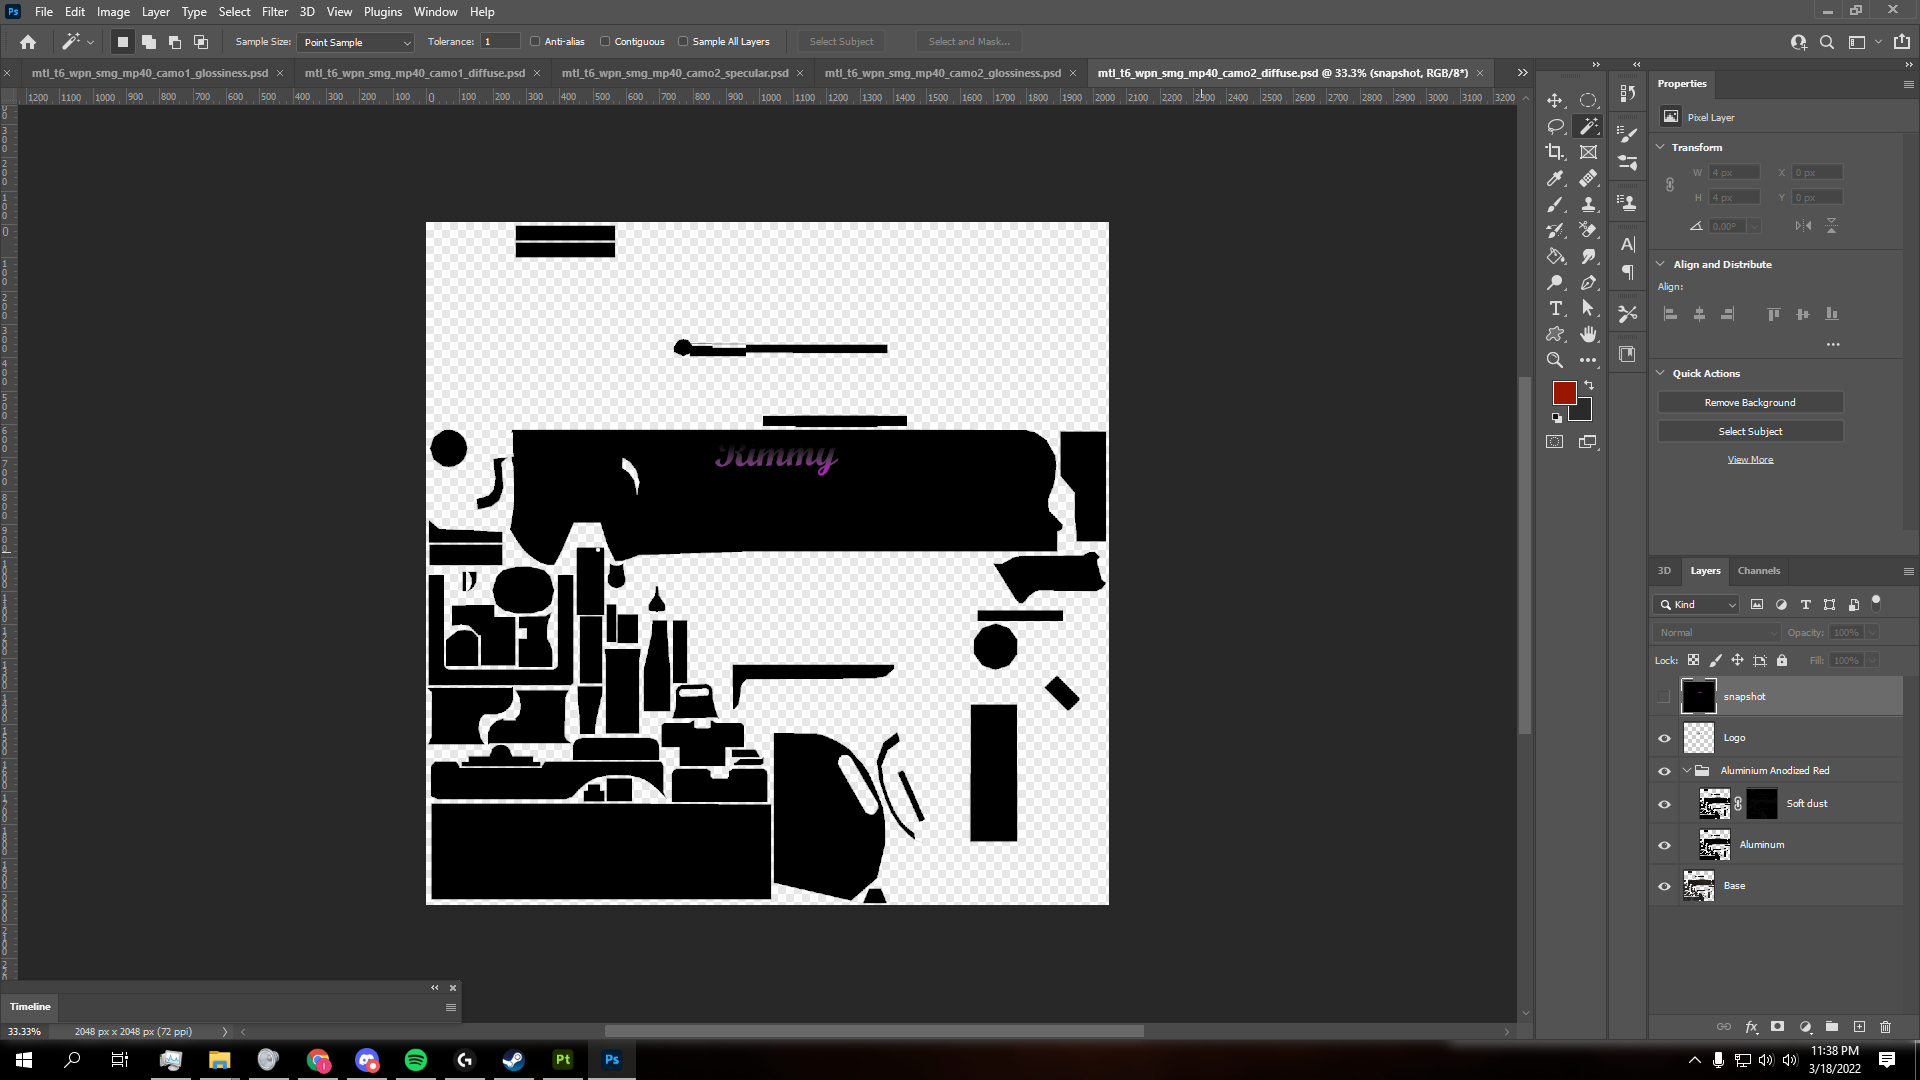
- The next step is very tricky and hard to explain. This step is also crucial, as the Submerger script isn't perfect. I suggest you refer to the video I linked above to perform this next step properly.
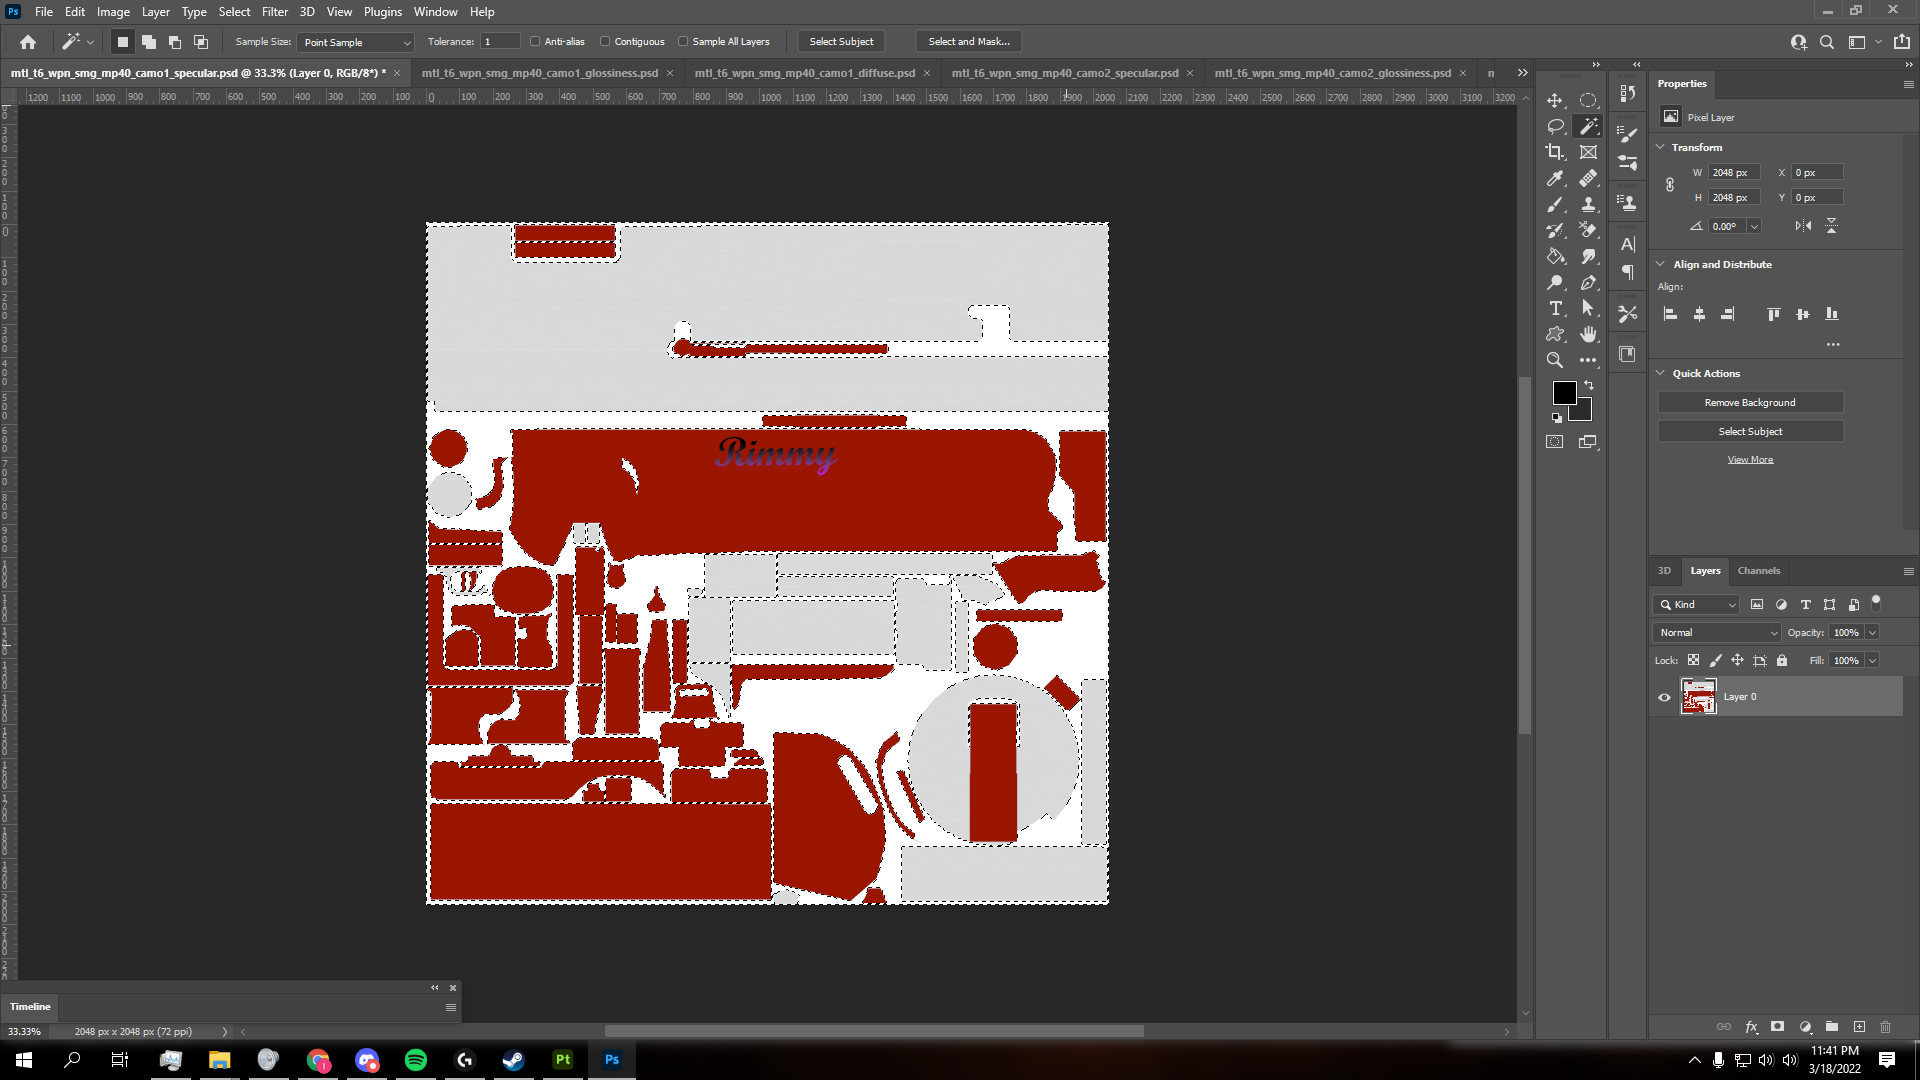

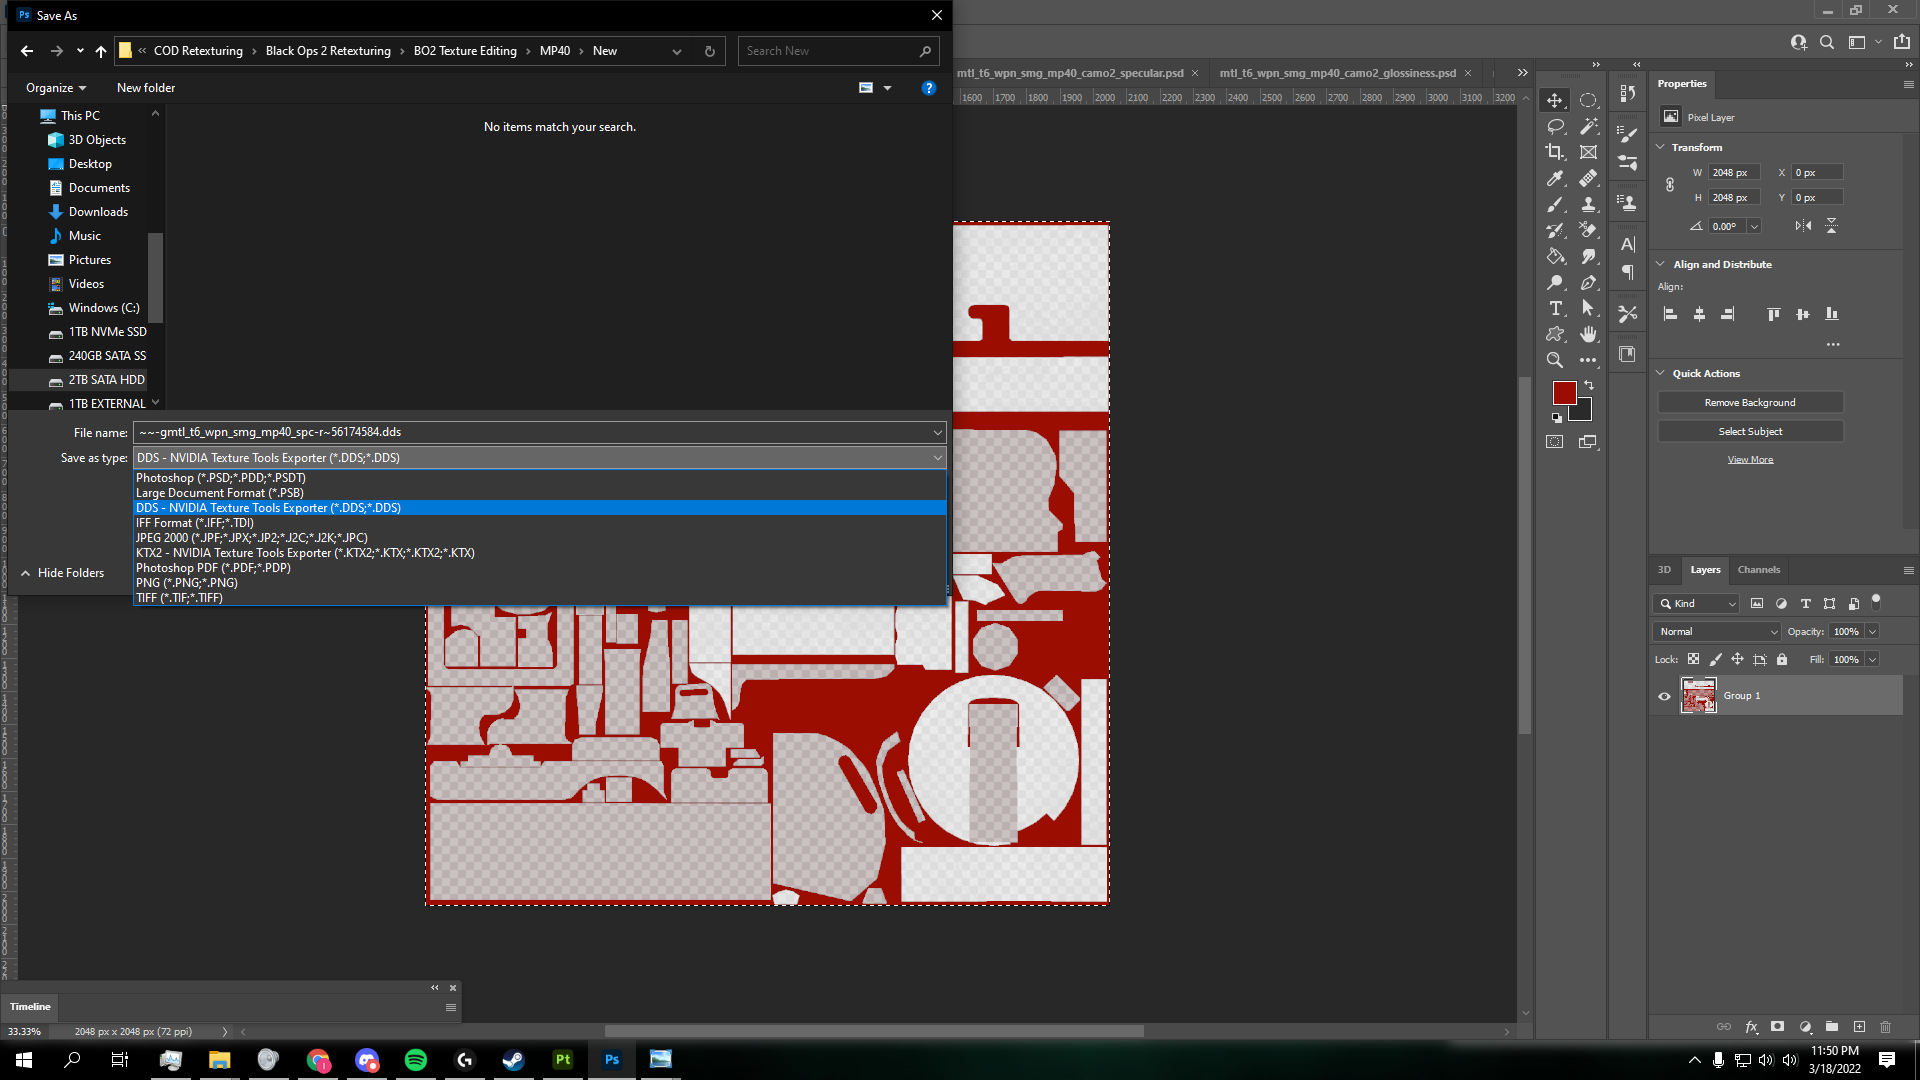
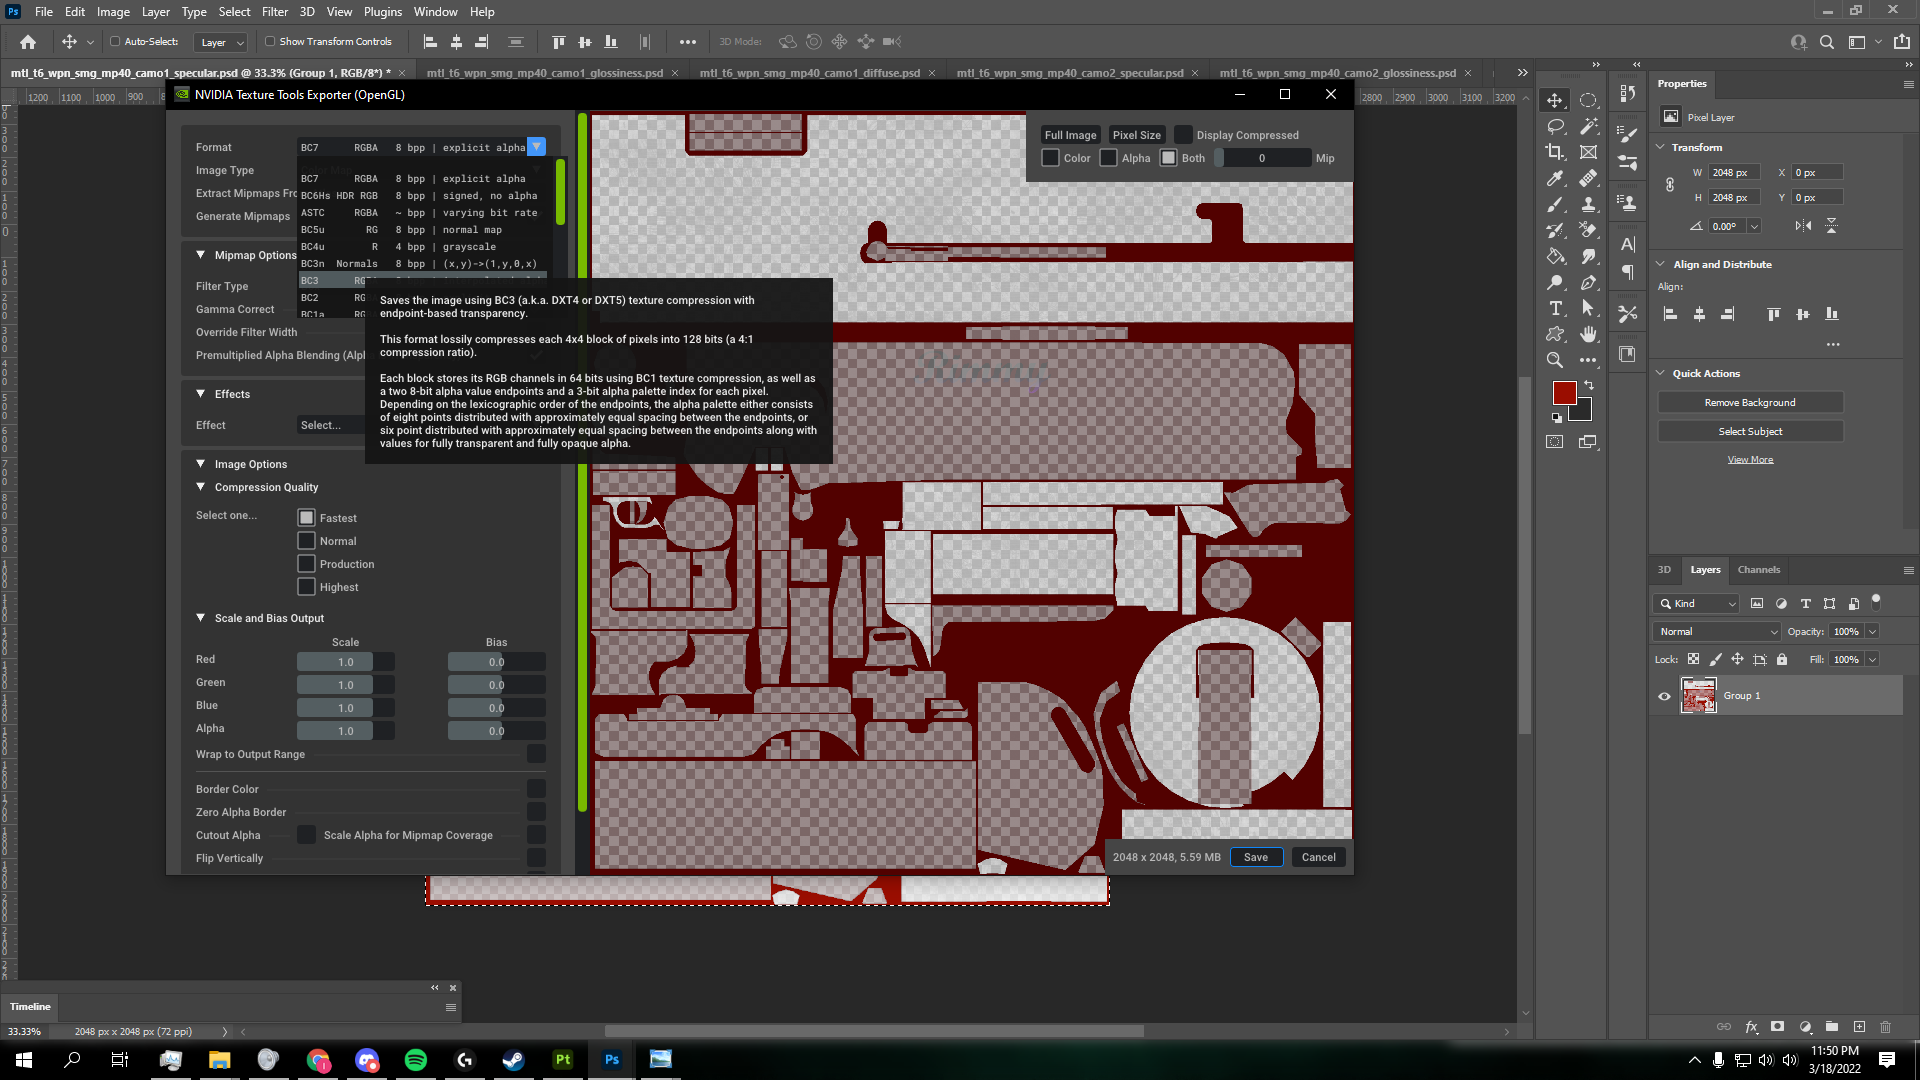
- Once done, export the diffuse and specular layers as .PNG files. You can ALSO merge all layers and export them as .DDS files. Make sure to use BC3 8BPP Interpolated Alpha (a.k.a DXT4/DXT5) in Photoshop.
- For the next step you'll have to export your normal layer from Substance Painter and follow the instructions in the video linked above. This process is ever so slightly different.
-
Once you have all 3 layers you are now able to convert them into .IWI files. If you exported as .DDS, then skip this step and refer to the next. Open each .PNG you exported in Photoshop, alone. Click Save As, and it should give you the option to save it as a .DDS. Refer to the step above on how to save .DDS files properly.
-
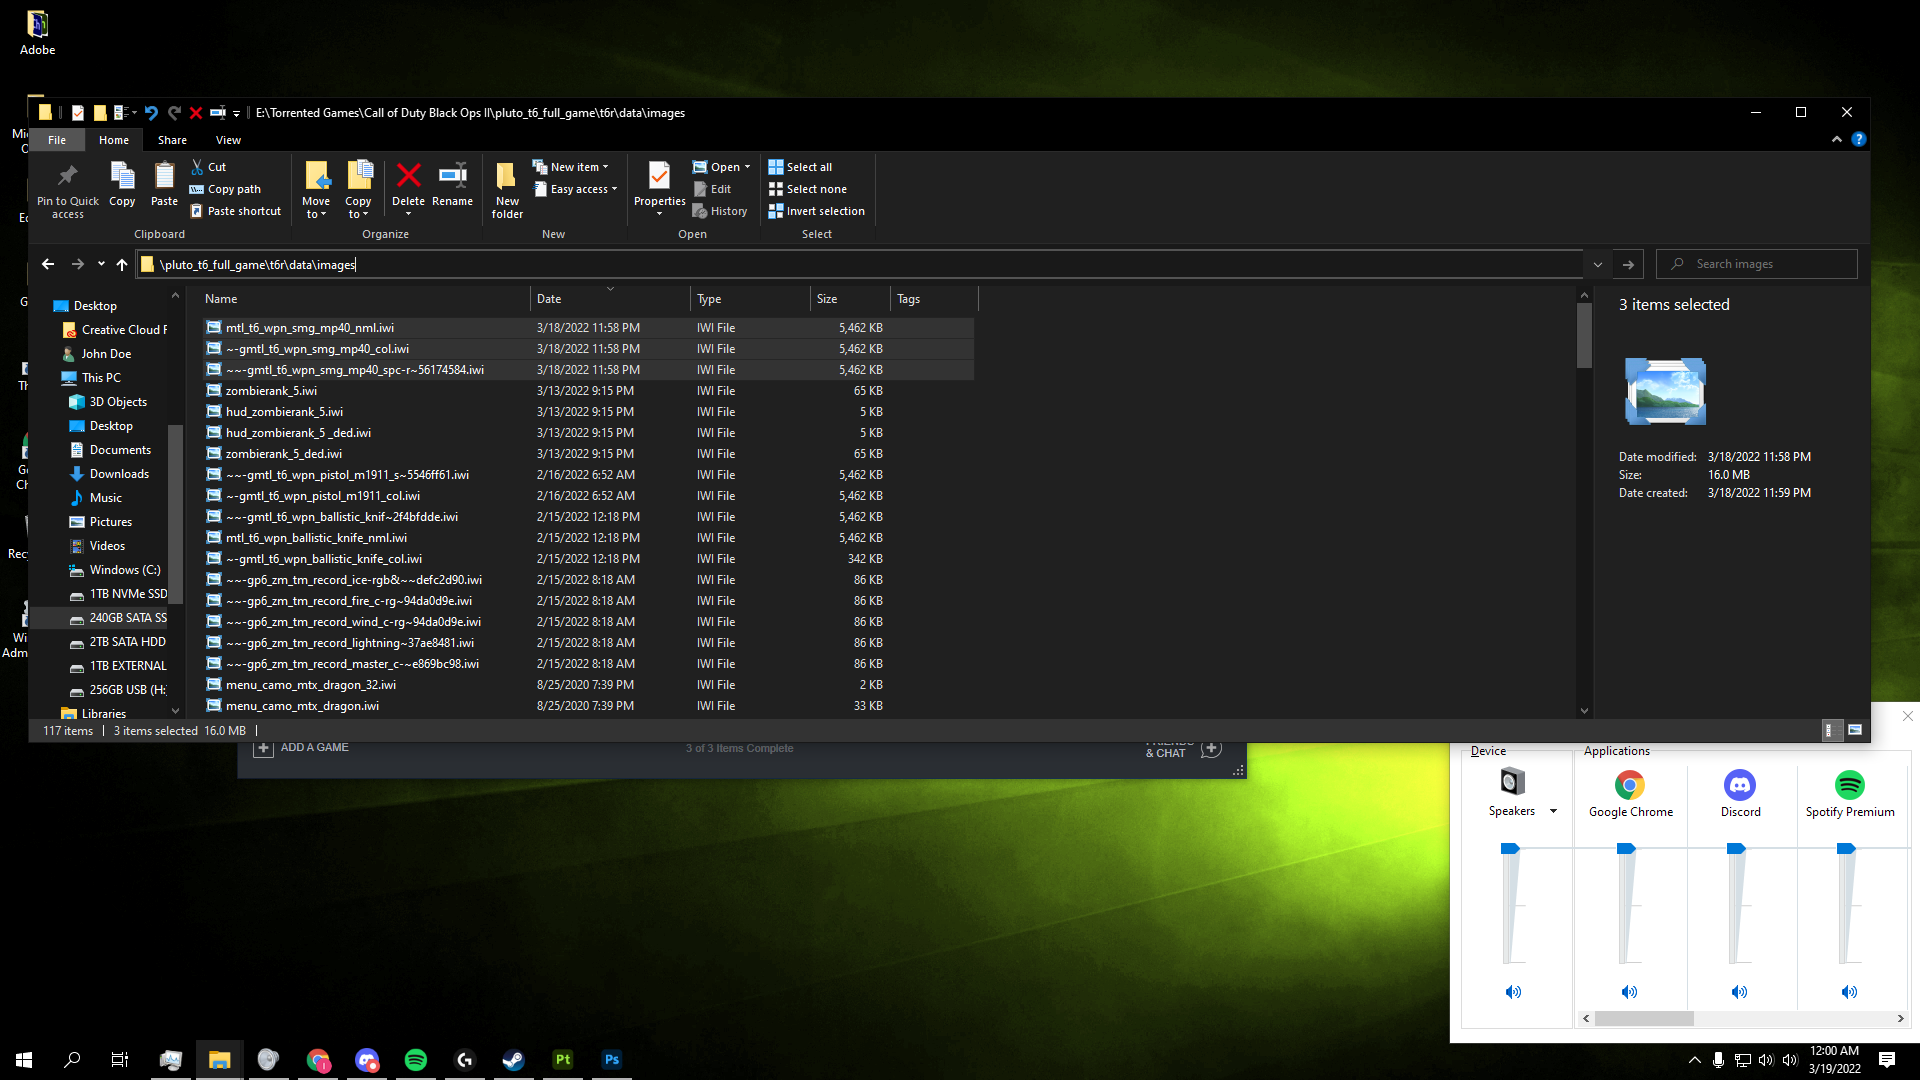
You should now have all 3 layers saved as .DDS files. Download the Tom IWI & DDS Converter and drag and drop your .DDS files onto the .EXE to and press 1 for BO2.
Note: If it's not working make sure to set the .EXE to Run as Administrator.
- Drag and drop your converted files into your
Plutonium\storage\t6\images directory. If you don't have one, make one.
Note: Your new .IWI files have to be the same exact name as the original .DDS layers.
- If done properly you camo should appear on your weapon EXACTLY how you designed it!

Disclaimer
I may have missed a few here and there, if so, please don't hesitate to let me know and I will fix. This will not be perfect, hence why I included all the xModels and image files as separate downloads.
Questions & Help
Almost every question you have will most likely be answered in the video. Make sure to watch it the entire way through as it has very minute details that make a huge impact on success of the process and the aesthetics of the camo.
Purpose of Upload
I wanted to upload all of the zombie models, on the sole basis that everyone has access to them without having the paid game. I hope everyone enjoys and can successfully make their own dope textures. If anything is wrong in this post, please let me know and I'll be happy to edit it!
Edits
- Grammar
- Re-did the entire example and added a lot more pictures and detail.
-
[Release] [Zombies] Origins Disc RetextureHilling_Walsh Oh fuck man my bad. I saw the WR speedrunner have his discs white and thought it looked good/helpful. I scoured this forum and every place I could think of and couldn’t find a single thing. Including your post. I don’t mean any Ill will, swear it was an honest mistake. Just wanted to help out other people who wanted the same thing as I did.
Hope you don’t care I’d I leave this post up. Yours is much more in depth, but I do and think some people would like my simple white for only the discs, who knows. Thanks for commenting though, crazy how the one thing I was looking for comes to me after I had just “done it myself”. Lol.
Edit: Holy fuck, I just saw we have almost EXACTLY the same post, and instructions… I SWEAR I never saw it prior to this. What the fuck, are we the same person lmao?
-
Setting up a server really is too hardSaltyLTS Hey man check out this tut https://youtu.be/BDfokZXXx6M.
If you follow all those steps correctly it should work. It worked for me. If you run into hiccups, add me Ahrimdon#1645.
Also, the server files are not that big. They are if you want it separate from your game, but normally you just re-download load the torrent for the game files. Also your loading screen should not be that grey pixel screen. It should be the actual loading screen if everything went right. Not sure what guide you’re following but there’s plenty of server resources and downloads on this forum!
")
Edit: Make sure you get a working server before you install IW4X Admin. It it considered working if the server shows up in the server list for you and your friends!
Edit 2: Just saw you bought a VPS, not sure how to set that up.
-
[Release] [Zombies] Origins Disc RetextureEver wanted to not pay a thought to getting the staff discs in Origins? Well look no further! This re-texture paints the discs a solid white, while keeping the inner middle circle it's respective staff color. I have been searching for something like this for a while now and couldn't find anything, so I decided to make it. I hope you guys enjoy! Especially the newbies!
You can download the files HERE
INSTRUCTIONS
- Extract all of the .iwi files into your \pluto_t6_full_game\t6r\data\images directory
*If you don't have a \pluto_t6_full_game\t6r\data\images, create one and paste the .iwi files into it.


(This is my first release for the T6 community, please go easy if it isn't perfect.)
-
Cannot get town to startJezuzLizard I have in the past when I first got my server setup. I used the original string where you had to list the gametype, etc and then the updated exec one. I'll take this as it's working for everyone else and I must've fucked up somewhere down the line. Thanks a lot for looking it over man!
-
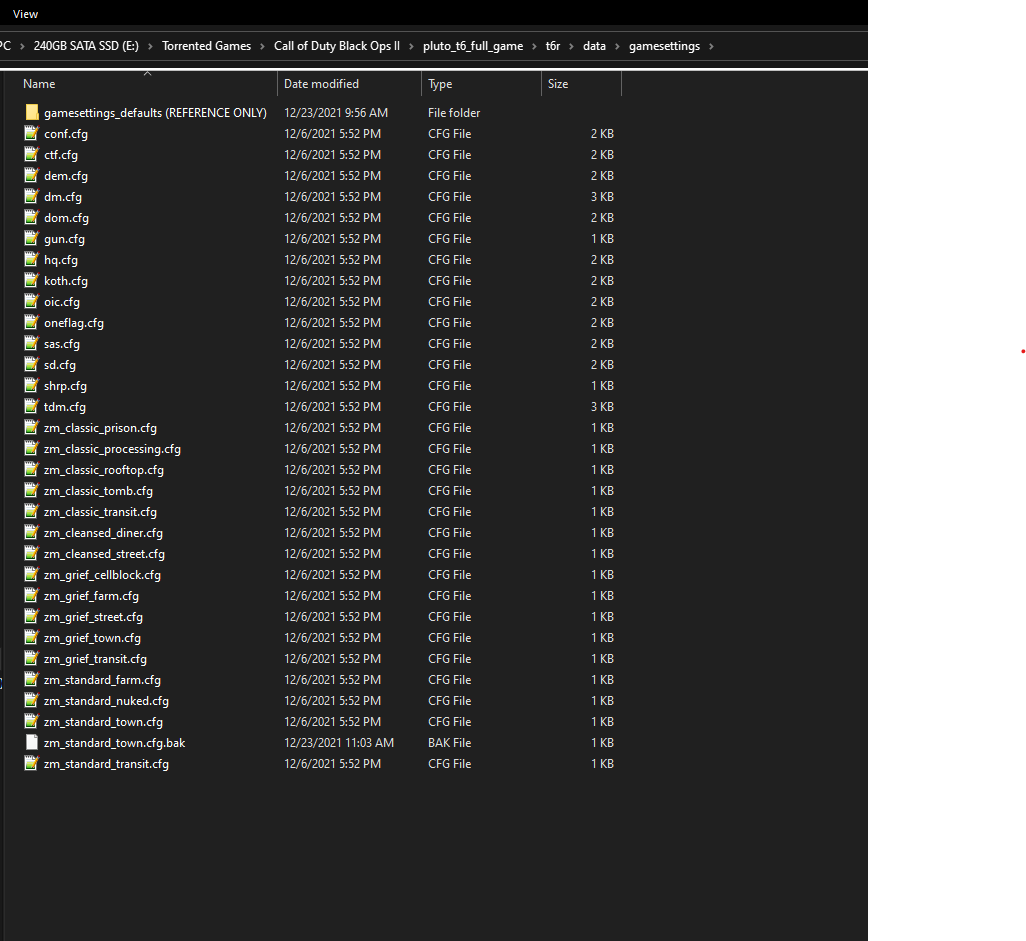
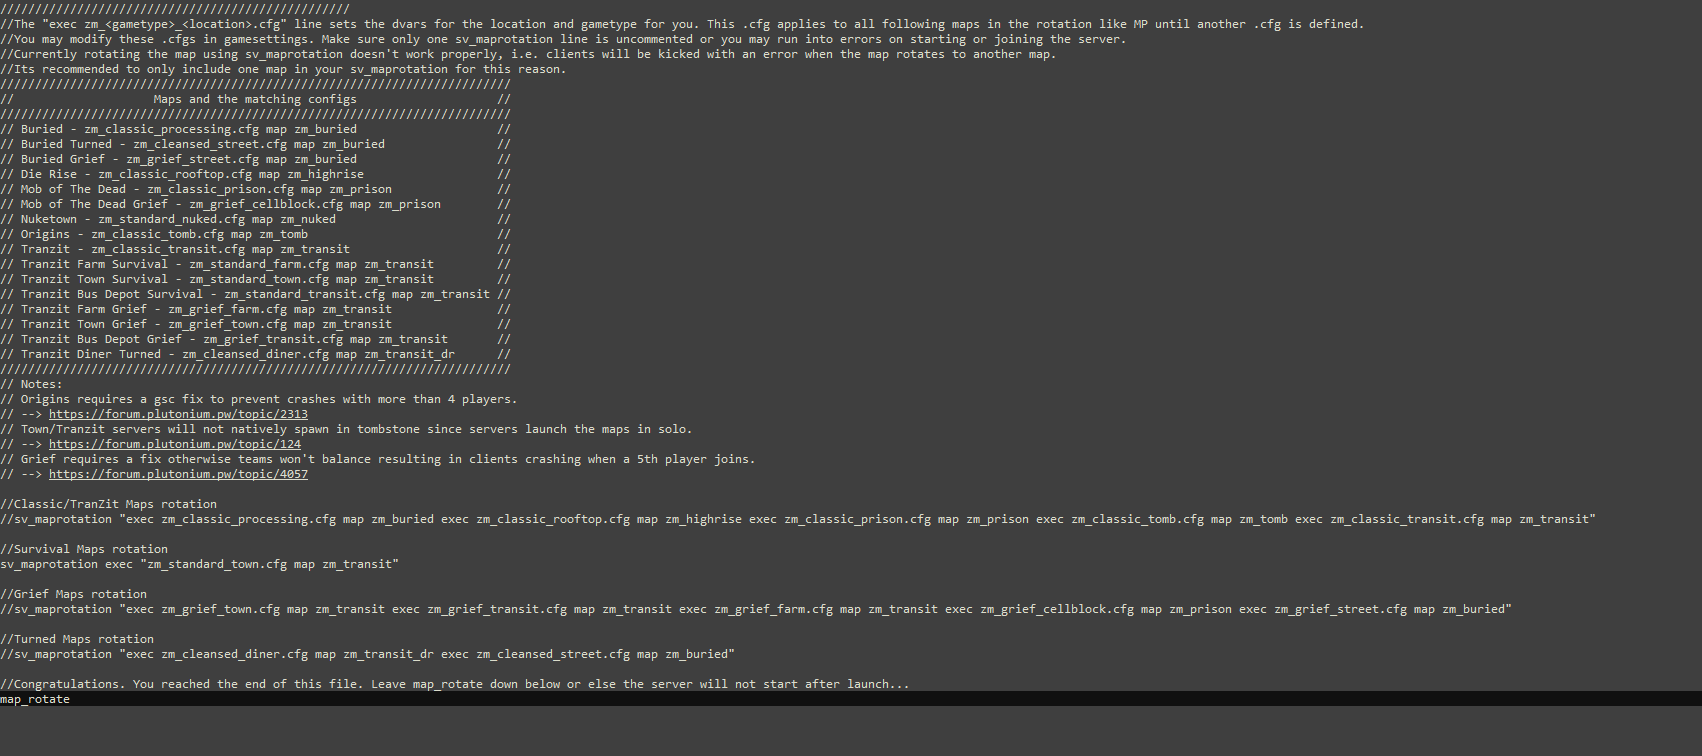
Cannot get town to startJezuzLizard It doesn't appear too. It's possible I'm missing something blatantly obvious, but I'm not sure that's the case as I've double checked everything fairly thoroughly. I know for sure that all maps other than the 3 Green Run sub maps run by using sv_maprotate "exec ...", with leaving the necessary map_rotate at the bottom. I've scoured this forum and glanced at others for everything I can find on this issue.
I saw that the configuration had only recently been made public due to unstable DVARS and figured it had to be me. Every post I've seen of people inquiring on this issue somehow got it to work, gave up, or was just told to look harder (which I'm assuming for what I already know). There doesn't appear to be anything wrong with file paths or others maps, just the zsurvival and grief game modes. I've also made sure everything that's unnecessary is commented out so it can't be that. I'll attach screenshots of everything if someone wouldn't mind glancing over.
What happens what I start my server with sv_maprotation "exec zm_standard_town.cfg map zm_transit": https://streamable.com/x6wl02
-
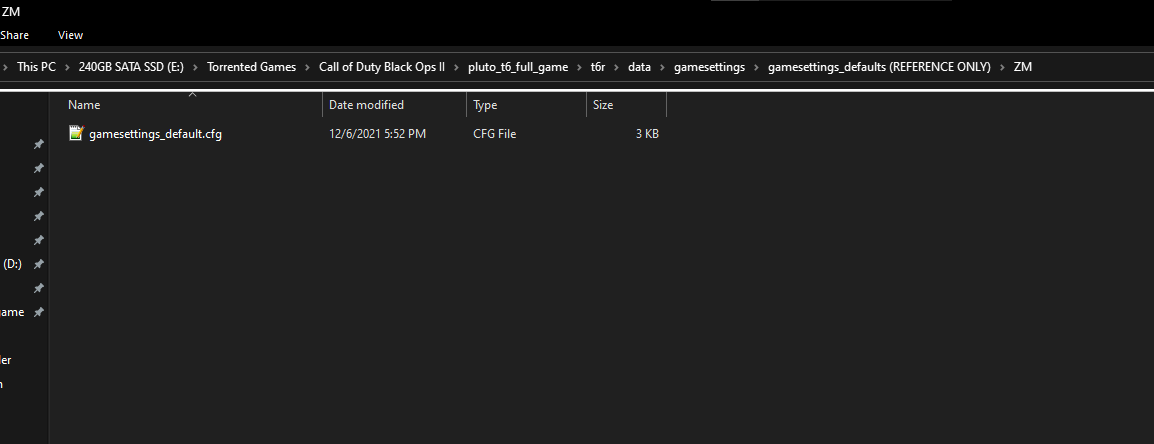
Cannot get town to startSo I have managed to get my server all setup, edited GSC's, installed plugins, IW4X Admin, Discord Webhooks etc. JUST to be embarrassed by not being able to start up town looool.
I've read roughly a year ago the commands to start it weren't publicly available, but recently have become. I've tried almost every positioning of syntax I could possibly think of to hopefully get a different outcome, sometimes I'll get script errors, others itll load up Transit. I have tried all other Green Run maps and for some reason, cannot get a single one aside from Original Transit. I have read over https://plutonium.pw/docs/server/t6/setting-up-a-server/ and can't seem to find where I messed up. I've even downloaded the new game settings .cfg files and tried replacing them with no luck.
I'm not sure if I'm blind or it purely doesn't work, assuming the former. Any help on this topic would be greatly appreciated as my friends and I would love to play some town!