Hopefully the mods are OK with a secondary/supplemental guide being posted here in the forum. I wasted literally hours trying to do correctly what is described in the title and am posting this in the interest that I can 1) save time for others (maybe also growing the player base a bit by lowering the barrier to entry) and 2) have a documented history of my trial-and-error efforts to get the game running correctly so that it will continue to function throughout updates with minimal input. I am not a programmer, just somebody who has learned a little about how the game works by making mistakes and doing lots of reading, so do not ask me how to fix errors that are not described in this guide.
If you’re reading this, you’re probably trying to learn how to get the game running locally with bots on custom maps, so that you can play MW3 on many of the classic MW2 and CoD4 environments, perhaps even with friends. The early parts of this guide (Steps 1-5) are mostly documented already and reproduced here for clarity, but the latter parts are less clear. This looks very long, but if everything goes without a hitch, this will take a about two hours at most once you’ve got the files, about 25 GB of free space, and a legal Steam copy of Modern Warfare 3. Here’s what to do.
1. Download the Modern Warfare 3 server tools from Steam (use the official guide). (~5-30 mins, depending on internet speed)
These are the core game files. Once they’re downloaded, leave them alone. You do not need to modify anything in this folder.
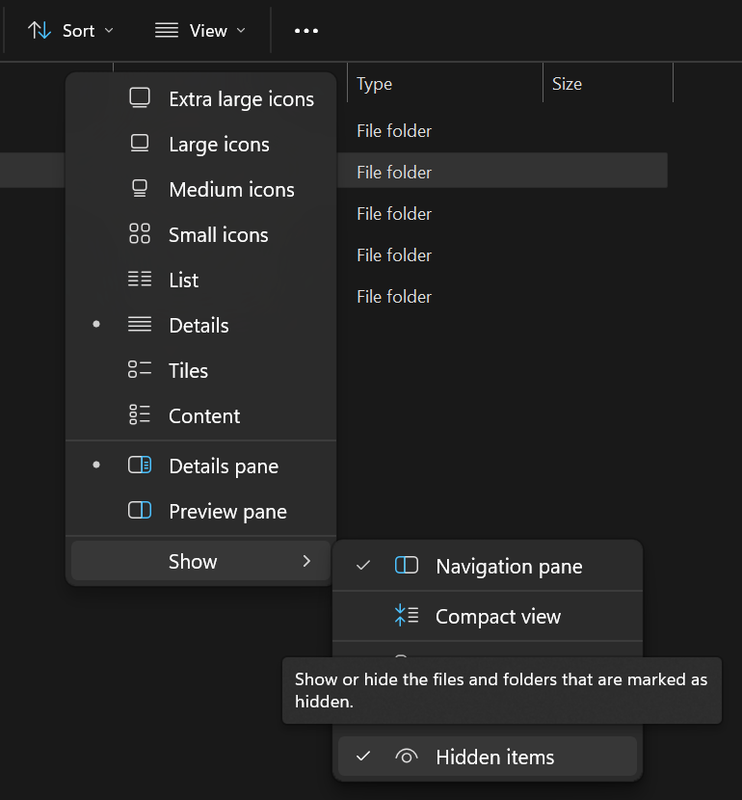
This will download all of the files needed to run MW3 through Plutonium IW5. Plutonium files for MW3 will be stored in "C:/Users/[username]/AppData/Local/Plutonium/storage/iw5". You will need to view hidden files and folders to see this folder.
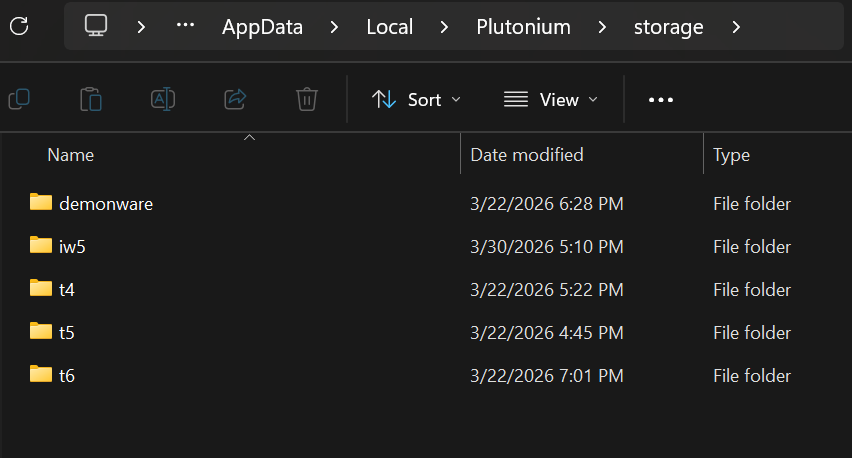
Once you’ve located the “storage” folder, I highly recommend pinning it to the Quick Access sidebar, because you will be using it a lot.
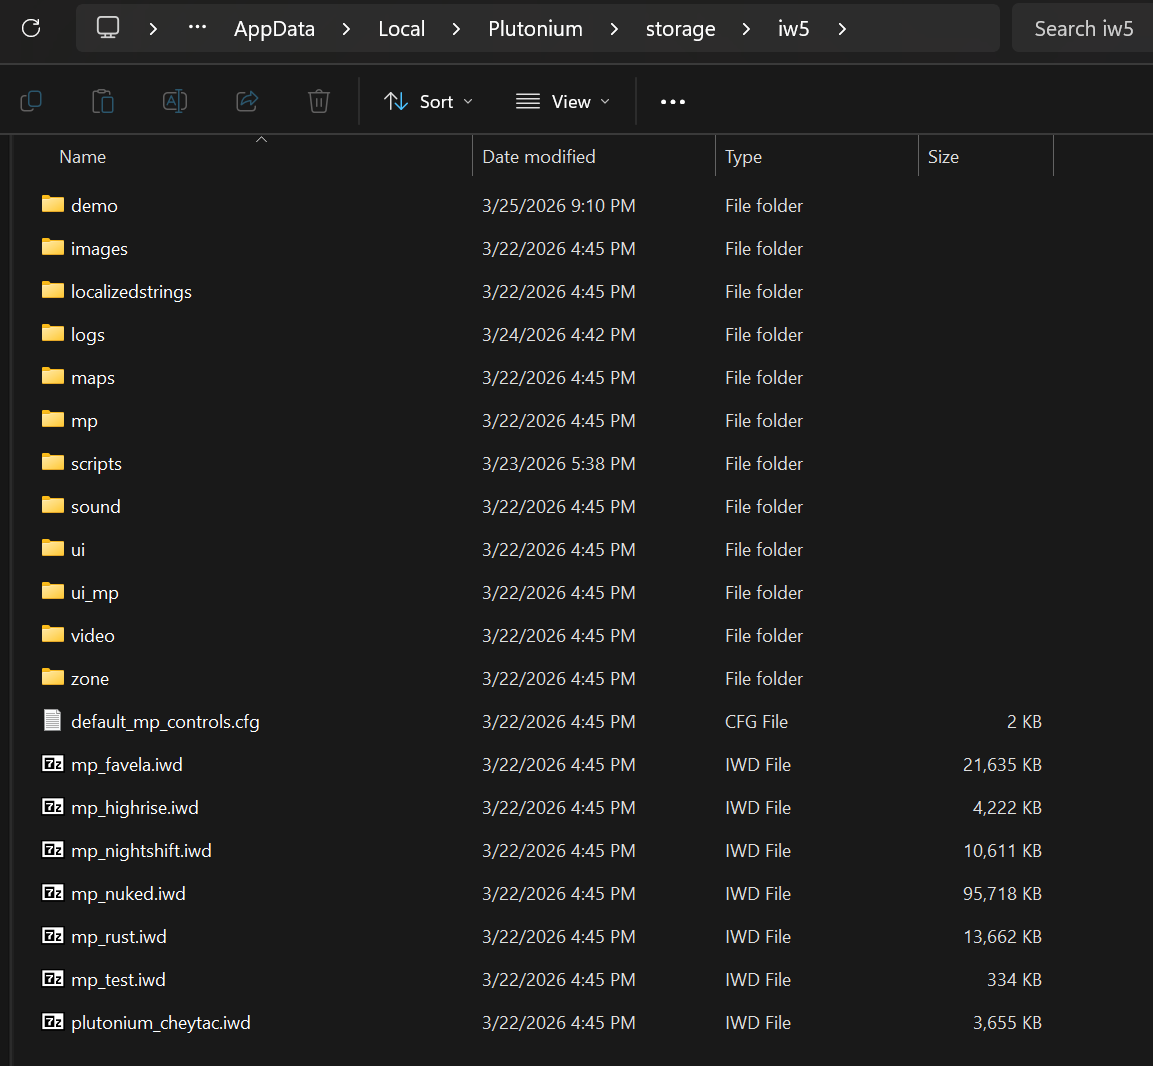
The “storage/iw5” folder in its default state looks like this:
3. Associate Plutonium IW5 with your MW3 game folder. (~1 min)
Simply open the Plutonium Launcher, log in, click on “locate game files” and navigate to C:/Program Files (x86)/Steam/steamapps/common/ and select the “Call of Duty Modern Warfare 3” folder to link it to Plutonium. This is where Plutonium will draw the base game files on startup.
Important Note: You do not need to modify your MW3 base game for any reason, as any custom maps or mods you wish to add to Plutonium IW5 will be placed in the “storage/iw5” folder.
4. Run the base game to verify your installation. (~2 mins)
Launch Plutonium using your linked base game folder. If the game starts, a short video will play (you can skip this video with the Escape key) and you will reach the main menu. If the game does not start, read any error codes and use the troubleshooting guides. As a Mac user/user of early 2010s Intel laptops that lack dedicated graphics cards (NVIDIA, AMD, etc.) but run on generally clean Windows installations, any errors I had were resolved by the following:
- Locate the "redist" folder inside your base game files (“steamapps/common”) and run every .exe in there from oldest to newest to update your Visual C runtimes and DirectX. This will likely resolve cryptic errors related to DirectX, which will 99% occur on fresh Bootcamp Macs and likely on old hardware (pre-2013) as well. On Bootcamp Macs, installing only the newest Visual C runtimes did not fix my errors—you must install them all.
- Verify your game files on Steam to ensure the download is not corrupted
- Uninstall/reinstall Plutonium
If you’re coming from the world of Mac, please note the following:
- Plutonium does not work on virtual machines, so you won’t get it to work in Parallels in macOS.
- Plutonium is a single-core process (devs, please correct me if I’m wrong), and thus performs very poorly in Crossover for Mac because of the processing power sapped from that core by the translation layer needed to run on ARM/macOS. There are guides to get it working if you’re happy playing at 15 FPS, but I’d recommend simply biting the bullet and finding a Windows PC (even cheap modern laptops with integrated graphics can run the game at a steady 60 FPS).
Important Note: The first time you run Plutonium IW5, Windows will ask for your permission to allow the game through your firewall on specific networks. This pop-up is hard to see because it shows up right before the game goes into fullscreen mode—you can see it by pressing the Windows key or using Alt+Tab to switch active windows once the game has loaded. You will have the option to grant Plutonium IW5 access through your firewall on either “Public” or “Private” networks. Be sure that Plutonium IW5 is allowed through the firewall on whichever network type you plan to use. You will have to reconfigure this later in the Control Panel to avoid connection issues if you do not do it now.
5. Optional: connect a controller (link to Plutonium guide). (~1 min-83 years, depending on OCD level)
If you’re using a wired Xbox 360 controller or modern Xbox controller (for Xbox “series”) then you simply need to pair it as a Bluetooth device and Plutonium IW5 will recognize it. Please use the controller guide for other controllers.
If nothing in the official Plutonium guide is working for your controller, there is also the option of using a keyboard emulator such as Joy2Key to map your controller to the existing keyboard and mouse inputs, though you will have to spend a lot of time (an hour if you’re an expert) messing about with the Joy2Key mouse emulation and in-game look sensitivity to make it play correctly—picking up a used Xbox Series or Xbox 360 wired controller is probably the best application of your time and money unless you’re steadfastly committed to being weird and playing with an N64 Controller or something (I eagerly await your Goldeneye mod if so).
Important Note: Be sure to test your controller in an actual match, as not all controllers will work on the menus.
6. Once you’ve got the game running, download and install the Bot Warfare mod to play against bots. (~3-5 mins)
To play against bots, you will need the Bot Warfare mod. Bots, or computer-created clients (players), can be summoned in unaltered Plutonium IW5 but need scripting to give them logic so they can function. The Bot Warfare mod supplies this scripting inside a file named “z_svr_bots.iwd”. At time of writing, this mod can be found from either GitHub or ModDB—I am not responsible for anything that happens to you because of something you downloaded on the internet. Make sure you have the Plutonium IW5 version of the mod, or it will not work!
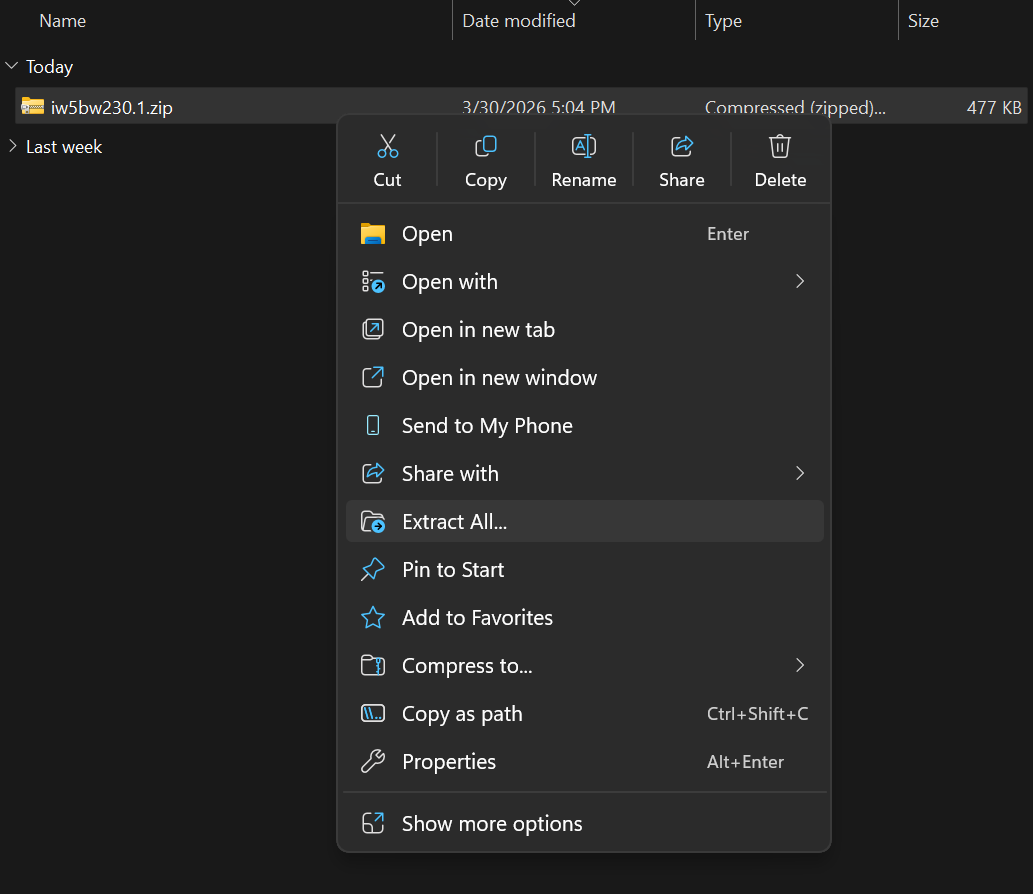
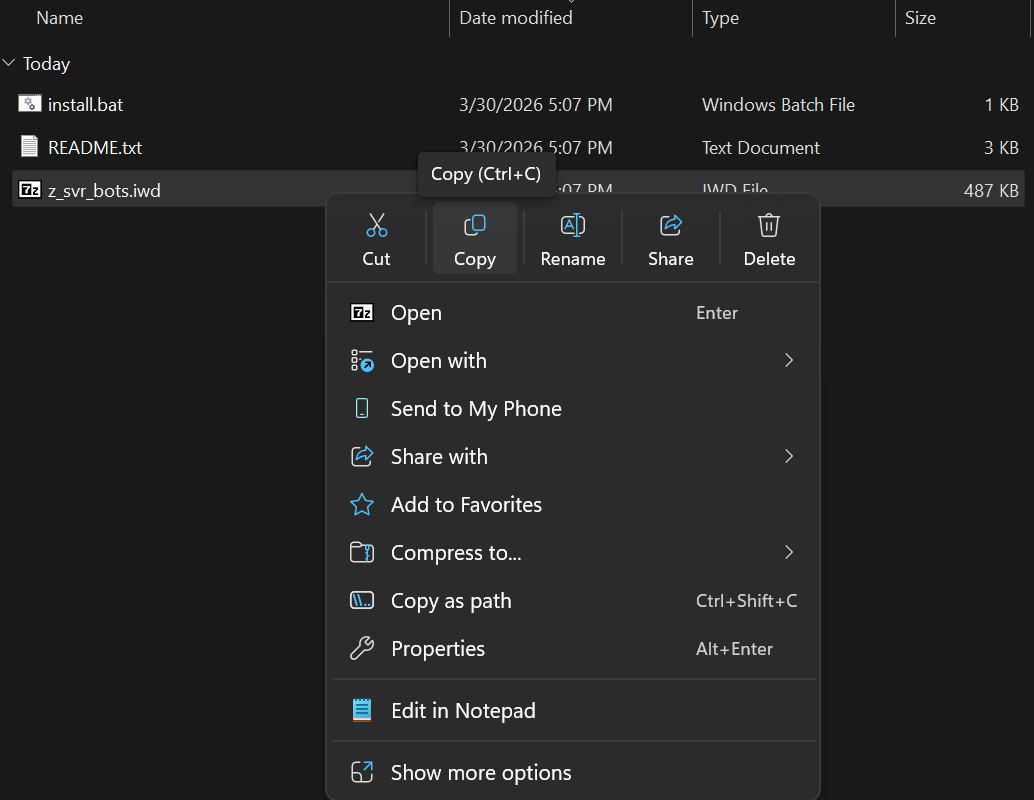
Once you’ve downloaded Bot Warfare, unzip it and access its contents:
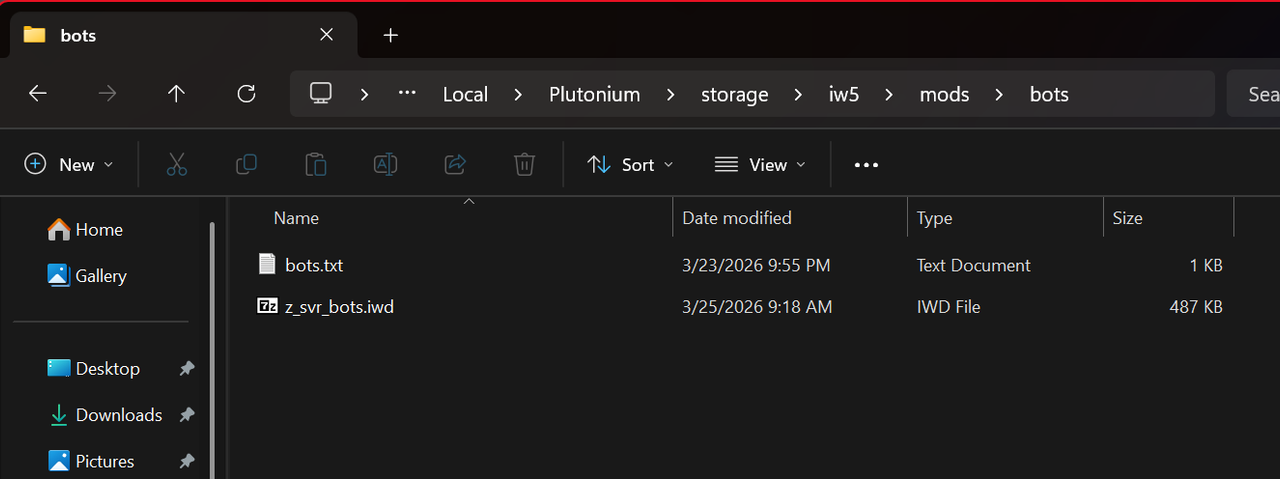
Copy the “z_svr_bots.iwd” file.
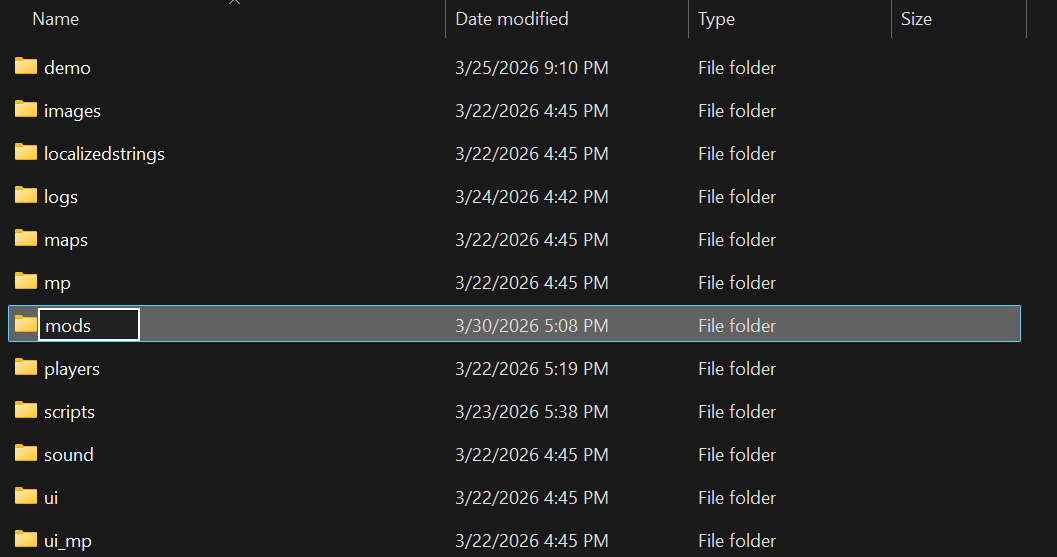
Navigate to “storage/iw5”. Inside “storage/iw5”, create a folder called “mods”.
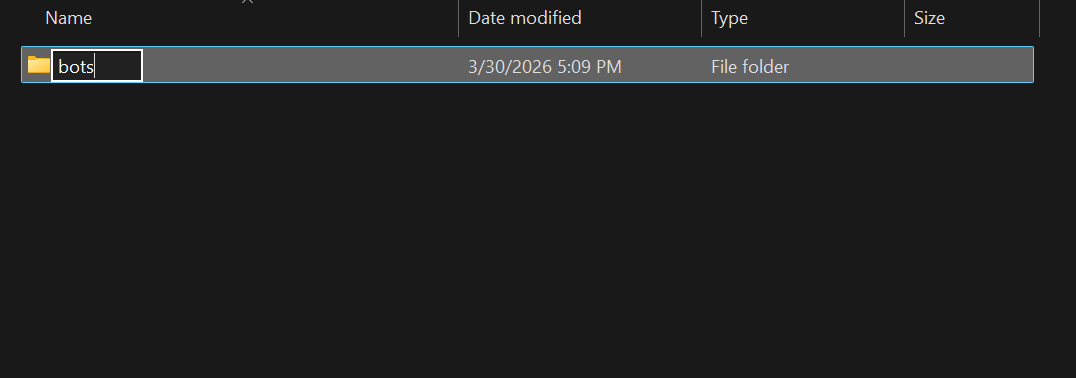
Inside your “storage/iw5/mods”, create a folder called “bots”.
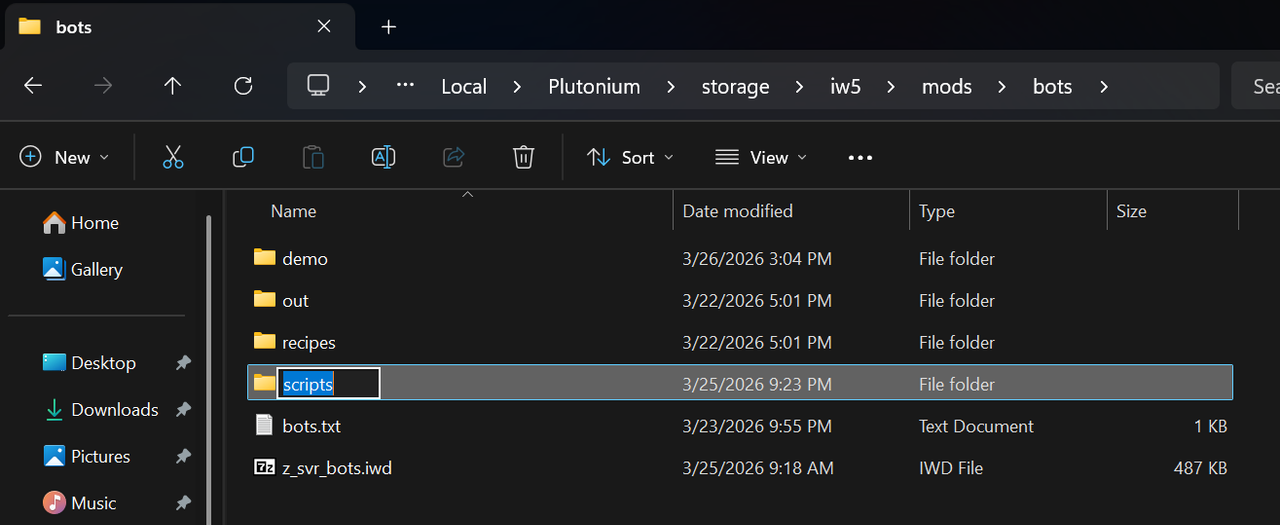
Paste z_svr_bots.iwd into “storage/iw5/mods/bots”.’ The first time you run the mod, several files and folders will be added to this folder.
Important Note 1: The .bat file included with Bot Warfare is meant to make the install process easier, but I do not recommend using it because the method I’m walking through here is reproducibly functional for every update to the z_svr_bots.iwd file in Bot Warfare.
Important Note 2: Plutonium will receive updates as long as it is in active development, and in the past, some of these updates have broken Bot Warfare and caused its bots to lag the game. As a result, Bot Warfare will need to be updated to remain compatible with Plutonium. My method described here is the easiest way to ensure updates to Bot Warfare are properly and successfully installed without affecting other changes in your “mods/bots” folder.
7. Optional: name your bots (~3-5 mins).
Bot Warfare bots will spawn into games named “bot1”, “bot2”, etc. You will probably agree that this is boring, so let’s give them some names! To do this, use Notepad to create a file called “bots.txt” and save it in “storage/iw5/mods/bots”. Each line of this file will be read by the game as a possible bot name—edit it to add names. As an example, all of my bots are named after Formula One and IndyCar drivers:
L Norris
O Piastri
G Russell
K Antonelli
M Verstappen
I Hadjar
C Leclerc
L Hamilton
C Sainz
A Albon
L Lawson
A Lindblad
F Alonso
L Stroll
E Ocon
O Bearman
N Hulkenberg
G Bortoleto
P Gasly
F Colapinto
V Bottas
S Perez
S Vettel
Y Tsunoda
D Ricciardo
G Zhou
M Schumacher
K Magnussen
N Latifi
C Herta
S Dixon
A Palou
K Simpson
J Newgarden
S McLaughlin
D Malukas
W Power
M Ericsson
K Kirkwood
P O'Ward
N Siegel
C Lundgaard
R Hunter-Reay
A Rossi
C Rasmussen
E Carpenter
H Castroneves
F Rosenqvist
M Armstrong
G Rahal
L Foster
T Sato
R Grosjean
D Hauger
C Collet
S Ferrucci
C Daly
J Harvey
R Veekay
S Robb
M Andretti
S Pagenaud
T Kanaan
Keeping this “bots.txt” file stored in ”storage/iw5/mods/bots” will keep your custom bot names intact with every update to Bot Warfare’s z_svr_bots.iwd file.
If you want to test out this feature, copy and paste the bot names in the code box above into a Notepad document, then save it in “storage/iw5/mods/bots” as “bots.txt”.
8. Test Bot Warfare. (~2 mins)
Launch Plutonium IW5. Once the game has started, open the console (the ~ key) and type “set fs_game mods/bots”.

This will load all of the files and scripts stored in “storage/iw5/mods/bots”. Begin a Private Match. If Bot Warfare has loaded properly, you will see a message which says “welcome to Bot Warfare!” in the killfeed for about the first 5 seconds of a game upon spawning into a map. Add bots to the game by pressing “N” to open the mod menu, using the WASD keys to navigate the options, and pressing the spacebar to enter a menu/select an option (use N to go backwards). Confirm that your bots spawn in with your custom names and move about the map in an orderly fashion, and test how many bots you can add to the game without dramatically lagging it (if your game freezes, use the Windows key, Ctrl+Shift+Escape, or the hard reboot if all else fails).
Important Note: If you’re running very old/slow hardware, you may begin to notice a performance hit once a certain number of bots are added to the game. This is a CPU-related issue—because Plutonium IW5 is a single-core process, adding too many bots may exceed the single-core computing capacity of your processor. This issue can potentially be solved by running two instances of the game on the same machine, using one core to run the bots (a game server) and the other to run your game experience (connecting client). Skip to Step 12 onwards to solve this problem if you notice your game lagging when lots of bots are present.
9. Add custom maps. (~10-30 mins, depending on internet speed)
You can obtain custom maps in two ways: 1) playing on a server hosting a custom map (mods can also be obtained in this fashion) or 2) downloading custom maps and saving them to your “storage/iw5” folder. The majority of custom maps playable in Plutonium IW5 can be found in various threads across the forum, though there are a few still missing here (notably Rundown and Quarry from MW2). At time of writing, these are the threads I could find containing links to custom maps:
Important Note: Custom maps are NOT all plug-and-play! Some maps have sound/visual errors or game mode compatibility issues, and NONE will work natively with Bot Warfare! You will have to do some (short) work to make bots functional on these maps, described in Step 10. Check any threads/links carefully to ensure there are not issues with the maps you wish to download, and access off-site downloads at your own risk—I am not responsible for anything that happens because of something you chose to download from the internet.
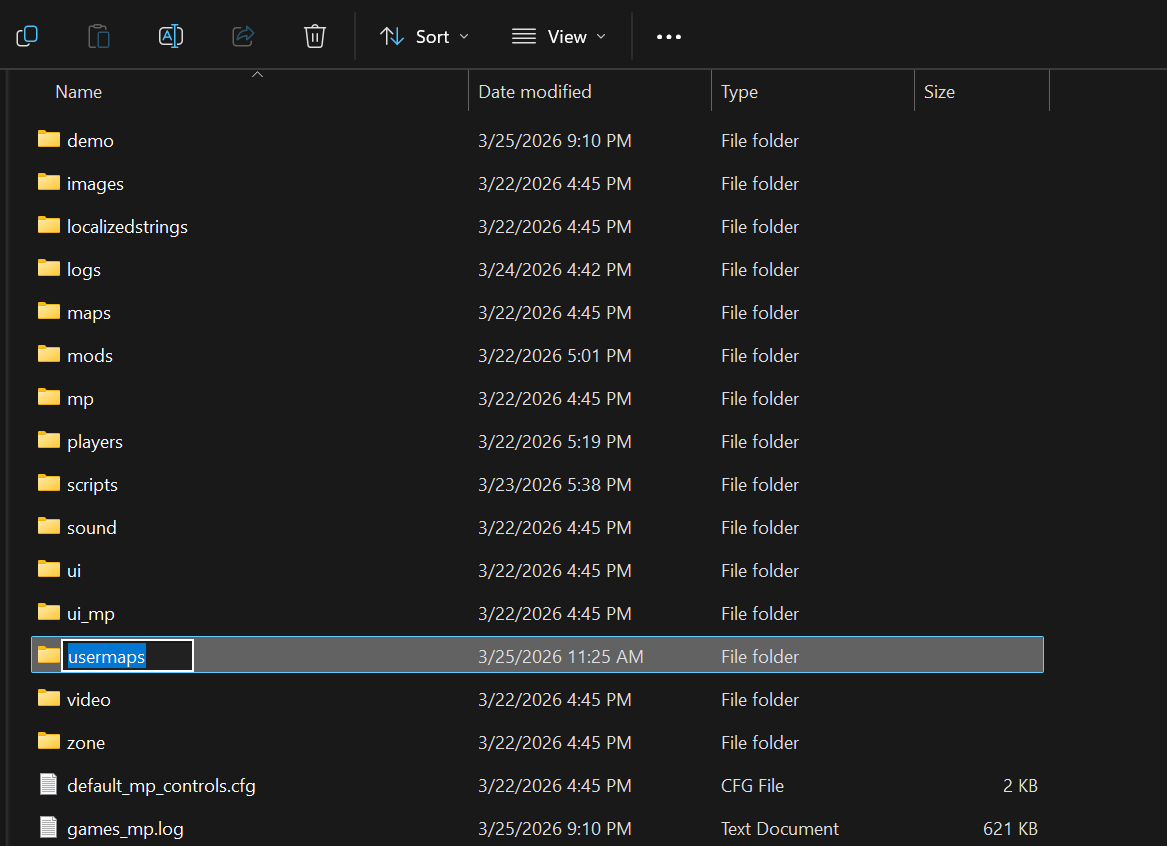
To use custom maps on Plutonium IW5, navigate to “storage/iw5” and create a folder titled “usermaps” (I believe the game might create this folder for you if you’ve already played on a custom map after connecting to a server).
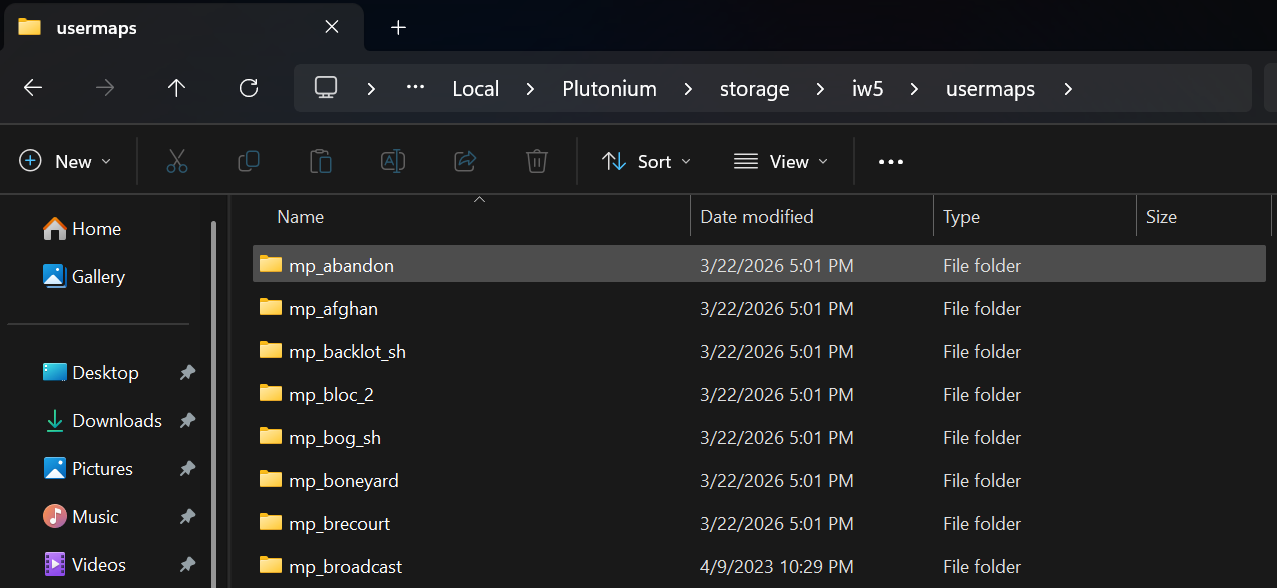
Inside “storage/iw5/usermaps”, you will paste a folder for each custom map:
Each folder should contain four files: two fastfiles (.ff), an IWD file containing map assets (.iwd), and an ARENA file (.arena) file.
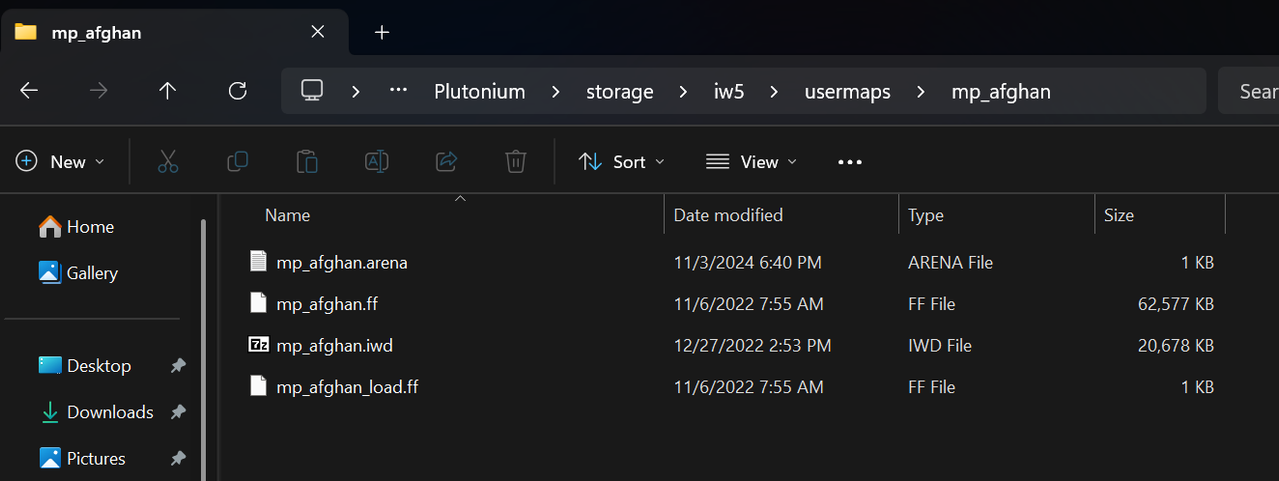
Arena files can be edited with Notepad and contain information including the map description and the factions that play on the map.
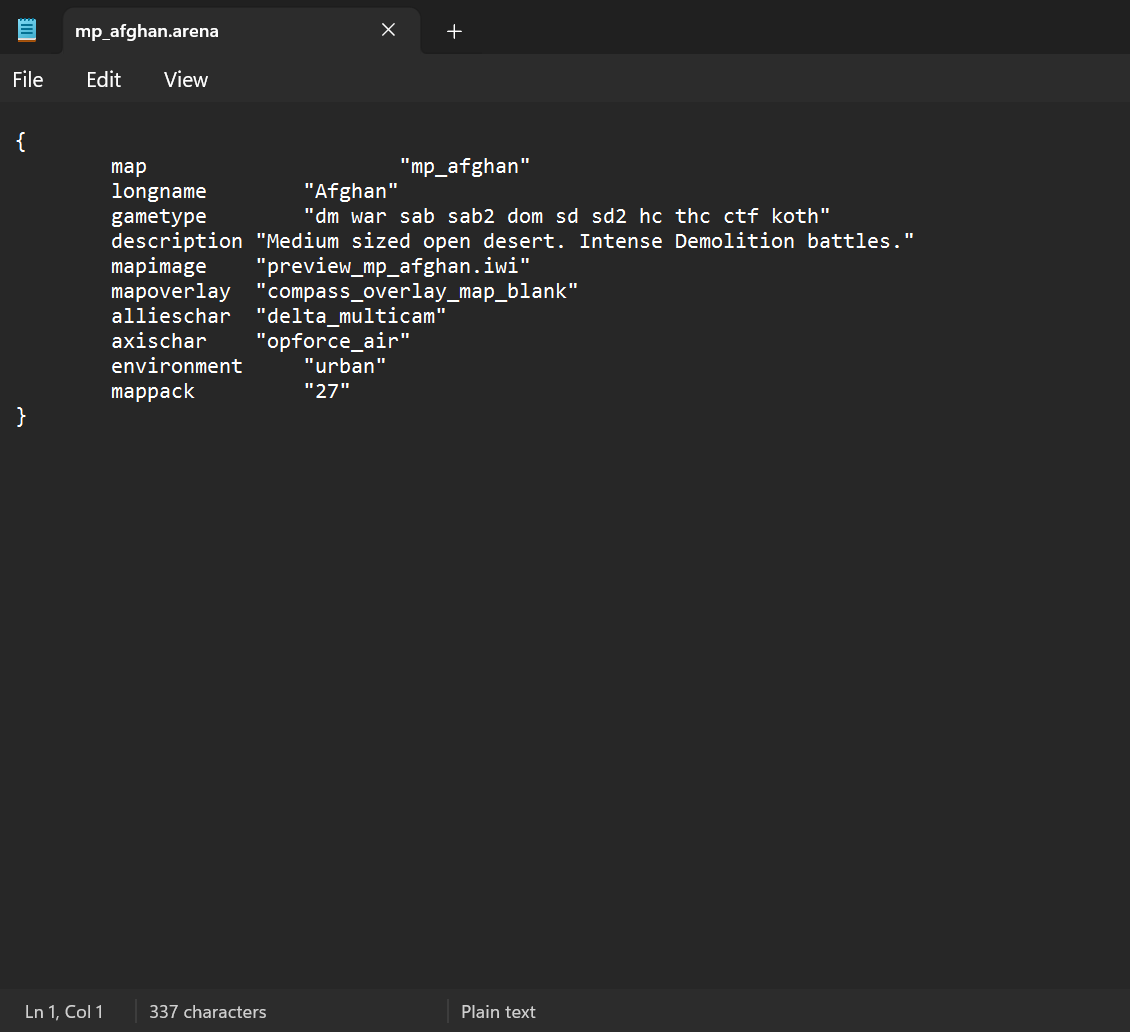
While you can edit the map description string shown above so that it will show up properly on the in-game map selection menu (I have done so for all my usermaps because I can’t remember which map is which), use caution editing the factions that play on each map, as changing them to anything other than the defaults will likely cause the map to crash, with limited exceptions. No custom maps will render a preview picture correctly and I have not yet figured out how to get them to do so.
Once you have added maps to this folder, open the game and test them to ensure that they load properly.
10. Program your bots to play on custom maps (add bot waypoints). (~5-10 minutes, depending on internet speed)
Heads-up: you might need 7-zip for this next step. If you do, I recommend downloading it only from the official 7-zip site. I am not responsible for what happens to you, your computer, your property, or the planet if you use 7-zip.
The Bot Warfare bots require an invisible navigation system known as “waypoints” to be loaded in a script (.gsc file) with each map in order to properly function, otherwise they will wander around randomly and get lost or stuck. Custom maps do not come with Bot Warfare waypoints, so you will have to locate the .gsc files containing waypoints for each custom map yourself. You can download my waypoint pack from this post (scroll to the bottom), or examine the below link for waypoints (will require 7-zip to open .iwd files:")
Important Note: that there may be multiple versions of each custom map, and waypoints for one may not be compatible with waypoints for another (e.g. mp_crossfire ≠ mp_cross_fire since they are from different games despite being the same map).
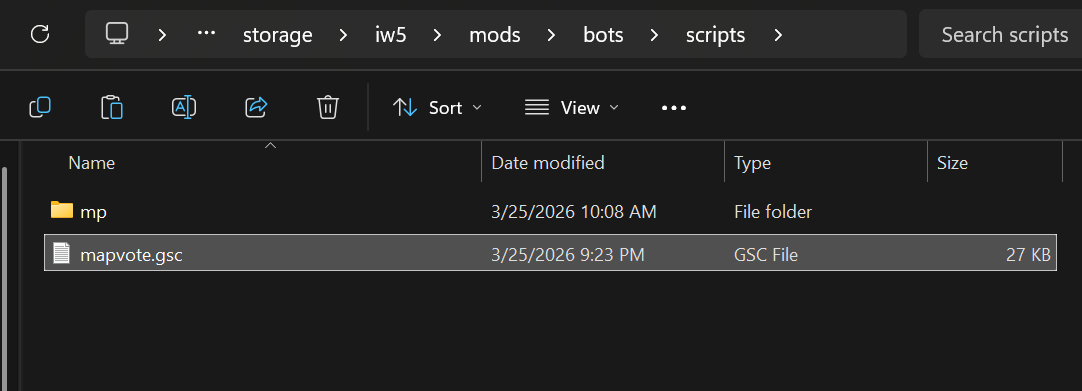
To add waypoints to your Bot Warfare mod, navigate to “storage/iw5/mods/bots” and create a folder called “scripts”.
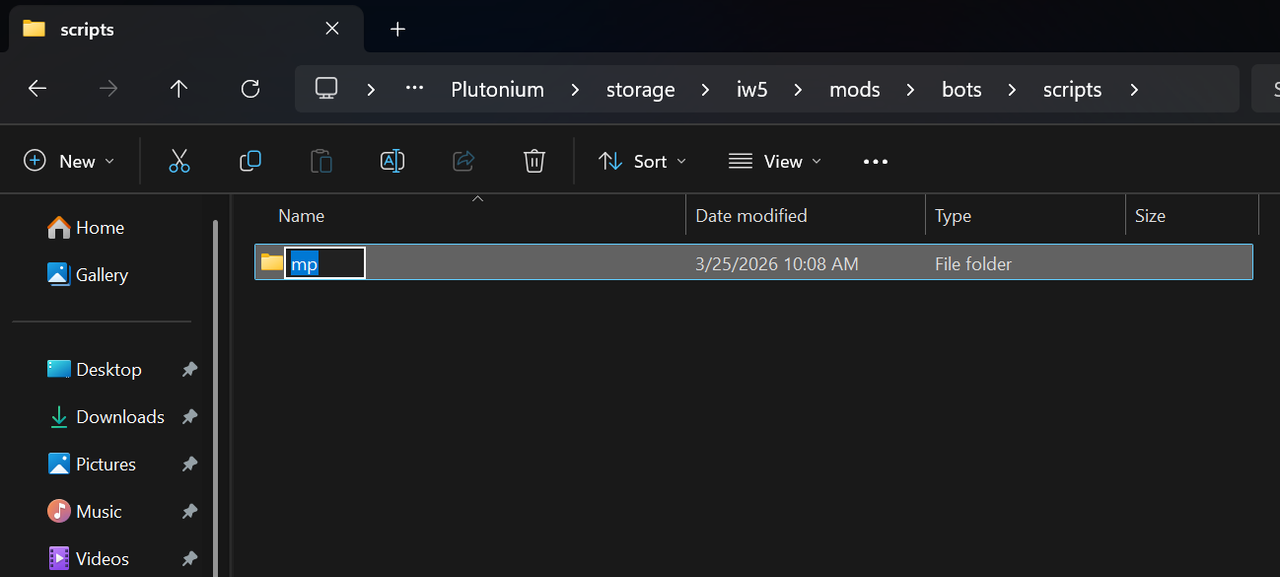
Inside “scripts”, create another folder called “mp”.
Inside this folder, paste the contents of my waypoints.zip file, OR the contents of a copy of“z_svr_bots.iwd/scripts/mp” containing waypoints for custom maps (will require 7-zip to open .iwd files) :
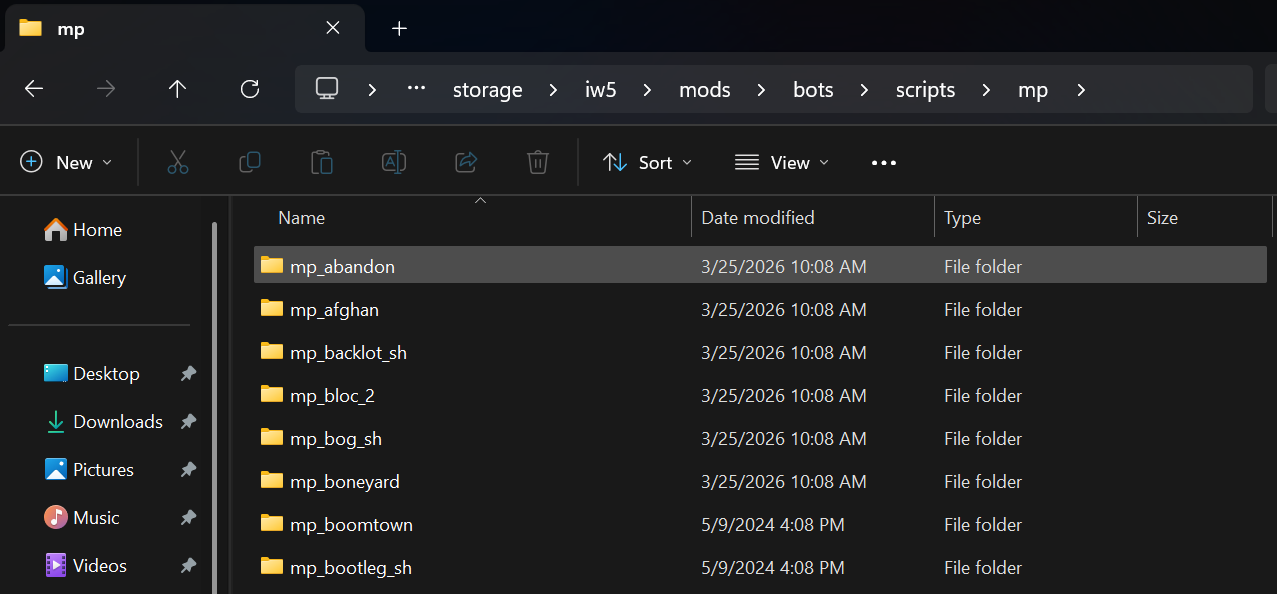
For posterity, the inside of “z_svr_bots.iwd/scripts/mp” looks like this:
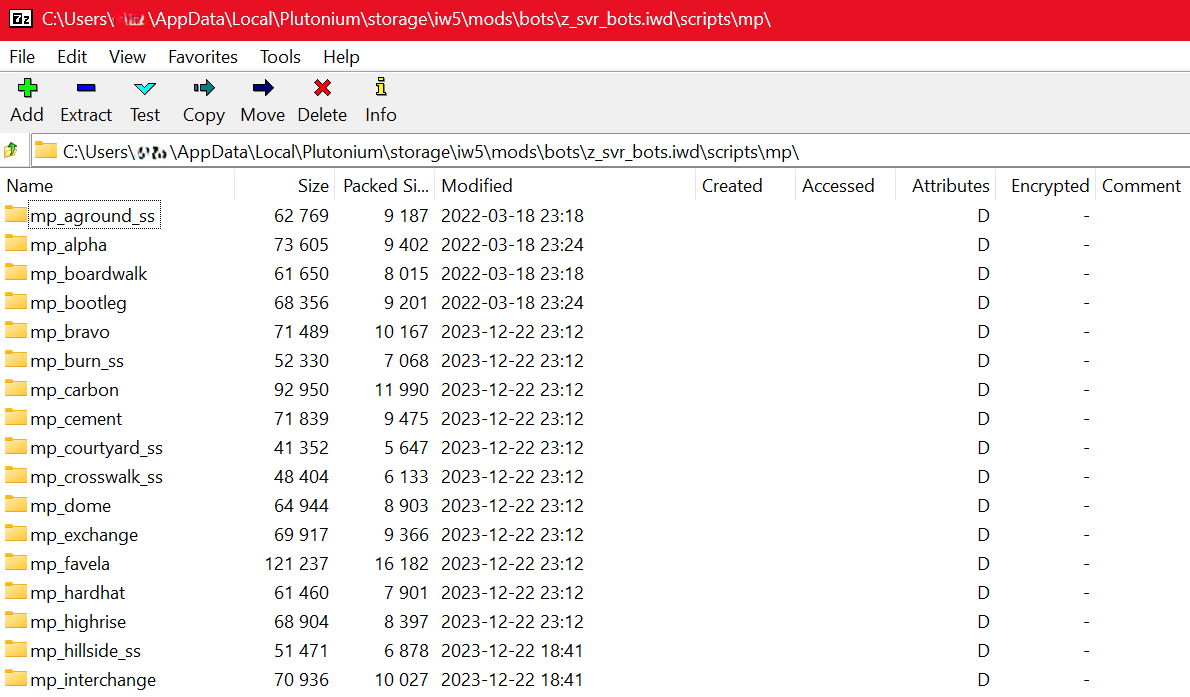
Each folder MUST match the name of the map folder for which the waypoints are intended (e.g. the waypoints for “storage/iw5/usermaps/mp_afghan” must be found in “storage/iw5/mods/bots/scripts/mp/mp_afghan”.
Once you have added waypoints, load your game and then your bots mod (don’t forget to open the console and type “set fs_game mods/bots” before loading a match), then navigate to a custom map and spawn bots to see if they behave in an organized manner. The easiest place at which to observe the effect of added waypoints is from the Delta/Allies spawn on Pipeline (mp_pipeline)—with waypoints, the bots will quickly sprint off in two columns, while without waypoints, they will meander around the hillside unfocused.
Advanced User Note: This method of adding waypoints to custom maps should be compatible with future Bot Warfare updates because it makes no changes to z_svr_bots.iwd, which can simply be replaced entirely by an updated z_svr_bots.iwd file each time an update is released to Bot Warfare. Other guides will suggest you use 7-zip to open your copy of z_svr_bots.iwd and add your waypoints to its folder structure—I do NOT recommend this, because updating Bot Warfare with a new z_svr_bots.iwd will then erase your waypoint collection and you cannot rename z_svr_bots.iwd to something else without breaking Bot Warfare (i.e. keeping a backup copy with your waypoints will become confusing). My above method works because the folder structure “storage/iw5/mods/bots/scripts/mp/[map name]/wps_[map name].gsc” mimics the folder structure inside z_svr_bots.iwd for each map (you can see this for yourself if you open z_svr_bots.iwd with 7-zip). As long as the folder structure inside each new z_svr_bots.iwd is unchanged by the developers of Bot Warfare with each update, you can simply replace your copy of z_svr_bots.iwd with the new one each time a Bot Warfare update is released without worrying about keeping track of your collection of custom map waypoints. If the folder structure in z_svr_bots.iwd is ever changed in an update, simply adjust the folder structure inside storage/iw5/mods/bots to match it, and your waypoint collection will remain compatible.
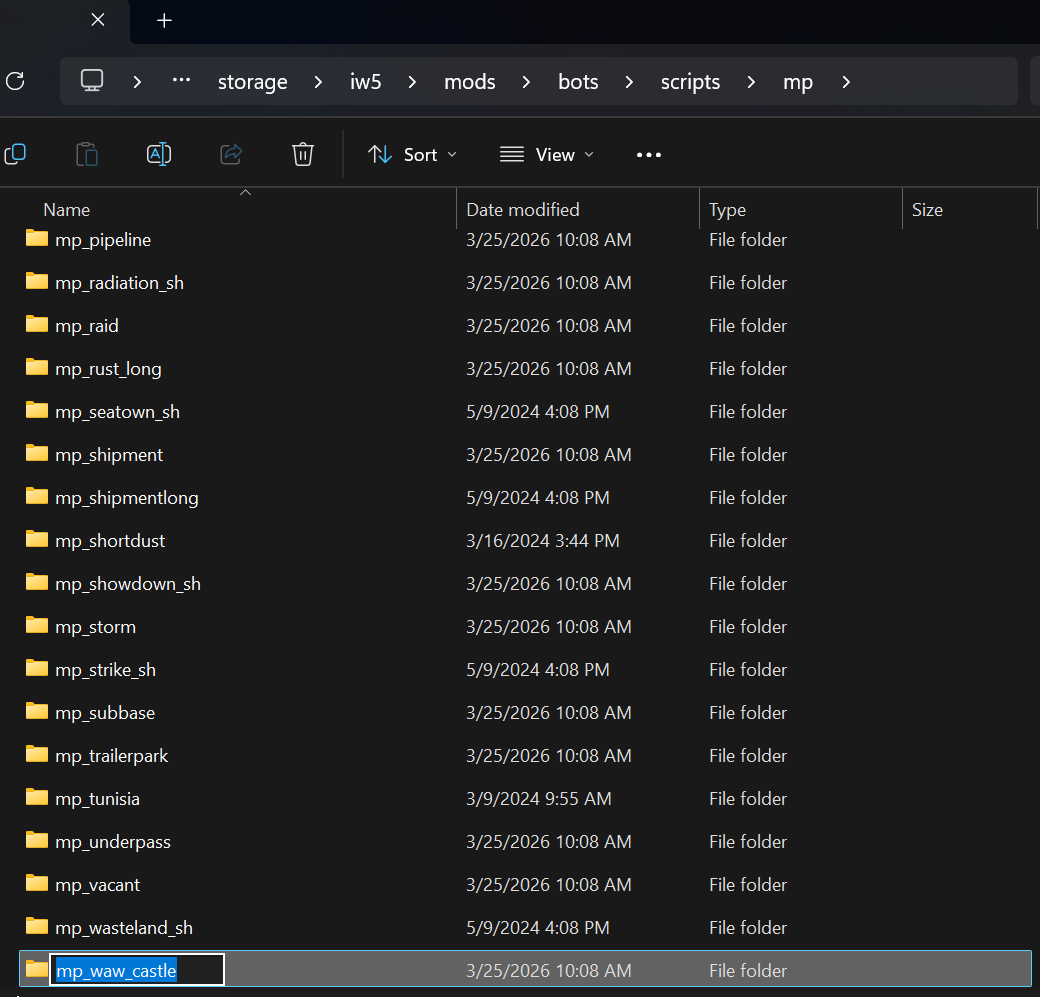
To add any new waypoints for new custom maps, navigate to “storage/iw5/mods/bots/scripts/mp” and create a folder for each map to which you wish to add waypoints:
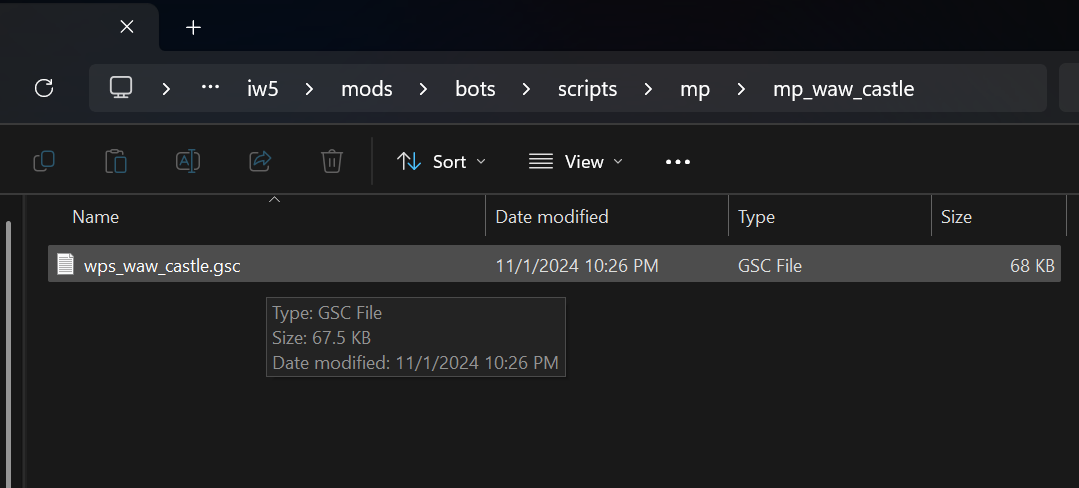
Inside each new folder, add the .gsc file containing the waypoints for that map:
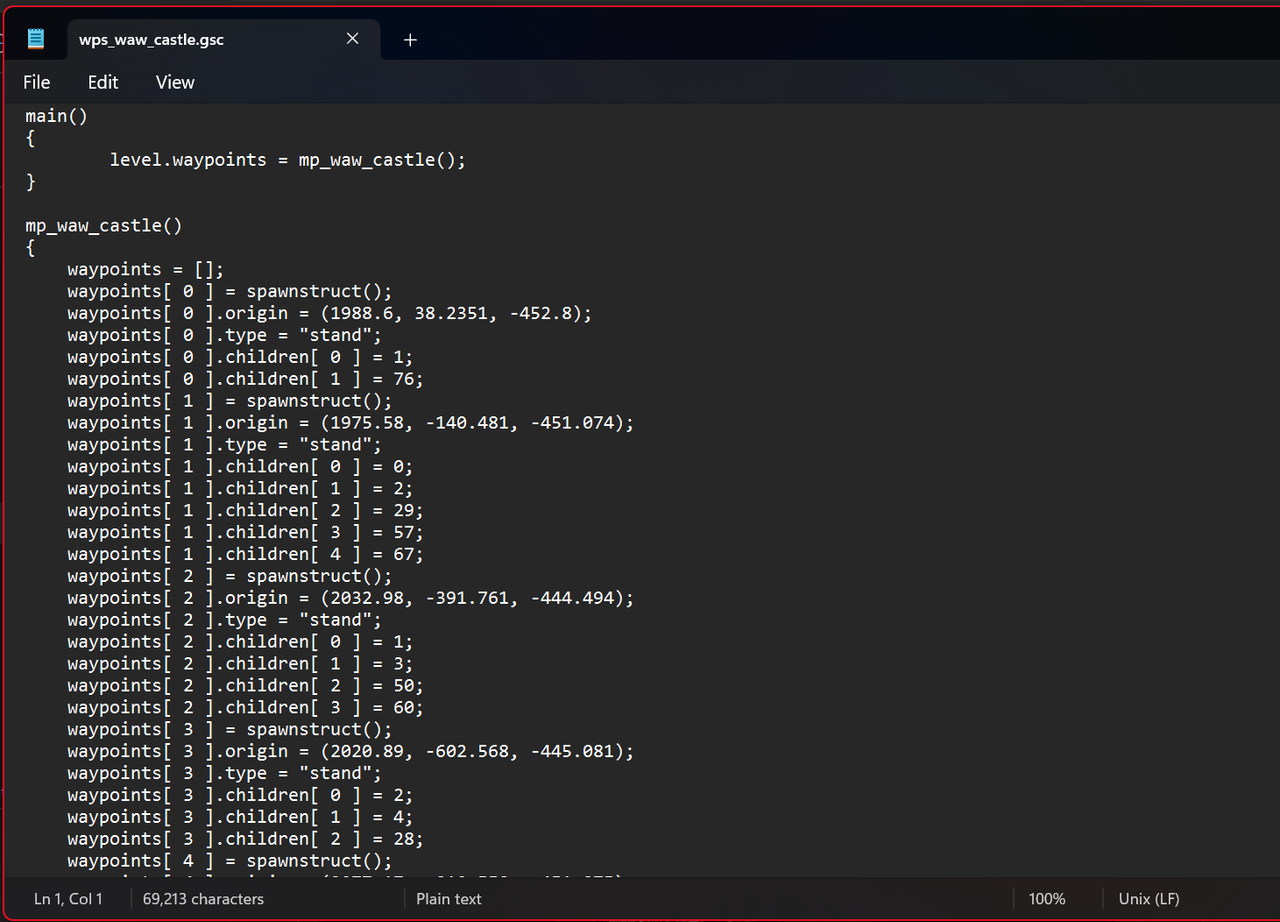
Script files containing waypoints can be opened with Notepad and will look like this:
11. Optional: create your own waypoints for the bots (~1.5-8 hours per map, depending on OCD level and ability to remember to save progress).
If you cannot find waypoints for a map you’d desperately like to play with bots, you can generate your own from within Bot Warfare. Load Plutoinum IW5, open the console to load Bot Warfare (“set fs_game mods/bots”), and then type “set bots_main_debug 1“. Begin a private match and load the custom map for which you’d like to set waypoints, and then follow the on-screen instructions to move around the map and set/connect waypoints. This method can also be used to edit an existing set of waypoints in the event you encounter a bug/bots getting stuck.
Once you’ve completed the process of generating waypoints, use the instructions described in the Bot Warfare waypoint editor to save the waypoints to a .gsc file (you might have to check your game files in steamapps/common or storage/iw5 to find this file). Move this .gsc file into the location described at the end of Step 10 (you will need to create a new folder), then load it up and test it!
Important Note: Try to stick to less than 300 waypoints for each map—anything more might cause the game to crash when you save your waypoints. I recommend saving your waypoints frequently since you can load them and edit them later.
12. Hosting mods and custom maps on an Apache fileserver for a LAN game. (~10-15 minutes)
Heads-up: You will need a program called XAMPP for this step. XAMPP is a program used by programmers to test web hosting features. XAMPP is not the only way to host files for a LAN game—there are a near-infinite number of ways to accomplish this step—but all of them will involve exposing files on your computer to other computers. If this makes you uncomfortable, do not proceed. Using XAMPP on a completely offline LAN occupied exclusively by clean, uncompromised computers is the only way to be certain that computers on the internet do not have access to your files. If you proceed, I’m not responsible if your pr0n collection or any other embarrassing/sensitive/critical information gets leaked or your stuff gets hacked. You have been warned.
It takes two things to host a Plutonium IW5 game with bots on custom maps: a gameserver and a fileserver. The gameserver, as its name implies, runs the game, while the fileserver supplies any additional files not found in the base game that are needed by players (i.e. custom maps and the Bot Warfare mod). A single machine can be the gameserver (one running instance of Plutonium IW5), the fileserver (one running instance of a file hosting program), and a connecting client (another running instance of Plutonium IW5) all at once—in fact, this is how it is recommended to run Bot Warfare because of the possible CPU limitations described in Step 8.
While other games automatically enable file sharing from the gameserver for connecting players, Plutonium IW5 does not—it has a function called “FastDL” that allows it to retrieve files from a fileserver, and it does not work by default so must be configured. To get our mods to work properly, we must use a separate program to allow our machine to be both the gameserver and the fileserver. This step illustrates how to do this for LAN games by hosting your Plutonium “storage” folder with XAMPP functioning as an Apache fileserver, because it’s all I’ve figured out how to do. It is also possible (and safer) to use a remote web host/web server as your fileserver and point FastDL to it using a URL, but this costs money and does not work offline, so is not the focus of this guide.
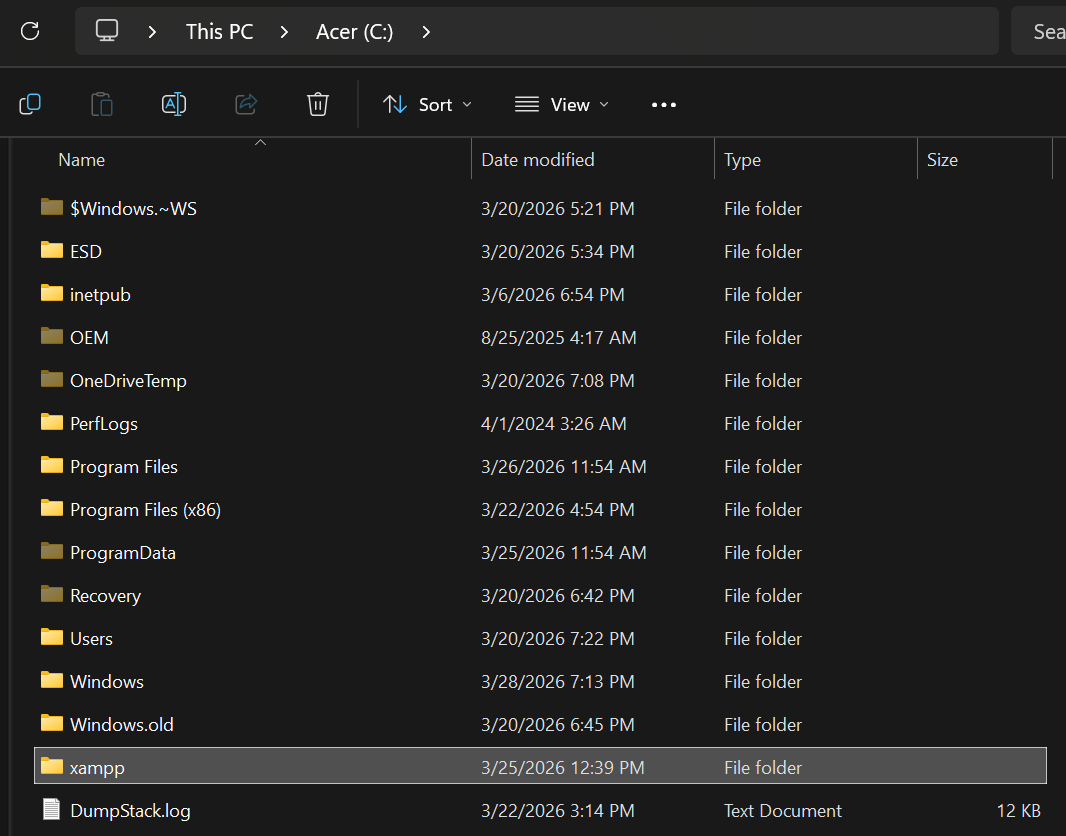
To enable your machine to function as the fileserver, download and install XAMPP, preferably from Friends of Apache (you must install at minimum the Apache service with the XAMPP installer). By default, it will install to C:/
For XAMPP to work for our purposes, it must be run as an administrator. For ease of use, you can make it so that Windows will always open XAMPP with administrator rights—right-click xampp-control.exe, select “Properties”, then the “Compatibility” tab, then select “Run this program as an administrator”. Optionally, you can do this for all users.
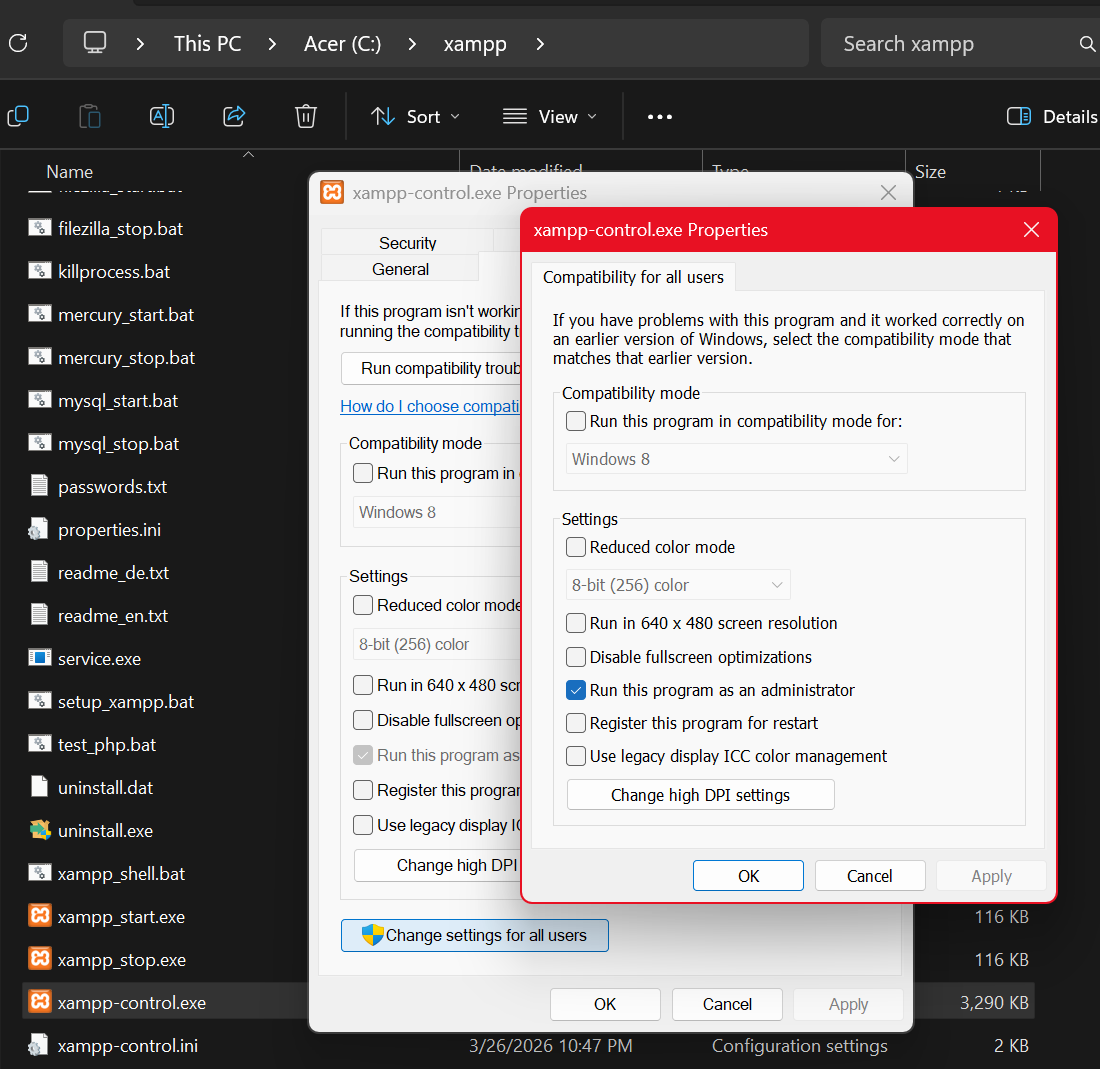
Important Note: XAMPP will tell you if you have failed to start it with administrator rights, but you will have to scroll up through its running log in the main XAMPP window to find this warning since it will always be pushed upstream by other information.
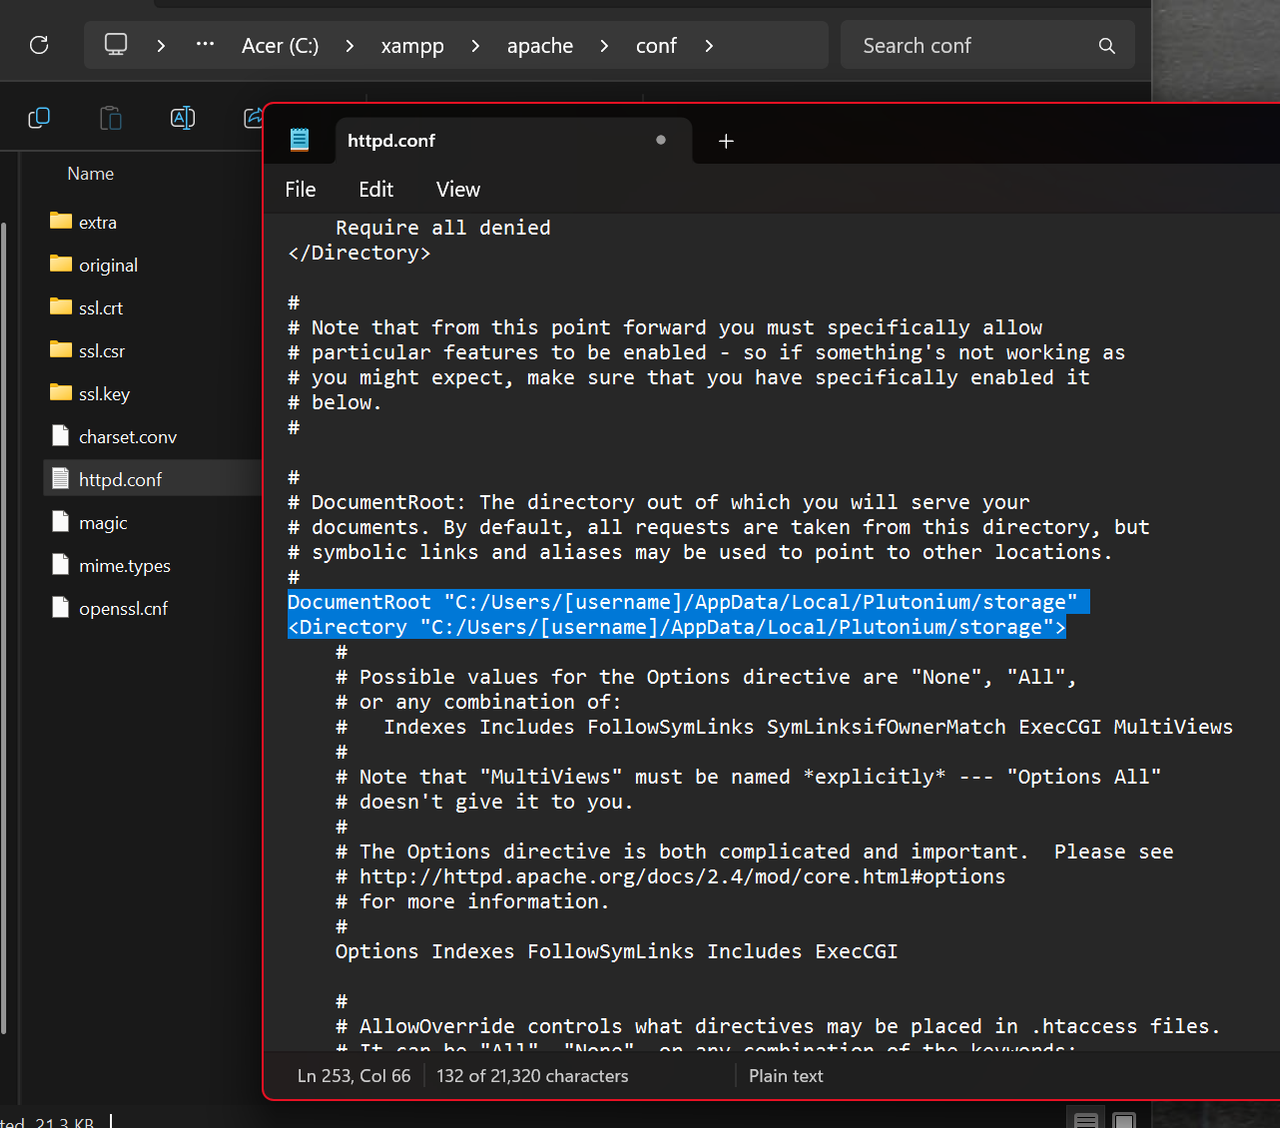
Next, we’ll tell XAMPP which folder to make available for connecting clients (i.e. connecting Plutonium IW5 players). To do this, navigate to C:/xampp/apache/conf and open “httpd.conf” with Notepad. Scroll down to the following line of code, and edit it to point to your Plutonium install’s “storage” folder (replace “[username]” with your Windows login username, no brackets, or navigate to “storage” and copy the path to that directory).
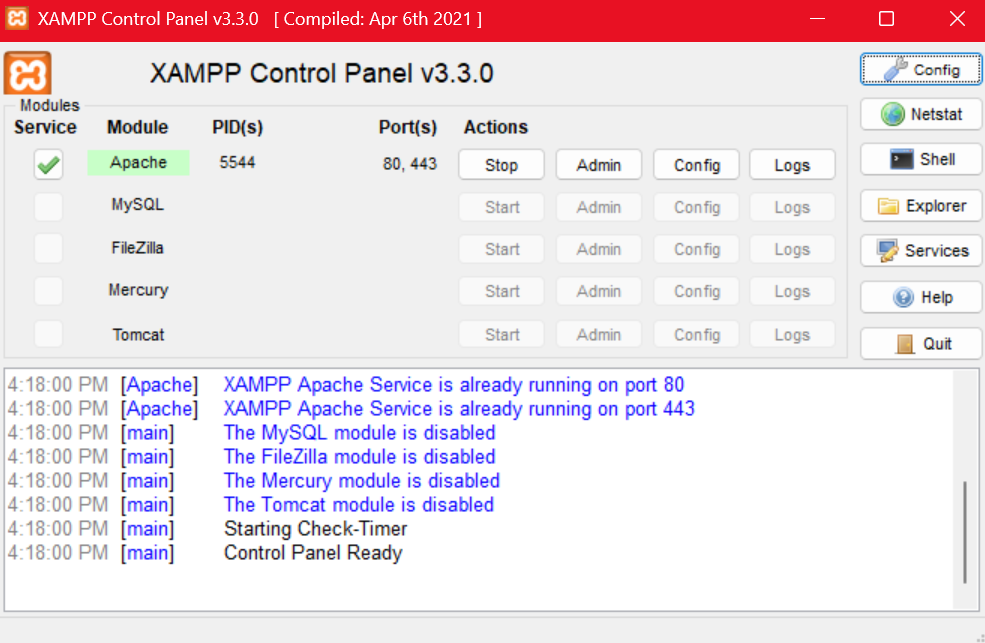
Now, open XAMPP. If you are properly running XAMPP as an administrator, you will get a darkened screen and a prompt from Windows asking you to confirm you wish to run XAMPP as an administrator. Once XAMPP has started, you will be prompted by Windows to allow it through the firewall on either Public or Private networks—for XAMPP to work with Plutonium IW5, it must be allowed through the firewall on the network you’re playing on (check to see if it’s Public or Private), otherwise you will have to grant it additional permissions later in the Control Panel.
After XAMPP has started, click “Start” near Apache to enable the Apache service to create a fileserver hosting your “storage” folder. By default, clients connecting to XAMPP’s Apache fileserver will connect on port 80.
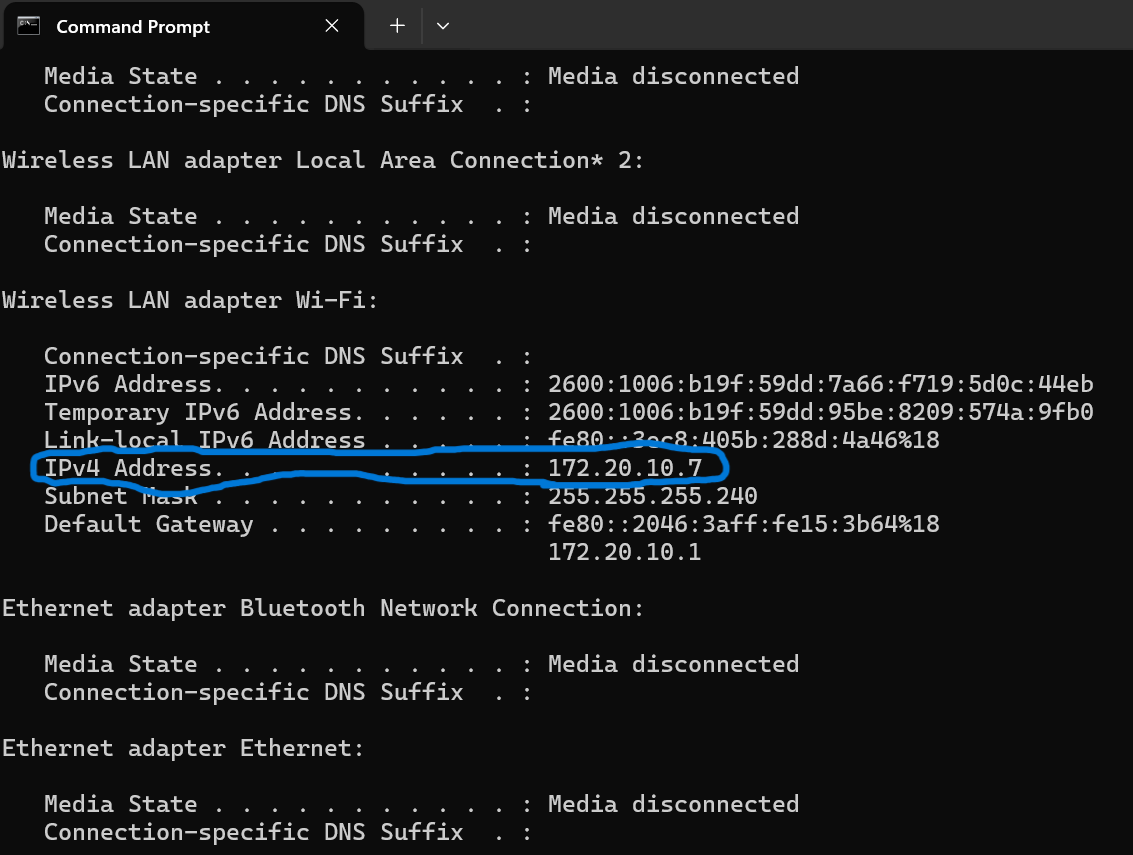
Before we continue, we have to make sure XAMPP is hosting your files correctly. First, determine the IPv4 address of the computer running XAMPP by opening the Command Prompt (Windows start menu, search “Command Prompt”). Type in “ipconfig” and press “Enter”. Locate the IPv4 address (it may be wired or wireless).
Now, on a separate device connected to the same network as the computer running XAMPP, open a browser and type in “http://[XAMPP computer IPv4 address]:80/. If XAMPP is working properly, you should see the following on your device:
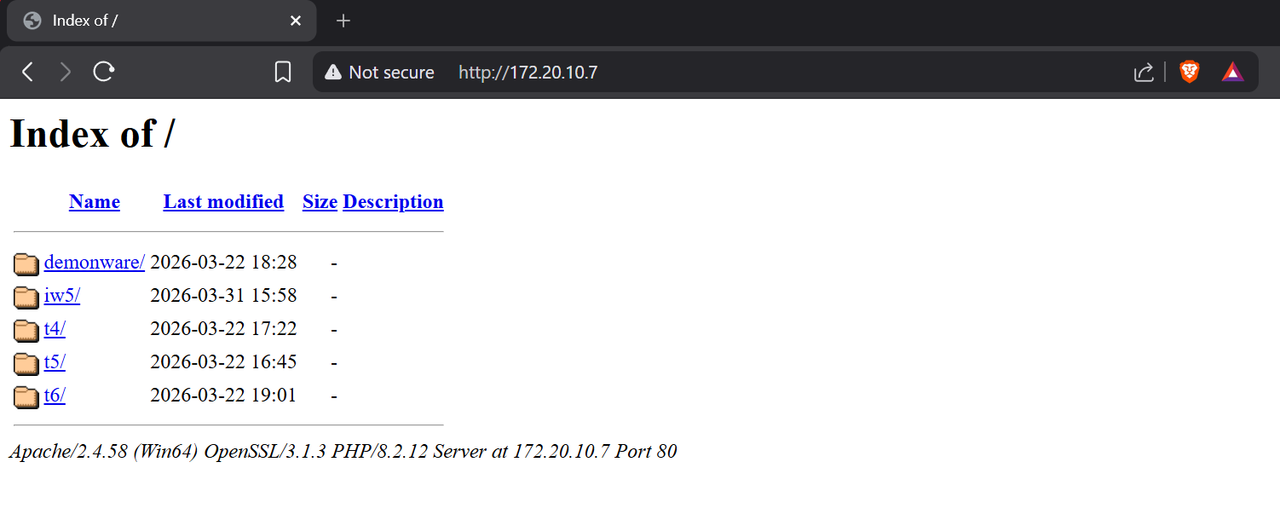
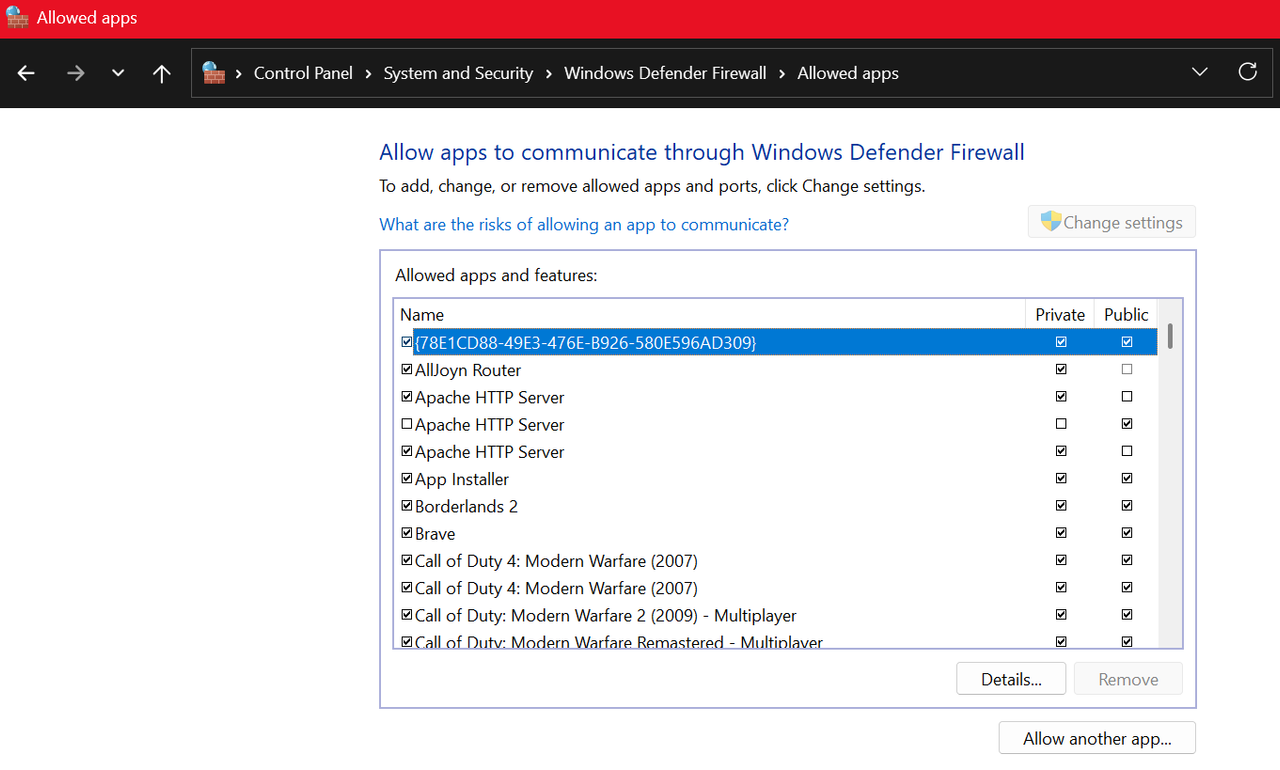
If you this page doesn’t load, double check to make sure the Apache service is running in XAMPP, and that XAMPP and its associated services have the necessary permissions to get through your firewall. You can find these in the Control Panel under “System and Security”, then “Windows Defender Firewall”, then “Allowed Apps” (you may need to specifically search for this on some versions of Windows).
Advanced User Note: You can point XAMPP to any folder on your computer by editing the above mentioned section of the “httpd.conf” file, however, it makes the most sense to point it to “storage” as described above, because any changes you make to your mods or usermaps in “storage/iw5” (changes that will affect your gameserver) are then automatically hosted to your connecting clients by your fileserver. If you store mods or usermaps outside of “storage” for your fileserver, you will have to ensure that the contents of both “storage” and your fileserver folder are identical, or clients will fail to connect to your game when downloading files from your fileserver—this is an unnecessary headache and I don’t recommend it, so just have your fileserver host “storage”.
13. Creating a gameserver for a LAN game. (~5-10 min)
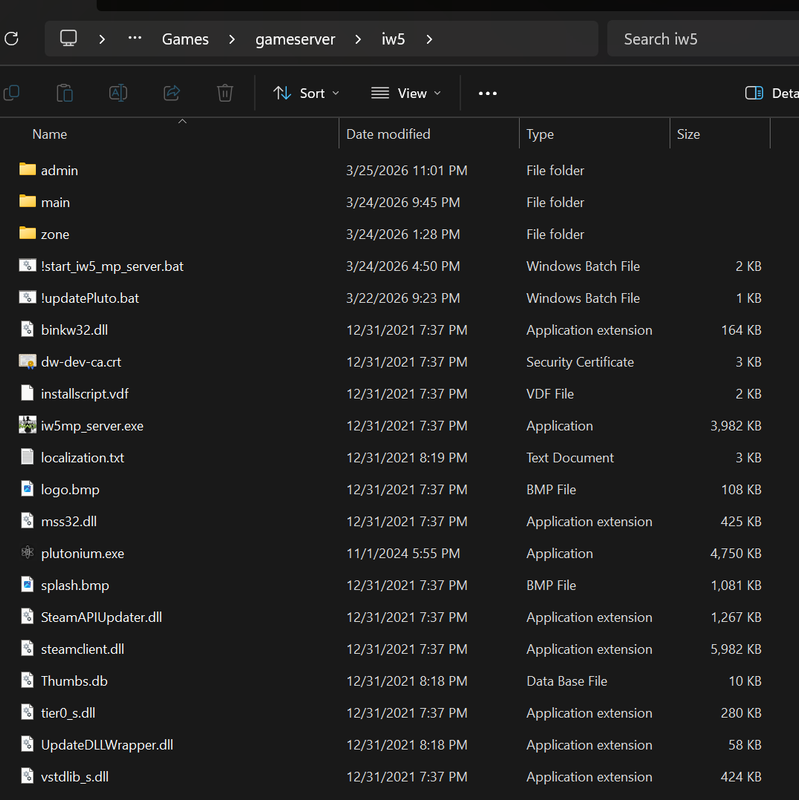
Since we’re trying to run two instances of Plutonium IW5 on the same machine, we need two copies of the game files: one for the gameserver, and one for the connecting client (you, the player). You can put this second set of game files anywhere on your machine (I recommend creating a folder called “gameserver”, and then a folder inside “gameserver” labeled “iw5”).
Important Note 1: You do not need to copy every single file from your Call of Duty: Modern Warfare 3 folder in “steamapps/common” to run a gameserver, and it is recommended that you don’t to save space. The official Plutonium gameserver guide tells you which files are essential and which can be deleted.
Important Note 2: If you’re using this guide as a basis to host online games, you will need a server key from Plutonium, which requires you to legally own the Steam version of Modern Warfare 3.
Once you have a gameserver folder ready to go, download and edit the gameserver batch files (.bat) using Notepad as described up to Step 1.2 of the official Plutonium guide. These files should be located in “gameserver/iw5”.
The gameserver is started with a batch file (“!start_server_mp.bat” or something similar—I strongly recommend renaming this to something like “!start_iw5_server_mp.bat” so that you know which Plutonium game it works for). The batch file tells the game to draw the server’s configuration from a “server.cfg” file.
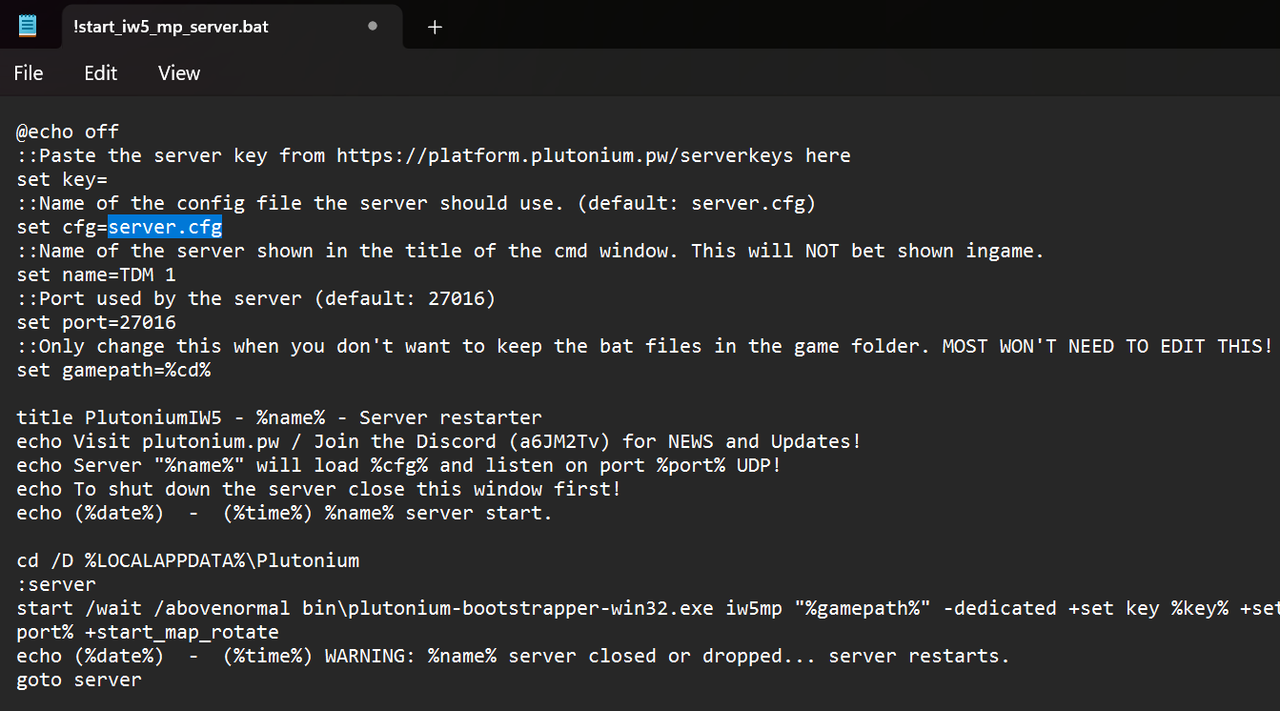
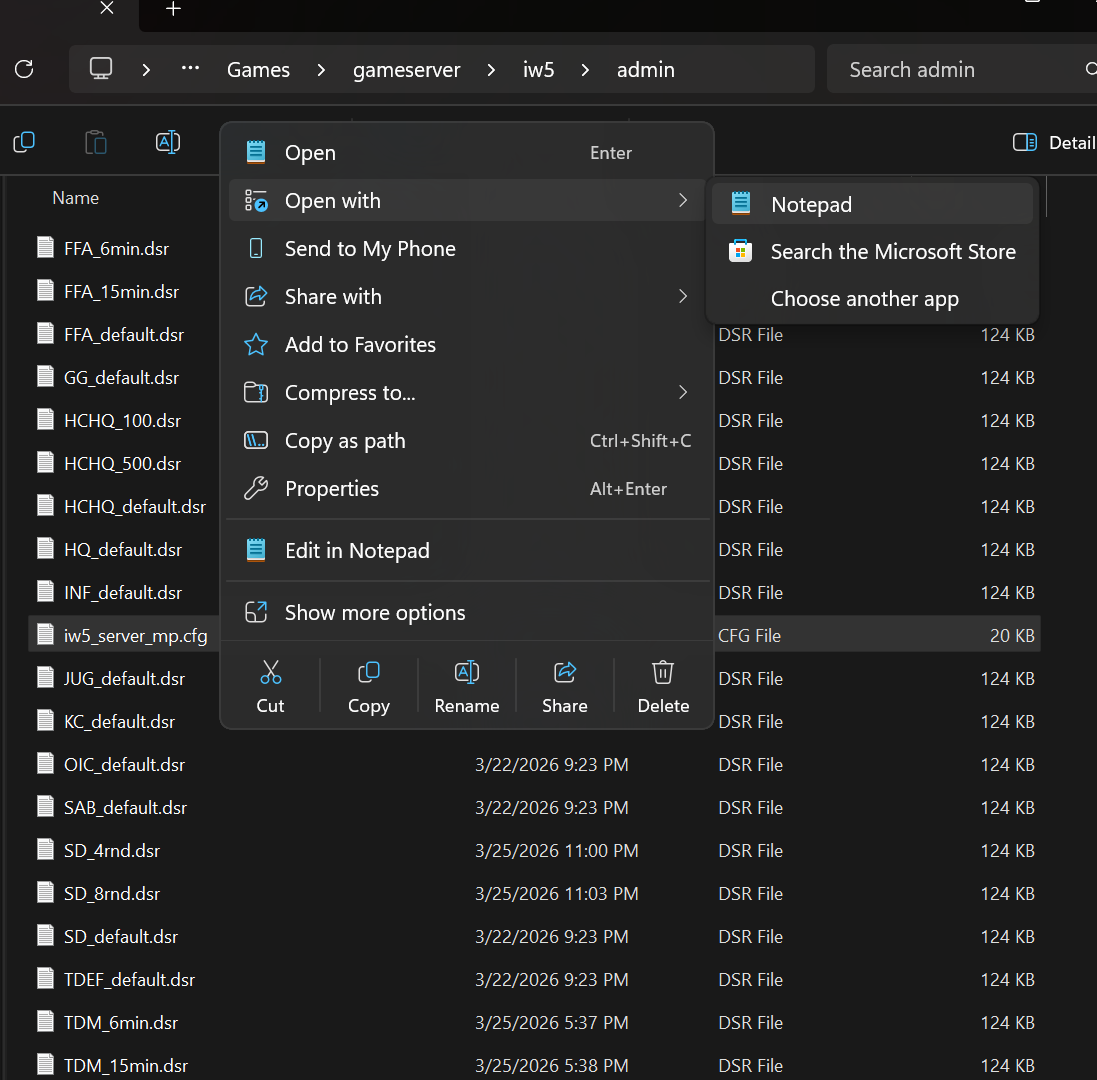
If you plan on using this method to host games for other engines supported by Plutonium (e.g. t4, t5, or t6), I would once again strongly recommend editing the name of the batch files AND the “server.cfg” files to clarify which ones are meant for which game (e.g. “iw5_server_mp.cfg” rather than “server.cfg”). The Plutonium IW5 “server.cfg” file should be located in “gameserver/iw5/admin”, while the batch file should be located in “gameserver/iw5”. Your edits should look as follows:
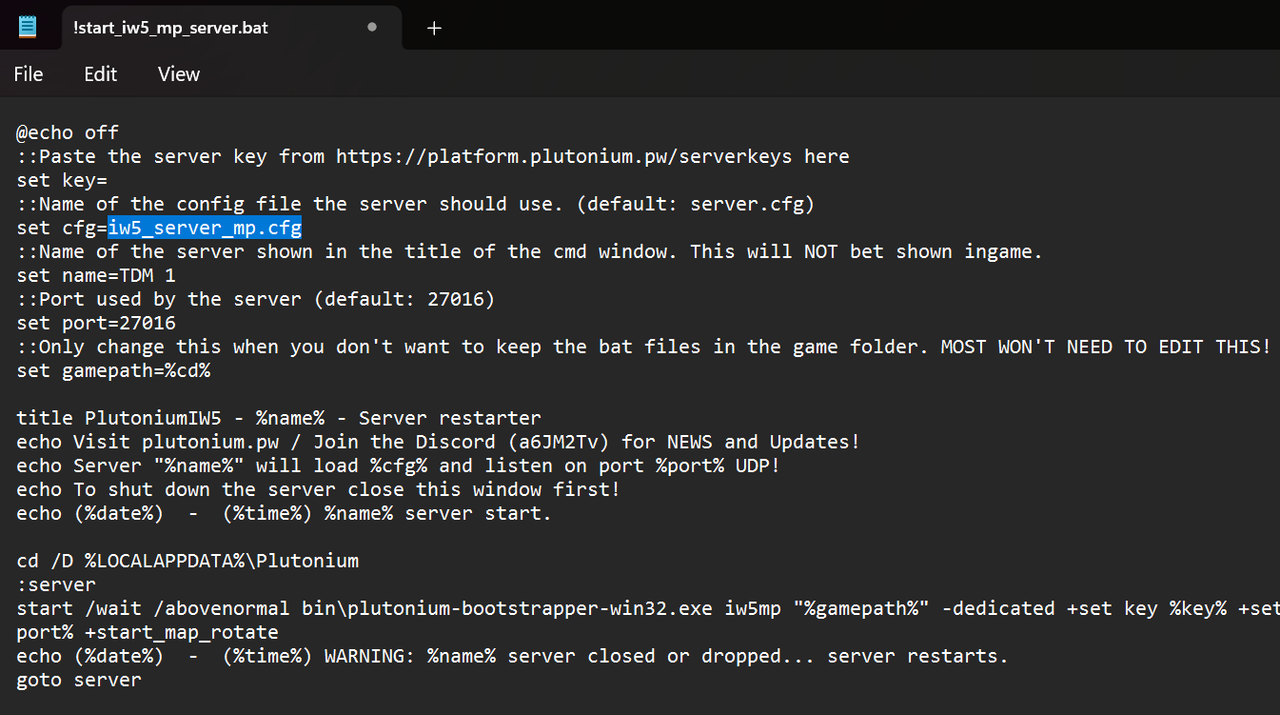
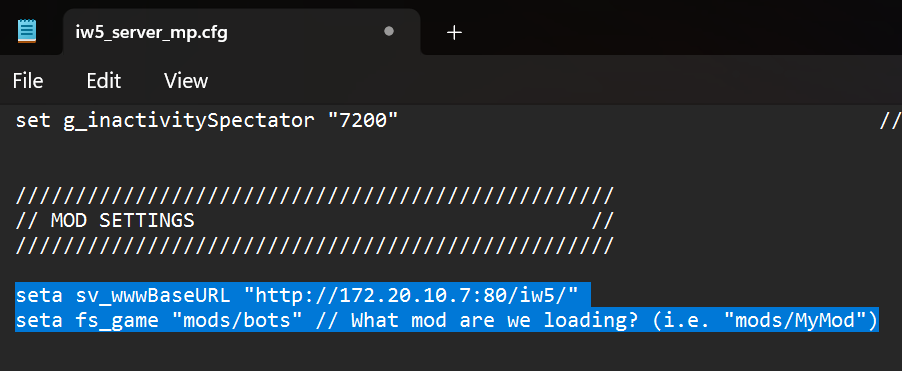
Next, we need to edit the gameserver config file (“iw5_server_mp.cfg”) with Notepad to tell connecting clients (including you the player on the same machine) the address of the fileserver, so that they can download mods and usermaps. Scroll down to “seta sv_wwwBaseURL”, and change the following, replacing the IPv4 address highlighted below with the IPv4 address you obtained from the “ipconfig” command in Step 12, and changing “seta fs_game” to “mods/bots”:
Now to test the server! First, ensure XAMPP’s Apache service is running, then load Plutonium IW5 (if you start your gameserver first, Plutonium.exe will not start), and then use the Windows key to leave fullscreen mode and launch “!start_IW5_mp_server.bat” (I recommend creating a desktop shortcut for this file to save time). Once the gameserver is running, open your fullscreen/client instance of Plutonium IW5, and type “connect [IPv4 address from your config file]:21016” (it’s possible you may have to try port 21017 instead).
If this worked correctly, your game will show the “Connecting…” dialog for a second or so and then the screen will go black and a map will start loading. If it hasn’t worked, the “Connecting…” dialog will remain up for more than a few seconds (you can cancel it with the Escape key).
Now to test if custom maps will work correctly. Use the Windows key to navigate to the Command Prompt window in which your gameserver is running (the one with all the game information) and type “map [custom map name]”, e.g. “map mp_shipment”, press “Enter” and ensure from the dialog in the gameserver window that the map is loading and no players have been kicked, then open your client instance of Plutonium IW5. If you’re playing on the custom map, you’ve successfully set up mods and usermaps on your gameserver!
Advanced User Note: You can use “localhost” or “127.0.0.0” as the IP address in your config files and in-game console if you’re not planning on hosting any LAN games or having other computers connect—this will point your computer to its own IP address automatically.
")
")